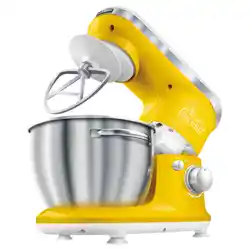
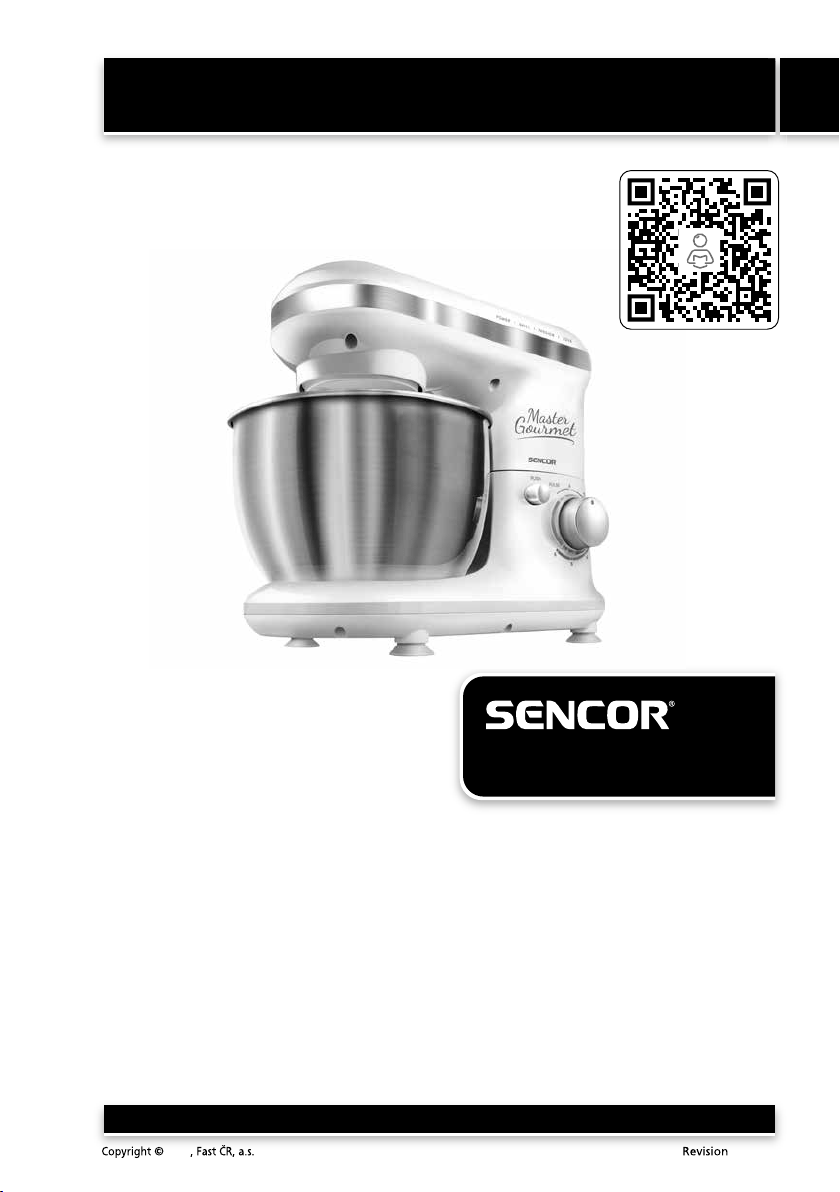
Food Mixer
User's manual
EN
EN-1
Before you turn this appliance on, please read the user's manual thoroughly, even if you are already experienced in
using similar appliances. Only use the appliance in the manner described in this user's manual. Keep this manual
for future use.
We recommend saving the original shipping cardboard box, packaging material, receipt and warranty card for the
duration of the warranty. During transportation, pack the appliance using the original packaging materials only.
2021 05/2021
STM 3620WH
STM 3621GR
STM 3624RD
Translation of the original manual

EN-2
EN
Food Mixer
STM 3620WH / STM 3621GR / STM 3624RD
2021 05/2021
CONTENTS
IMPORTANT SAFETY INSTRUCTIONS ...........................................................................3
READ CAREFULLY AND STORE FOR FUTURE USE. ...............................................................3
DESCRIPTION OF THE APPLIANCE .............................................................................5
PLANETARY MIXING SYSTEM ..................................................................................6
BEFORE FIRST USE .............................................................................................6
SELECTING ATTACHMENT TYPES ...............................................................................6
ASSEMBLING AND DISASSEMBLING THE APPLIANCE ...........................................................6
OPERATING THE APPLIANCE ..................................................................................7
QUICK GUIDE TO MIXING ......................................................................................8
CLEANING AND MAINTENANCE ...............................................................................8
STORAGE ......................................................................................................9
TIPS AND ADVICE ..............................................................................................9
RECIPES ......................................................................................................13
TECHNICAL SPECIFICATIONS .................................................................................16
INSTRUCTIONS AND INFORMATION REGARDING THE DISPOSAL OF USED PACKAGING MATERIALS .............. 16
DISPOSAL OF USED ELECTRICAL AND ELECTRONIC EQUIPMENT ..............................................16

Food Mixer
STM 3620WH / STM 3621GR / STM 3624RD
EN
EN-3
2021 05/2021
IMPORTANT SAFETY INSTRUCTIONS
READ CAREFULLY AND STORE FOR FUTURE USE.
■ This appliance may not be used by children. Keep the
appliance and its power cord away from children.
■ The appliance may be used by persons with reduced
physical, sensory or mental capabilities or with alack
of experience and knowledge, if they are supervised
or have been instructed to use the appliance in asafe
manner and understand the potential dangers.
■ Children must not play with the appliance.
■ Cleaning and maintenance performed by the user
must not be performed by unsupervised children.
■ In the event that the power cord is damaged, have it
repaired at aprofessional service centre to prevent
causing adangerous situation. It is forbidden to use
the appliance if it has adamaged power cord.
Warning:
Incorrect use may lead to injuries.
■ Be especially careful not to injure yourself on the
sharp cutting edges when handling the chopping
blades, especially when removing the blades from
the blending jar, when emptying the container and
when cleaning it.

EN-4
EN
Food Mixer
STM 3620WH / STM 3621GR / STM 3624RD
2021 05/2021
■ The surfaces of the appliance that come into contact
with food must always be cleaned according to the
instructions in this user‘smanual.
■ Always turn off the appliance and disconnect it from
the power socket if you will not be using it and if
you will be leaving it without supervision, before
assembly, disassembly, cleaning or moving it.
■ Prior to replacing accessories or accessible parts
that move during use, turn off the appliance and
disconnect it from the el. power supply.
■ Before connecting this appliance to apower socket, make sure that the voltage stated on its rating label corresponds to the voltage
in your power socket.
■ Never use accessories, which have not been supplied with this appliance or which have not been explicitly recommended by the
manufacturer.
■ The appliance is intended and designed for processing astandard amount of food in the household.
■ Do not use the appliance for any other purposes than those intended.
■ Do not use the appliance in an industrial environment or outdoors.
■ Do not use sprays in the vicinity of the appliance.
■ Do not place the appliance on window sills or on unstable surfaces. Only place the appliance on an even, dry and stable surface.
■ Do not place the appliance on an electric or gas stove, in the vicinity of an open flame or appliances that are sources of heat.
■ Ensure that the power plug contacts do not come into contact with water or moisture.
■ Do not wash the appliance (except for the removable attachments and mixing bowl) under running water and do not submerge it
in water or any other liquid.
■ Before attaching attachments to the appliance, removing or replacing them, ensure that the appliance is turned off and disconnected
from the power socket.
■ For safety reasons, this appliance is equipped with a safety mechanism that prevents the motor from being started if the
appliance‘sarm is tilted out.
■ Before putting the appliance into operation, check that it is correctly assembled and that the arm is in the horizontal position.
■ Allow hot liquids or food to cool down before mixing them.
■ Do not leave the appliance in continuous operation under aheavy load for aperiod longer than 6 minutes. Before turning it on again,
allow it to cool down for at least 10 minutes.
■ Do not tilt out the arm or put your hands or items, such as akitchen knife, fork or wooden spoon, into the bowl while mixing. Do not
touch the rotating attachments and ensure that foreign items such as clothing, hair, etc. are kept away. An injury could occur or the
appliance could be damaged.
■ If an item, such as aspoon, falls into the mixing bowl while the appliance is running, immediately set the speed control knob to
position 0 (stand-by mode), disconnect the power cord from the power socket and take the item out of the bowl.
■ If ingredients stick to the attachments or the inside of the bowl, turn off the appliance and disconnect it from the power socket. Use
aspatula to clean the attachments and the inside of the bowl. Then you can continue mixing.
■ Do not turn the appliance on when empty. The incorrect use of the appliance may negatively affect its lifetime.
■ Before storing the appliance, check that the stand arm is tilted to the horizontal position.
■ Do not place heavy items on the power cord. Make sure that the power cord does not hang over the edge of atable or that it is not
touching ahot surface.
■ Do not disconnect the appliance from the power socket by pulling on the power cord. This could damage the power cord or the
power socket. Disconnect the cord from the power socket by gently pulling on the plug of the power cord.
■ To avoid the danger of injury by electrical shock, do not repair the appliance yourself or make any adjustments to it. Have all repairs
or adjustments of the appliance performed at an authorised service centre. Tampering with the appliance during the warranty
period may void the warranty.

Food Mixer
STM 3620WH / STM 3621GR / STM 3624RD
EN
EN-5
2021 05/2021
DESCRIPTION OF THE APPLIANCE
A
6
9
qa
7
8
1
2
3
4
5
0
qs
1 Kneading hook
2 Balloon whisk
3 A-shaped beater
4 4-litre stainless steel bowl
5 Base unit
6 Pouring shield
7 Mixing head with shaft for connecting attachments A1, A2 or A3
8 Tilt-out arm with open position lock
9 PUSH button for releasing the arm
0 Speed control knob with light
PULSE (pulse mode for short operation at the maximum speed level)
– 0 (turned o to stand-by mode) – speed level setting 1, 2, 3, 4, 5, 6
(52, 87, 112, 122, 136 and 172 rpm)
0 Anti-slip feet with suction cups
qs Storage space for winding up the power cord

EN-6
EN
Food Mixer
STM 3620WH / STM 3621GR / STM 3624RD
2021 05/2021
PLANETARY MIXING SYSTEM
• The planetary mixing system is based on the principle of dual rotation of the attachment. The attachment
rotates anticlockwise along the inner perimeter of the bowl while rotating around its own axis in the opposite
direction. This ensures that ingredients inside the bowl are processed thoroughly and evenly.
BEFORE FIRST USE
1. Take the appliance and its accessories out of the packaging materials.
2. Thoroughly wash all parts that are intended to come into contact with food (kneading hook A1, whisk A2,
beater A3, the stainless steel mixing bowl A4 and pouring shield A6 using warm water and aneutral kitchen
detergent. Then rinse them with clean water and dry thoroughly with ane wiping cloth.
SELECTING ATTACHMENT TYPES
ATTACHMENT TYPE PURPOSE OF USE
Kneading hook A1
It is used for kneading and preparing heavy and thick doughs containing yeast, e.g.
bread dough.
Beater A3
It is used for mixing medium heavy and lighter doughs not containing yeast, for mixing
sauces, creams, llings, etc.
Whisk A2
It is used for whisking whole eggs or egg whites, whipped cream, light doughs, foamy
creams, etc. Do not use it for mixing heavy and thick doughs.
ASSEMBLING AND DISASSEMBLING THE APPLIANCE
• Before you start assembling or disassembling the food mixer, check that it is turned o and disconnected from
the el. power socket.
1. Inserting the mixing bowl
1.1 Place the food mixer on an even, dry surface, for example on akitchen workbench.
1.2 Release the arm A8 by pressing the PUSH button A9 and tilt it upwards. The arm A8 is locked in the open
position when the PUSH button A9 slides out together with an audible click.
1.3 Place the stainless steel bowl A4 into the hole in the base unit A5 and secure it in place by turning it clockwise.
When the bowl A4 is properly attached, it is not possible to lift it o the base unit A5.
2. Attaching an attachment (kneading hook, beater or whisk)
2.1 If you decide to use the pouring shield A6, then it is necessary to attach it prior to mounting an attachment.
Carefully seat the pouring shield A6 on to the tilt-out arm and secure it in the locked position by turning it
anticlockwise.
2.2 When attaching an attachment, the arm A8 must be secured in the open position, see point 1.2 in chapter
Inserting the mixing bowl. Attach one of the attachments to the T-shaped shaft of the mixing head A7 so
that the shaft ts into the hole on the attachment. Push the attachment towards the mixing head A7 turn it
anticlockwise to secure it to the shaft.
2.3 With one hand, hold the attachment and gently pull it downwards. If it is properly secured to the shaft, it will not
come o.
2.4 If you will not be immediately placing ingredients into the mixing bowl A4, press the PUSH button A9 and tilt
the arm A8 to the horizontal position. When the arm A8 is tilted to the horizontal position, the PUSH button
A9 will slide out accompanied by an audible click.

Food Mixer
STM 3620WH / STM 3621GR / STM 3624RD
EN
EN-7
2021 05/2021
3. Removing the attachment and mixing bowl
3.1 Release the arm A8 by pressing the PUSH button A9 and tilt it upwards. The arm A8 is locked in the open
position when the PUSH button A9 slides out together with an audible click.
3.2 Hold the attachment and gently push it towards the mixing head A7. Then rotate it clockwise until it is released
from the motor shaft and take it o. Turn the mixing bowl A4 anticlockwise and take it o the base unit A5.
Move the arm A8 back to the horizontal position.
OPERATING THE APPLIANCE
1. Unwind the necessary length of power cord from the compartment Aqs.
2. Release the arm A8 by pressing the PUSH button A9 and tilt it out.
3. Into the bowl A4 that is seated in the base unit A5, place the ingredients.
Attention:
The maximum weight of the ingredients that can be processed in asingle batch is 1.6 kg. When preparing
bread dough, do not process more than 600 g of our at once. When preparing dough for sweet pastries
(fruit cakes, etc.) it is possible to process no more than 450 g of our at once. The maximum number of
egg whites that can be whisked at once is 8
.
4. Press the PUSH button A9 and tilt the arm A8 together with the attached attachment to the horizontal
position.
5. Make sure that the food mixer is correctly assembled and that the speed control knob A0 is set to position 0
(stand-by mode). Connect the power cord to the el. power socket. Connection to aworking power socket is
indicated by the speed control knob A0 being lit.
6. Use the speed control knob A0 to set the required speed level from 1 to 6. First, set alower speed to prevent
ingredients from being sprayed around. As soon as they are mixed together, increase the speed to the required
level. The speed can be adjusted at any time as required.
The pulse mode is used for increasing the speed to maximum for ashort time. To activate the pulse mode, turn
the speed control knob A0 to the PULSE position and to ensure continuous operation hold it down in this
position. As soon as you release the speed control knob A0, it will automatically return to position 0 (o).
Attention:
If it is necessary to wipe ingredients o the inside of the mixing bowl A4 and the attachment, rst
turn o the food mixer by setting the speed control knob A0 to position 0 (stand-by mode) and
then disconnect it from the power socket. Then wipe away the ingredients using aplastic spatula.
The maximum operating time is 6 minutes. Do not leave the appliance in continuous operation for
longer than indicated above. This is especially true under aheavy load (e.g. when processing heave,
thick doughs). If the appliance is in operation under heavy load, allow it to cool down for at least
10 minutes before turning it on again. At lower loads, acooling time of 3 to 5 minutes is usually
sucient.

EN-8
EN
Food Mixer
STM 3620WH / STM 3621GR / STM 3624RD
2021 05/2021
7. After you have nished using the appliance, set the speed control knob A0 to position 0 (stand-by mode) and
disconnect the power cord from the power socket.
8. Disassemble the food mixer according to the instructions included in chapter Assembling and disassembling
the appliance. Use asoft plastic spatula to remove mixes from the mixing bowl A4 and the attachment.
9. Clean out the food mixer after each use according to the instructions in chapter Cleaning and maintenance
QUICK GUIDE TO MIXING
Attachment type Ingredients Amount Processing time Selecting aspeed
Whisk A2
Egg whites max. 8 pcs 4 minutes Level 6
Whisk A2
Cream 500 ml 4–5 minutes Level 6
Whisk A2
Mayonnaise 3 egg yolks 1 minute Level 2–4
Beater A3
Cake dough approx. 800 g 6 minutes Level 2–6
Kneading hook A1
Bread dough max. 600 g of our 4 minutes Level 2
Note:
The above processing times are only areference. To prevent ingredients from splattering out of the bowl,
select an initial speed level of 1 or 2. Later set ahigher speed based on requirements.
CLEANING AND MAINTENANCE
• Before cleaning the food mixer, always turn it o by setting the speed control knob A0 to position 0 and
disconnect it from the power socket.
• It is necessary to thoroughly clean the attachment after every use in hot water and neutral kitchen detergent.
Then rinse it under clean running water and thoroughly wipe dry with ane wiping cloth.
Note:
The attachments are intended for short term contact with food (including beverages), i.e. max. 4 hours.
• Wash the stainless steel mixing bowl A4 using hot water and neutral kitchen detergent. Then rinse it under
clean running water and wipe dry with ane wiping cloth.
Tip:
If you whisked egg whites, rst rinse the whisk A2 and the mixing bowl A4 under cold water. If you were to
use hot water, the egg white remains would harden and their removal would be more dicult.
• To clean the base unit A5 and the arm A8, use a cloth dipped in a weak detergent solution. Then wipe
everything dry.
• Never submerge the appliance or its power cord in water or any other liquids. For cleaning do not use thinners
or solvents, or cleaning agents causing abrasion. Otherwise the surface treatment of the appliance could be
damaged.

Food Mixer
STM 3620WH / STM 3621GR / STM 3624RD
EN
EN-9
2021 05/2021
STORAGE
• If you will not be using the food mixer, store it in adry place out of children'sreach. Make sure that the arm A8
is tilted into the horizontal position.
TIPS AND ADVICE
BREAD DOUGH – INGREDIENTS
FLOUR
This is the most important ingredient used for baking bread. Together with yeast it creates the texture of the loaf.
When it is mixed with aliquid, the proteins contained in it start to create gluten. Gluten is aweb of exible bres
which entrap gases produced by the yeast.
White wheat our
It is sold as baking our, bread our or ne wheat our. Fine our is the most readily available,
nevertheless, you will achieve better result with our with a protein content of at least 11 % to 12 %.
The recipes included in this user's manual require the use of bread our with a protein content of
11 %. This information is provided on the packaging of the our. Do not sieve the our or use our with baking
powder unless specied in the recipe.
Whole grain wheat our
It is produced from wheat grains and contains bran and germ. Bread baked from this type of our will be denser. You
will achieve aless dense bread by replacing one cup of whole grain our with one cup of white bread our.
Rye our
It is very popular in bread making. It contains alarge amount of mineral compounds, but has alow protein content
and so it is usually combined with wheat our to ensure that the bread rises well.
Gluten our
It is produced by extracting gluten from wheat grains. Adding gluten our can improve the texture and quality of the
bread when using aour with alower protein content.
BREAD MIXES
They contain our, sugar, dried milk, salt and other ingredients such as bread improver. Usually water and yeast is
added.
BREAD IMPROVER
It is available in supermarkets and health food stores. The ingredients contained in bread improver are usually food
processing industry acids such as ascorbic acid (vitamin C) and enzymes (amylase) extracted from wheat our.
Bread improver will help in rming up the dough, thus achieving alarger size loaf and ner texture. The bread is
more stable and lasts longer.
SUGAR
It provides sweetness, avour and abrown colour to the bread crust. It is added to yeast. White sugar, brown sugar
or honey are suitable.

EN-10
EN
Food Mixer
STM 3620WH / STM 3621GR / STM 3624RD
2021 05/2021
DRIED MILK AND DAIRY PRODUCTS
They enrich the taste and increase the nutritional value of the bread. Dried milk is suitable and easy to use. Store it in
an air-tight container in the refrigerator. Likewise, dried soya milk may be used but it makes the bread tougher. Fresh
milk should not be substituted unless indicated in the recipe otherwise.
SALT
It is an important ingredient for baking bread. It increases the absorption capacity of the dough, improves kneading,
supports gluten development and has an eect on the shape of the loaf, texture of the crumb, taste and increases
the lifetime of the bread. Measure it out carefully as it prevents the bread from rising.
FAT
Adds avour and retains moisture. Vegetable oils such as saower, sunower or rape seed oil may be used. Oils can
be substituted for by butter or margarine, however the crust colour may become yellowish.
YEAST
It is used as aleavening agent. The recipes in this user'smanual use dried yeast. Prior to using dried yeast, always
check the use-by-date because yeast with an expired use-by-date may cause the dough not to rise.
Three times as much fresh or pressed yeast must be used compared to dried yeast. To create astarter, one needs
liquid, sugar and heat.
FAST RISING YEAST
It is amix of yeast and bread improver. If you wish to replace standard yeast in your recipe with this type of yeast
then leave out the bread improver. Fast rising dough should not be used in combination with bread mixes as abread
improver is usually already contained in them.
WATER
Standard tap water is usually used. It is necessary to warm cold water up to room temperature before use. Water that
is too cold or too hot will prevent the starter from forming.
EGGS
They are used in certain bread recipes. They help the dough to rise and increase the nutritional value of the bread.
They add avour and ane crust and usually are used for sweeter types of bread.
OTHER INGREDIENTS
Ingredients such as dried fruit, nuts, chocolate chips, etc. which should remain whole in the baked bread, should
be mixed into the dough. They should be added to the dough gradually during the kneading process before the
dough rises.
BREAD DOUGH – PREPARATION
• Check the minimum lifetime or the use-by-date of all the ingredients.
• Add the ingredients in the order that they are provided in the recipe.
• Store opened foods in air-tight containers.
• Allow ingredients that you have taken out of the refrigerator to rst reach room temperature before using them.
• If not indicated in the recipe otherwise, use bread our. Do not use our with aprotein content lower than 11 %.
• Do not use our with baking powder for making ayeast-based bread, unless indicated otherwise in the recipe.
• If you live in alocation that is above 900 m above sea level, you will probably need to adjust the amount of yeast
indicated in the recipe. The higher the above-sea-level altitude, the lower the air pressure and the faster dough
rises. It is recommended to use ¼ of ateaspoon of yeast less than indicated in the recipe.
• If the weather is hot and humid, use ¼ of ateaspoon of yeast less than is indicated in the recipe to prevent the
dough from over-rising.
• The properties of the our may change with the season or type of storage. Then it is necessary to adjust the
water to our ratio in the following way. If the dough is too sticky, add 1 to 2 tablespoons of our. If the dough

Food Mixer
STM 3620WH / STM 3621GR / STM 3624RD
EN
EN-11
2021 05/2021
is too dry, add 1 to 2 tablespoons of water. Several minutes are needed for these ingredients to be absorbed. It
should be possible to shape adough with the right amount of our and water into asmooth loaf that is moist
to touch but not sticky.
How to prepare ayeast starter
• Pour the amount of warm water indicated in the recipe into aclean glass bowl. Then add the necessary amount
of fresh or pressed yeast together with 1 teaspoon of sugar and one teaspoon of our. Carefully mix everything
together and cover with aplastic bag. Leave it in awarm place (30 °C) for approximately 30 minutes or until the
mixture foams up. This mixture should be used immediately.
Rising in awarm location
• Yeast, whether it be during fermentation or in the dough, requires heat to gain in volume. Create awarm place
for rising your dough by placing ametal baking tray onto abowl with suciently hot water. Place the prepared
dough on to the baking tray and cover with alightly greased thicker plastic bag or akitchen wiping cloth.
Awarm location without adraft is required for dough to rise. Allow the dough to rise until it doubles in volume.
CAKE AND PASTRY DOUGH – INGREDIENTS
FLOUR
Flour used for cakes and ne pastries should have alower protein (gluten) content, than our used for baking bread.
Medium-ne and ne our
This our has alower protein (gluten) content and gives the baked goods, such as cakes, tarts, ne pastry, pancakes
aner texture.
Flour with baking powder
It is amixture of our and leavening agents such as baking powder. To make 1 cup of the our and baking powder
mixture, mix 1 cup of our with 2 teaspoons of baking powder.
Whole wheat our
Contains bran and wheat germ and may be used in doughs for tarts and pies. The texture of aproduct made from
whole wheat our will be denser.
Corn our
It is made from corn and is used for certain baked goods to which it loans aner texture. It may be used to thicken
sauces and desserts.
Rice our
It is made from rice and is used to make the texture of baked goods ner, for example for shortcrust pastry.
BAKING POWDER
It is used as aleavening agent in baking.
BAKING SODA
It is known as sodium bicarbonate. It can be used as an additional leavening agent or for darkening certain baked
goods.
BUTTER
It provides aspecic taste and ane texture to baked goods. In certain recipes it is possible to substitute oil for
butter, however the resulting taste and texture of the baked good will be dierent. In this case, use ¼ less butter than
the amount of oil indicated in the recipe. Before you start whipping butter together with sugar, allow it to soften at
room temperature.

EN-12
EN
Food Mixer
STM 3620WH / STM 3621GR / STM 3624RD
2021 05/2021
EGGS
Eggs should be at room temperature to give the correct volume to baked goods. Crack the eggs individually into
aseparate bowl and only then add to the other ingredients. This will prevent ruining the entire batch if one of the
eggs is rotten. If you will be whisking the egg whites, carefully separate them from the yolks. Egg yolks contain fat
and their remains prevent the successful whipping up of egg whites. Before you start whipping the egg whites, make
sure that the whisk and the mixing bowl are completely clean and without fat residues. Otherwise, the egg whites
might not be perfectly whipped.
MILK
Full-cream milk should be used unless indicated in the recipe otherwise. Low-fat or half-cream milk can be used but
the nal taste and texture of the baked goods may be dierent.
SUGAR
Usually white granulated sugar is used. It adds avour, texture and colour to baked goods.
Caster sugar is also frequently used because it dissolves easier when it is whipped with butter. Brown sugar may be
used to add adierent taste and colour to the baked goods.
BAKING
• Allow the oven to preheat to the correct temperature before starting baking.
• The baking temperature may dier depending on the type of baking oven. Reduce the temperature indicated
in the recipe by 15–20 ˚C if using ahot-air oven.
• Instead of oured baking pans and trays, you can use parchment paper if appropriate. You can coat the baking
pan with asmall amount of fat to prevent the parchment paper from sliding on the smooth surface of the
baking pan.
• Test that the baked good is nished before taking it out of the oven. Gently touch the top of the baked good, if
it returns to its initial shape, it should be properly baked. Carefully insert askewer into the middle of the baked
good and pull it out. If the dough does not stick to the skewer, the baked good is nished.
• To make biscuits crispier, take the baking tray out of the oven and place it onto ametal rack. Move the individual
items on the baking tray from their baking location and allow them to cool down. Once they cool down move
them from the baking tray to aplatter.

Food Mixer
STM 3620WH / STM 3621GR / STM 3624RD
EN
EN-13
2021 05/2021
RECIPES
Sponge cake
4 eggs, separated egg whites from yolks
¼ of acup of caster sugar
1 cup (150 g) of medium-ne our with baking powder, sieved
3 tablespoons of water
• Use the whisk A2.
• Set the speed level to 6 and whisk up the egg whites into athick foam. Reduce the speed level to 1 and slowly
add sugar until the foam thickens and stops to be smooth.
• Add the egg yolks and mix carefully.
• Set the speed level to 1 and intermittently add our and water. Whisk until the ingredients combine.
• Pour the dough into apre-prepared greased and oured baking pan.
• Bake in apreheated oven at 180 °C for approx. 20–25 minutes.
• Allow the baked sponge cake to cool down on ametal rack.
Vanilla batter dough cake
125 g of butter, softened
¾ of acup of caster sugar
1 teaspoon of vanilla essence
2 eggs
2 cups (300 g) of medium-ne our with baking powder, sieved
¾ of acup of milk
• Use the beater A3.
• Set the speed to 6 and beat the butter together with sugar until the mixture is uy and smooth.
• Add the vanilla essence, eggs one after the other and beat them thoroughly.
• Reduce the speed to 2 and slowly intermittently add our and milk and beat until asmooth dough forms.
• Pour the dough into apre-greased and oured baking pan with adiameter of 22 cm.
• Bake in apreheated oven at 180 °C for approximately 45–50 minutes or until the dough is golden in colour.
• Allow the baked cake to cool down on ametal platter.
Butter biscuits (approx. 40 pcs)
125 g of butter, softened
¾ of acup of caster sugar
1 teaspoon of vanilla essence
1 egg
2 cups (300 g) of medium-ne our
1 teaspoon of baking powder
• Use the beater A3.
• Set the speed to 6 and beat the butter until smooth. Add sugar, vanilla essence and the egg. Beat until alight
smooth mixture is created.
• Mix the our and the baking powder.
• Set the speed to 2 and gradually add the our until everything is properly combined into asingle mass. Do not,
however, beat for too long.

EN-14
EN
Food Mixer
STM 3620WH / STM 3621GR / STM 3624RD
2021 05/2021
• Use ateaspoon to form small balls and lay them out evenly on to alightly greased or parchment paper covered
baking tray. Leave sucient room around each ball. Using alightly oured fork, push down each of the balls.
• Bake in apreheated oven at 190 °C for approximately 12–15 minutes or until the biscuits are lightly golden in
colour.
• Take the biscuits o the baking tray and leave to cool down on ametal rack.
Cream snow pus (20–24 pcs)
4 egg whites
1 cup of caster sugar
• Use the whisk A2.
• Set the speed level to 6 and whip up athick snow from the egg whites. Lower the speed to level 1 and carefully
add half the sugar and whip it in. Then add the remaining sugar.
• Using aspoon, apply asmall amount of the snowy mixture on to alightly greased baking tray. Leave about 3 cm
around the individual pieces so that they do not bake to one another.
• Bake in the oven at 120 °C about 1 to 1½ hours or until the snow pus are dry. To avoid burning them, do not,
however, bake then too long. Take them o the baking tray and put them aside to cool down and store them in
an air-tight container.
Note:
You can use adecorating tool to create larger snow pus. This may necessitate alonger baking time.
White bread
4 cups (600 g) of bread our
3 tablespoons of dried milk
1½ teaspoons of salt
1½ tablespoons of sugar
1 teaspoon of bread improver
2 teaspoons of instant yeast
2 tablespoons of oil
1½ cups (375 ml) of water
additional bread our for hand kneading
• Use the kneading hook A1.
• In the mixing bowl, mix the our, dried milk, salt, sugar, bread improver and the instant yeast.
• Set the speed to 1–2 and slowly add water and oil into the dry mix. Leave it to knead until adough starts to form.
• Move the dough on to a lightly oured rolling board and thoroughly knead by hand until the dough is
suciently ne and smooth.
Note:
At this stage, the dough should be very well kneaded so that gluten is formed, which gives the dough the
correct elasticity and helps it to rise.

Food Mixer
STM 3620WH / STM 3621GR / STM 3624RD
EN
EN-15
2021 05/2021
• Place the dough into alarge bowl and cover with plastic wrap. Allow it to rise in awarm place for about 20
minutes or until the dough doubles in size.
• Take the risen dough out of the bowl and knead once more on alightly oured rolling board.
• Place the dough into abaking pan. Cover with plastic wrap and allow it rise in awarm place for about 30–40
minutes or until the dough has risen suciently. Remove the plastic wrap.
• You can make aegg glaze before baking.
• Bake in apreheated oven at 200 °C for approximately 40–50 minutes or until the bread is golden in colour.
• Allow the baked bread to cool down for 15 to 20 minutes and then remove it from the baking pan. Allow the loaf
to cool down completely before cutting it, to prevent it from collapsing.
Egg glaze for bread dough
1 egg, lightly beaten
2–3 tablespoons of water
• Mix both ingredients together until a smooth mixture is formed. Do not whip. If necessary strain through
asieve. Brush the egg glaze on to the bread dough before baking.
Focaccia (2–4 portions)
3 cups (450 g) of bread our
1 teaspoon of salt
2 teaspoons of sugar
2 teaspoons of instant yeast
2 tablespoons of olive oil
1 cup (250 ml) of water
For glazing:
2 tablespoons of olive oil
1 tablespoon of coarse salt
2 tablespoons of black olives, sliced
• Use the kneading hookA1.
• In the mixing bowl, mix the our, salt, sugar and yeast.
• Set the speed to 1–2 and slowly add water and oil into the dry mix. Leave it to knead until adough starts to form.
• Move the dough on to alightly oured rolling board and thoroughly knead by hand until ane smooth dough
forms.
• Place the dough into alarge bowl and cover with plastic wrap. Allow it to rise in awarm place for about 20
minutes or until the dough doubles in size.
• Take the risen dough out of the bowl and knead once more on alightly oured rolling board.
• Place the dough into alightly greased Teon baking pan of dimensions 20 × 30 cm and roll into the shape of the
baking pan.
• Lightly cover with plastic wrap and allow it rise in awarm place for about 20–30 minutes or until the dough has
risen alittle. Remove the plastic wrap.
• Brush the dough with olive oil and sprinkle on the coarse salt and sliced olives.
• Bake in apreheated oven at 200 °C for approximately 30–35 minutes or until the focaccia bread is golden in
colour.
• After taking it out of the oven, allow it to cool down on ametal rack.

EN-16
EN
Food Mixer
STM 3620WH / STM 3621GR / STM 3624RD
2021 05/2021
TECHNICAL SPECIFICATIONS
Rated voltage range ....................................................................................................................................................................... 220−240 V
Rated frequency ..................................................................................................................................................................................50-60 Hz
Rated power input ...................................................................................................................................................................................600 W
Safety class (for electric shock protection) ................................................................................................................................................II
Noise level .............................................................................................................................................................................................. 86 dB(A)
The declared noise emission level of the appliance is 86 dB(A), which represents alevel Aof acoustic power with
respect to areference acoustic power of 1 pW.
Glossary of technical terms
Safety class for electric shock protection:
Class II – Electric shock protection is provided by double or heavy-duty insulation.
Changes to the text and technical parameters are reserved.
INSTRUCTIONS AND INFORMATION REGARDING THE DISPOSAL OF USED
PACKAGING MATERIALS
Dispose of packaging material at apublic waste disposal site.
DISPOSAL OF USED ELECTRICAL AND ELECTRONIC EQUIPMENT
The meaning of the symbol on the product, its accessory or packaging indicates that this product
shall not be treated as household waste. Please, dispose of this product at your applicable collection
point for the recycling of electrical & electronic equipment waste. Alternatively in some states of the
European Union or other European states you may return your products to your local retailer when
buying an equivalent new product. The correct disposal of this product will help save valuable
natural resources and help in preventing the potential negative impact on the environment and
human health, which could be caused as aresult of improper liquidation of waste. Please ask your
local authorities or the nearest waste collection centre for further details. The improper disposal of
this type of waste may fall subject to national regulations for nes.
For business entities in the European Union
If you wish to dispose of an electrical or electronic device, request the necessary information from
your seller or supplier.
Disposal in other countries outside the European Union
If you wish to dispose of this product, request the necessary information about the correct
disposal method from local government departments or from your seller.
This product meets all the basic EU regulation requirements that relate to it.