Fast Installation Manual
Quality . Service . Competitiveness
Before operating this unit,please read these instructions
carefully,and save them for future use.
V3.3.20
1
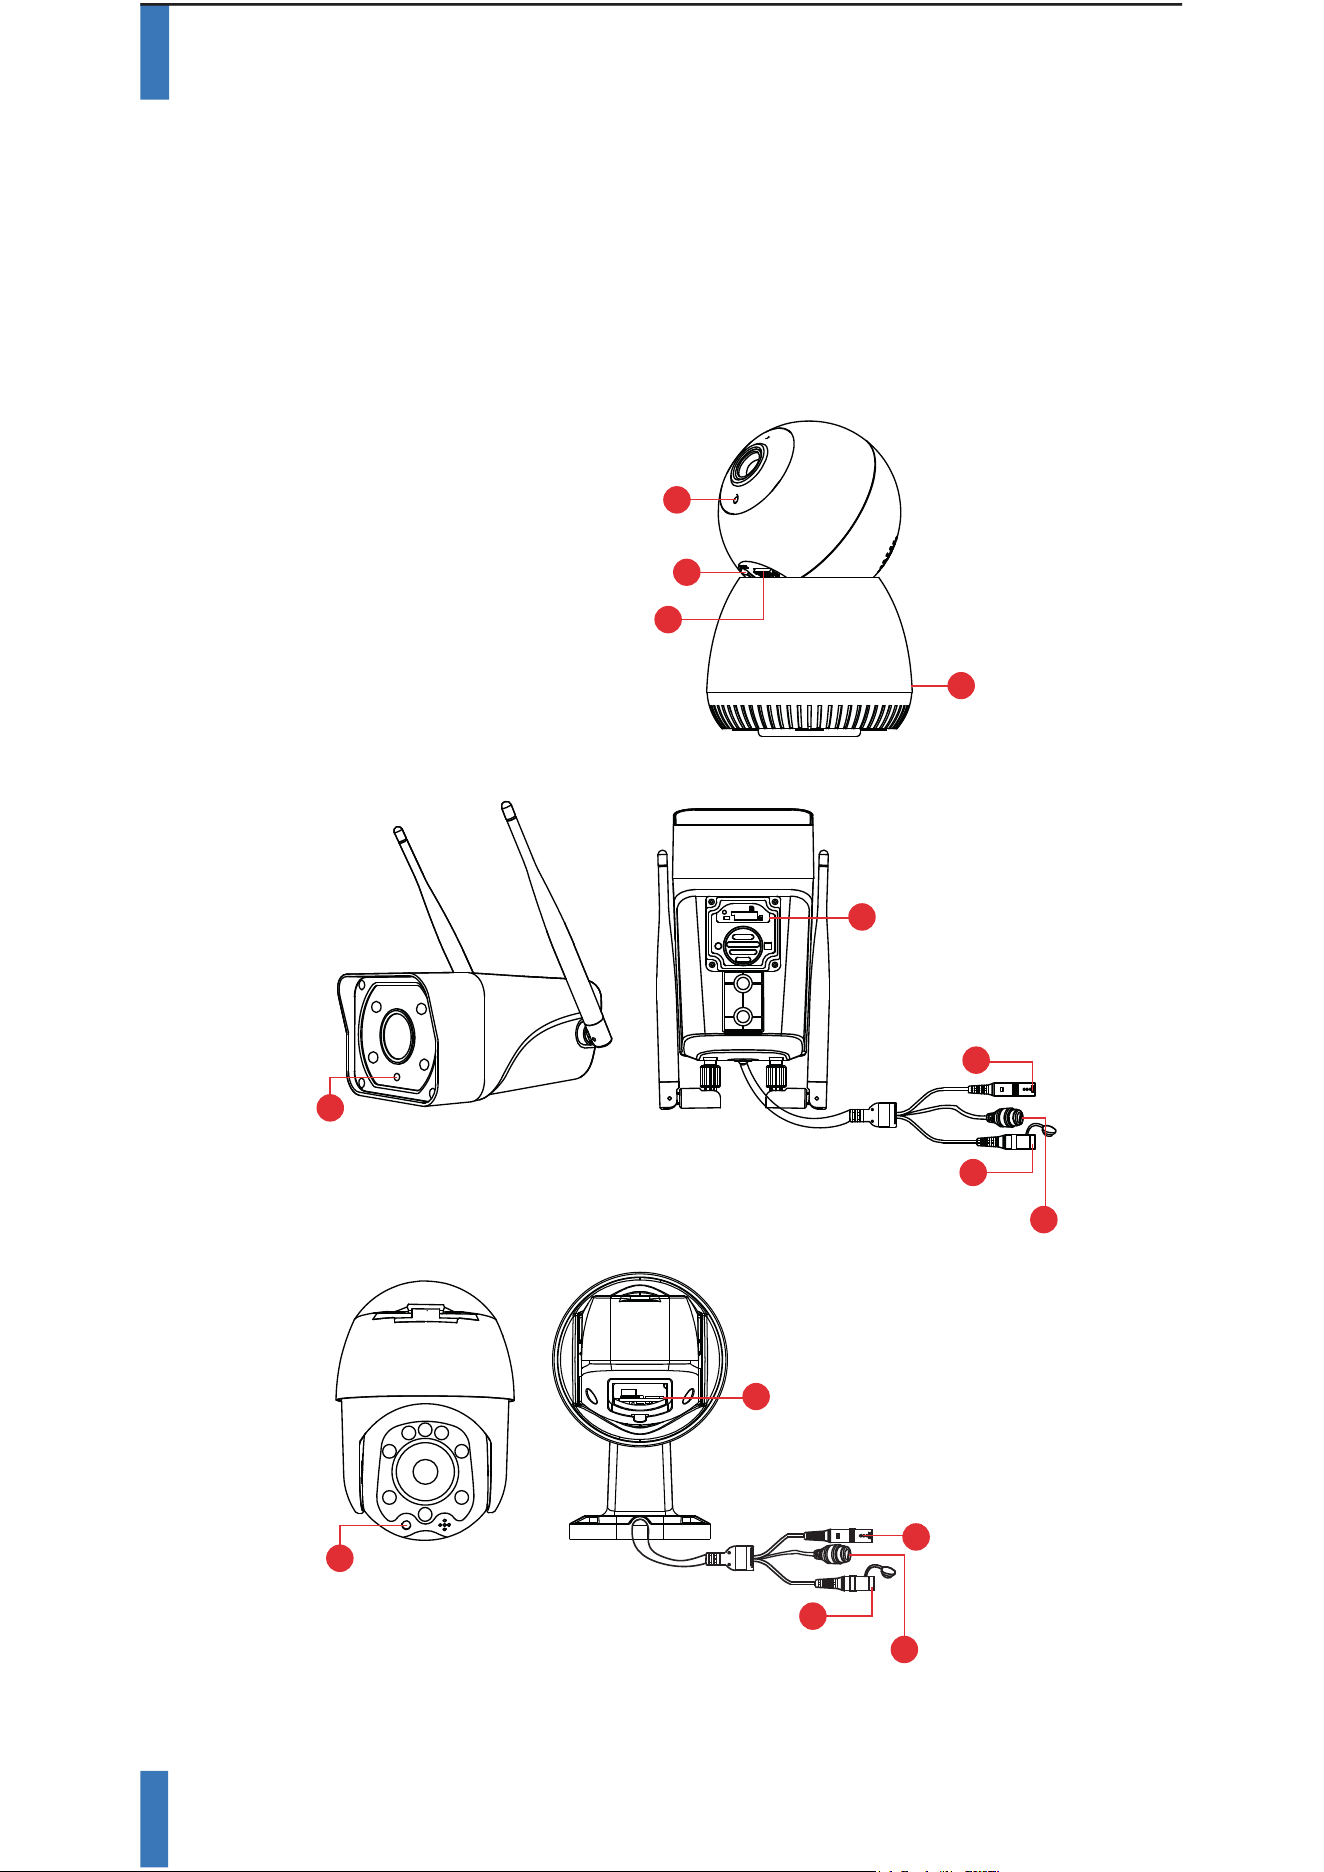
Appearance
This manual is suitable for various types of cameras.
(The appearance may be different due to different batches. The details
are subject to the receipt.This manual is only for the installation instructions
of this series of equipment.)
1. Wireless Pan-tilt IP Camera
2. WiFi Spot Light Camera
3. WiFi MINI Dome Cmaera
DC power
supply (5V)
4
1
Photosensitive
2
3
Reset button
SD card slot
RST
WIFI 4G
SIM
TF
1
Photosensitive
2
4
5
Reset button
DC power supply (12V)
Network port and
indicator light
3
SD card slot
(* You can see it by unscrewing the screw.)
2
Reset button
4
5
Network port and
indicator light
3
SD card slot
1
Photosensitive
DC power
supply (12V)
(* You can see it by unscrewing the screw.)

2
APP Download and Installation
Users can search “EseeCloud” on APP store or “IP PRO” on
Google Play,or scan the QR code below to install the APP.
EseeCloud APP APP download
Note: For iOS system, it requires iOS 8.0 version or above.
For Android,Android 4.4 or above.
are subject to the receipt.This manual is only for the installation instructions
Description
Collect ambient luminosity value, turn
on the infrared light when the current
illuminance is less than 3 Lux.
The working state of the device, long
press 3-5 seconds to restore the
factory, the camera will have a voice
prompt broadcast.
TF card, storage video and playback
video.
Power input
Connect the Lan cable and check the
current device status indicator light
( flashes once /1 s on hotspot mode)
1. Photosensitive
2. Reset button
3. SD card slot
4. DC power supply
5. Network port and
indicator light
3
(1). login Eseecloud APP, power on camera,wait for the
camera to start the configuration mode prompt tone (if
you do not hear the device startup configuration mode
prompt tone, please long press the reset button for more
than 3 seconds to reset the device.
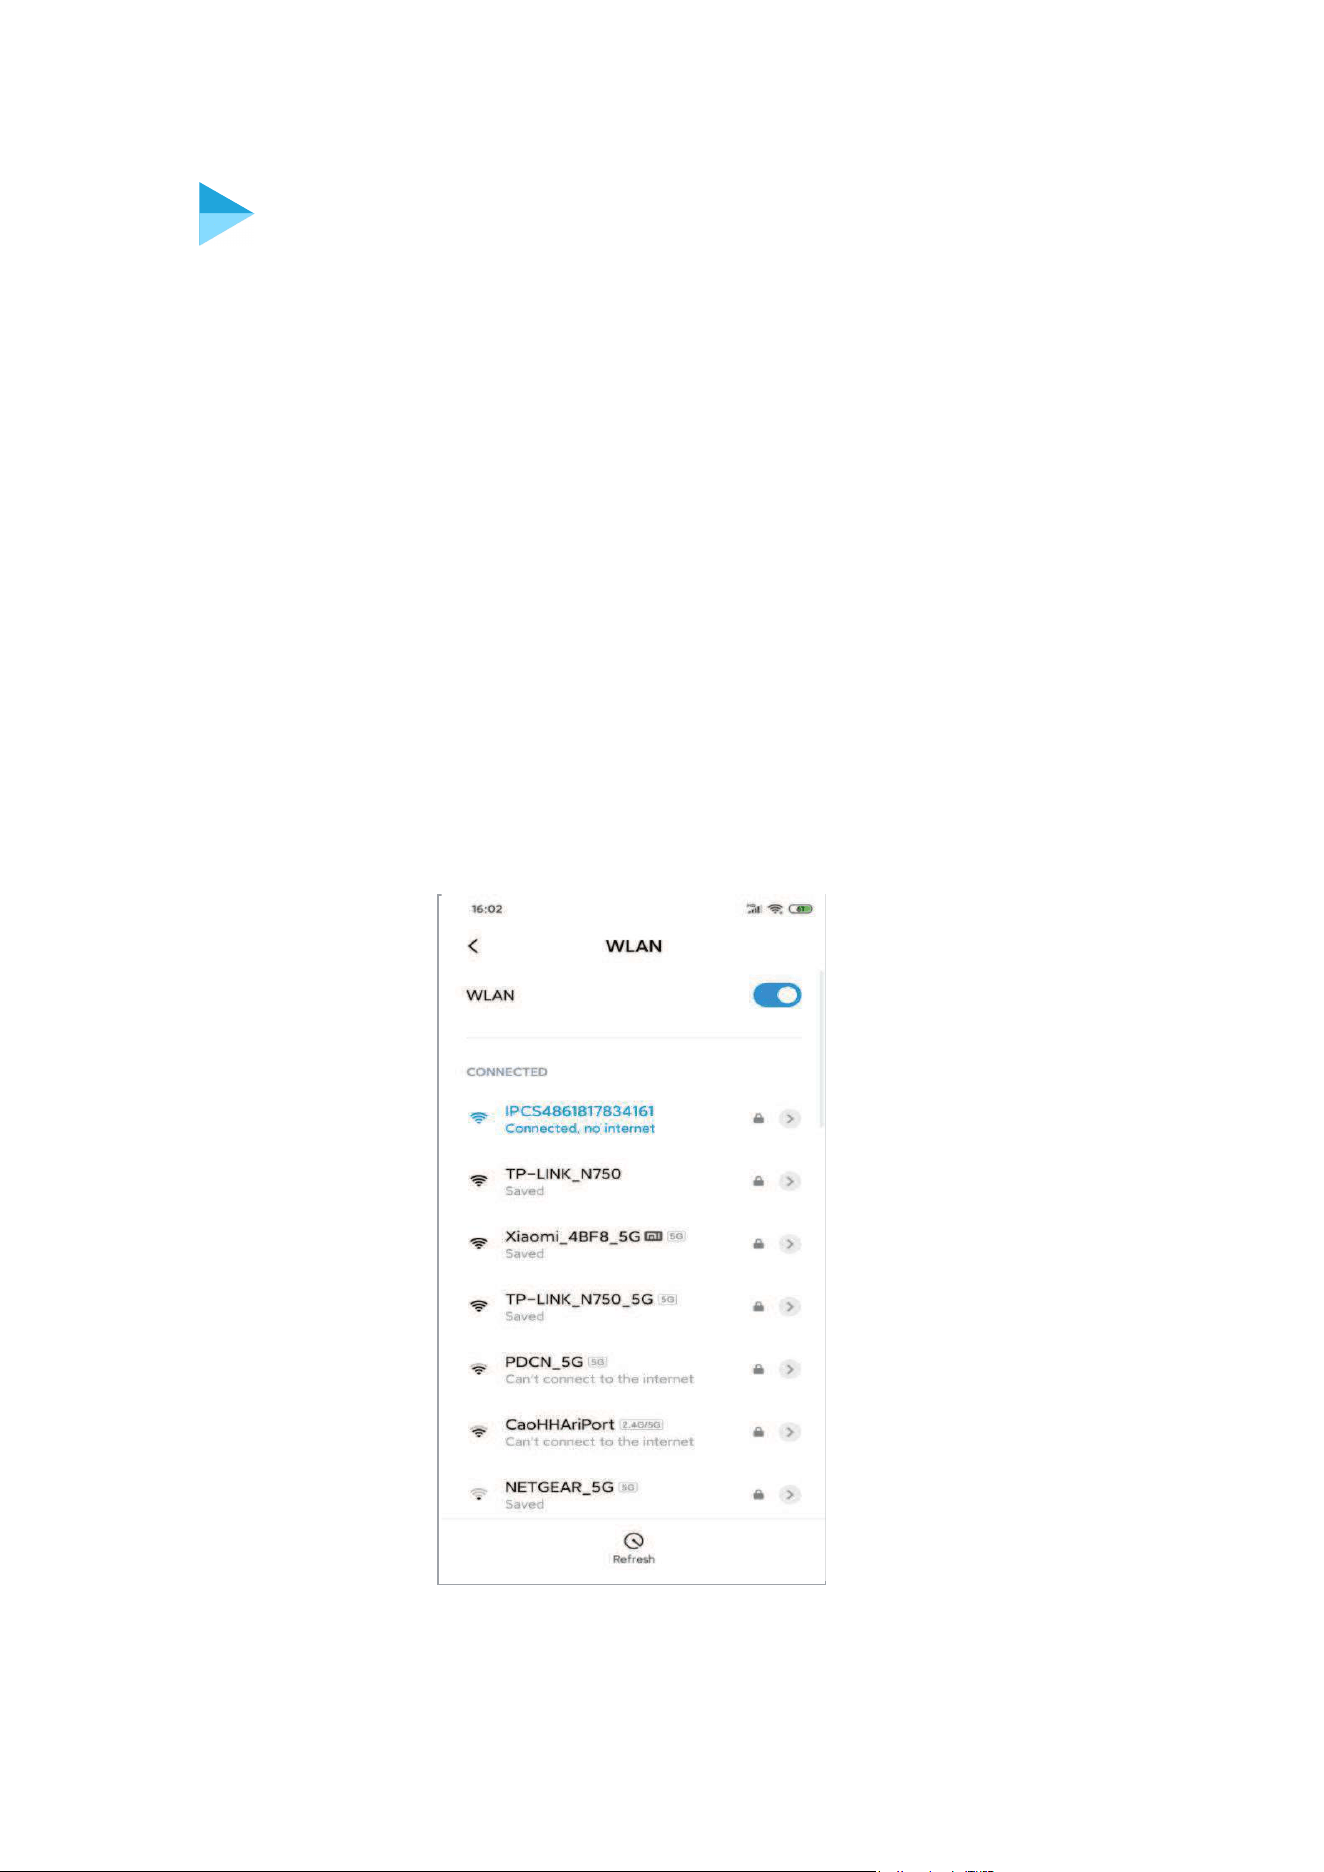
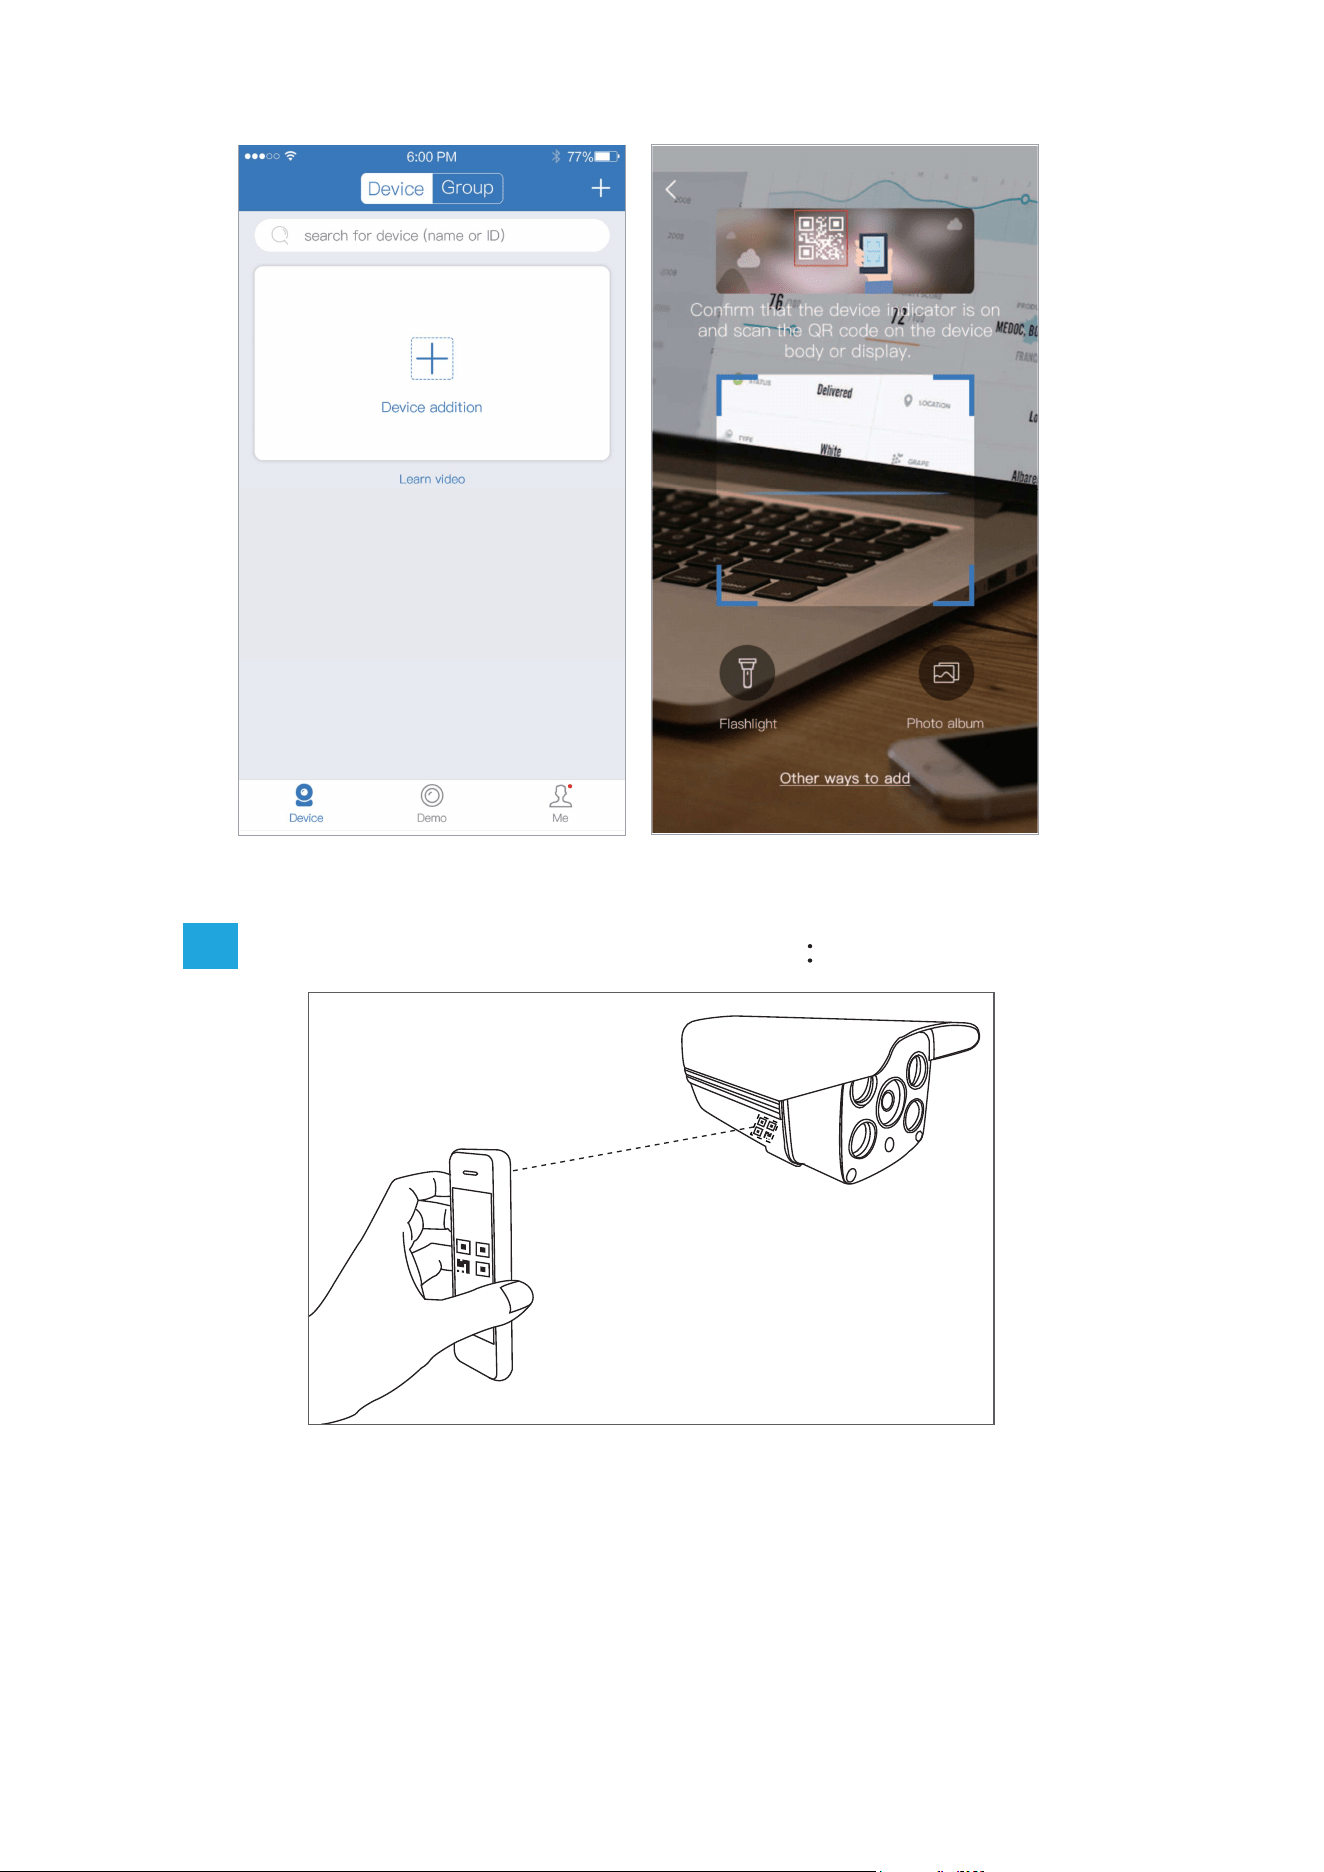
(2). Please go to the phone system settings (WiFi hotspot
list)and select the device hotspot connection starting with
IPC. The default password is 11111111(Fig 1)
Please keep connected with device hotspot when adding.
(3). Open APP,click “+” in the device list(Fig 2) to enter
scanning interface(Fig 3).
Setting installation and configauration
1. Wireless add configuration steps
Fig 1
4
Fig 2 Fig 3
1.1
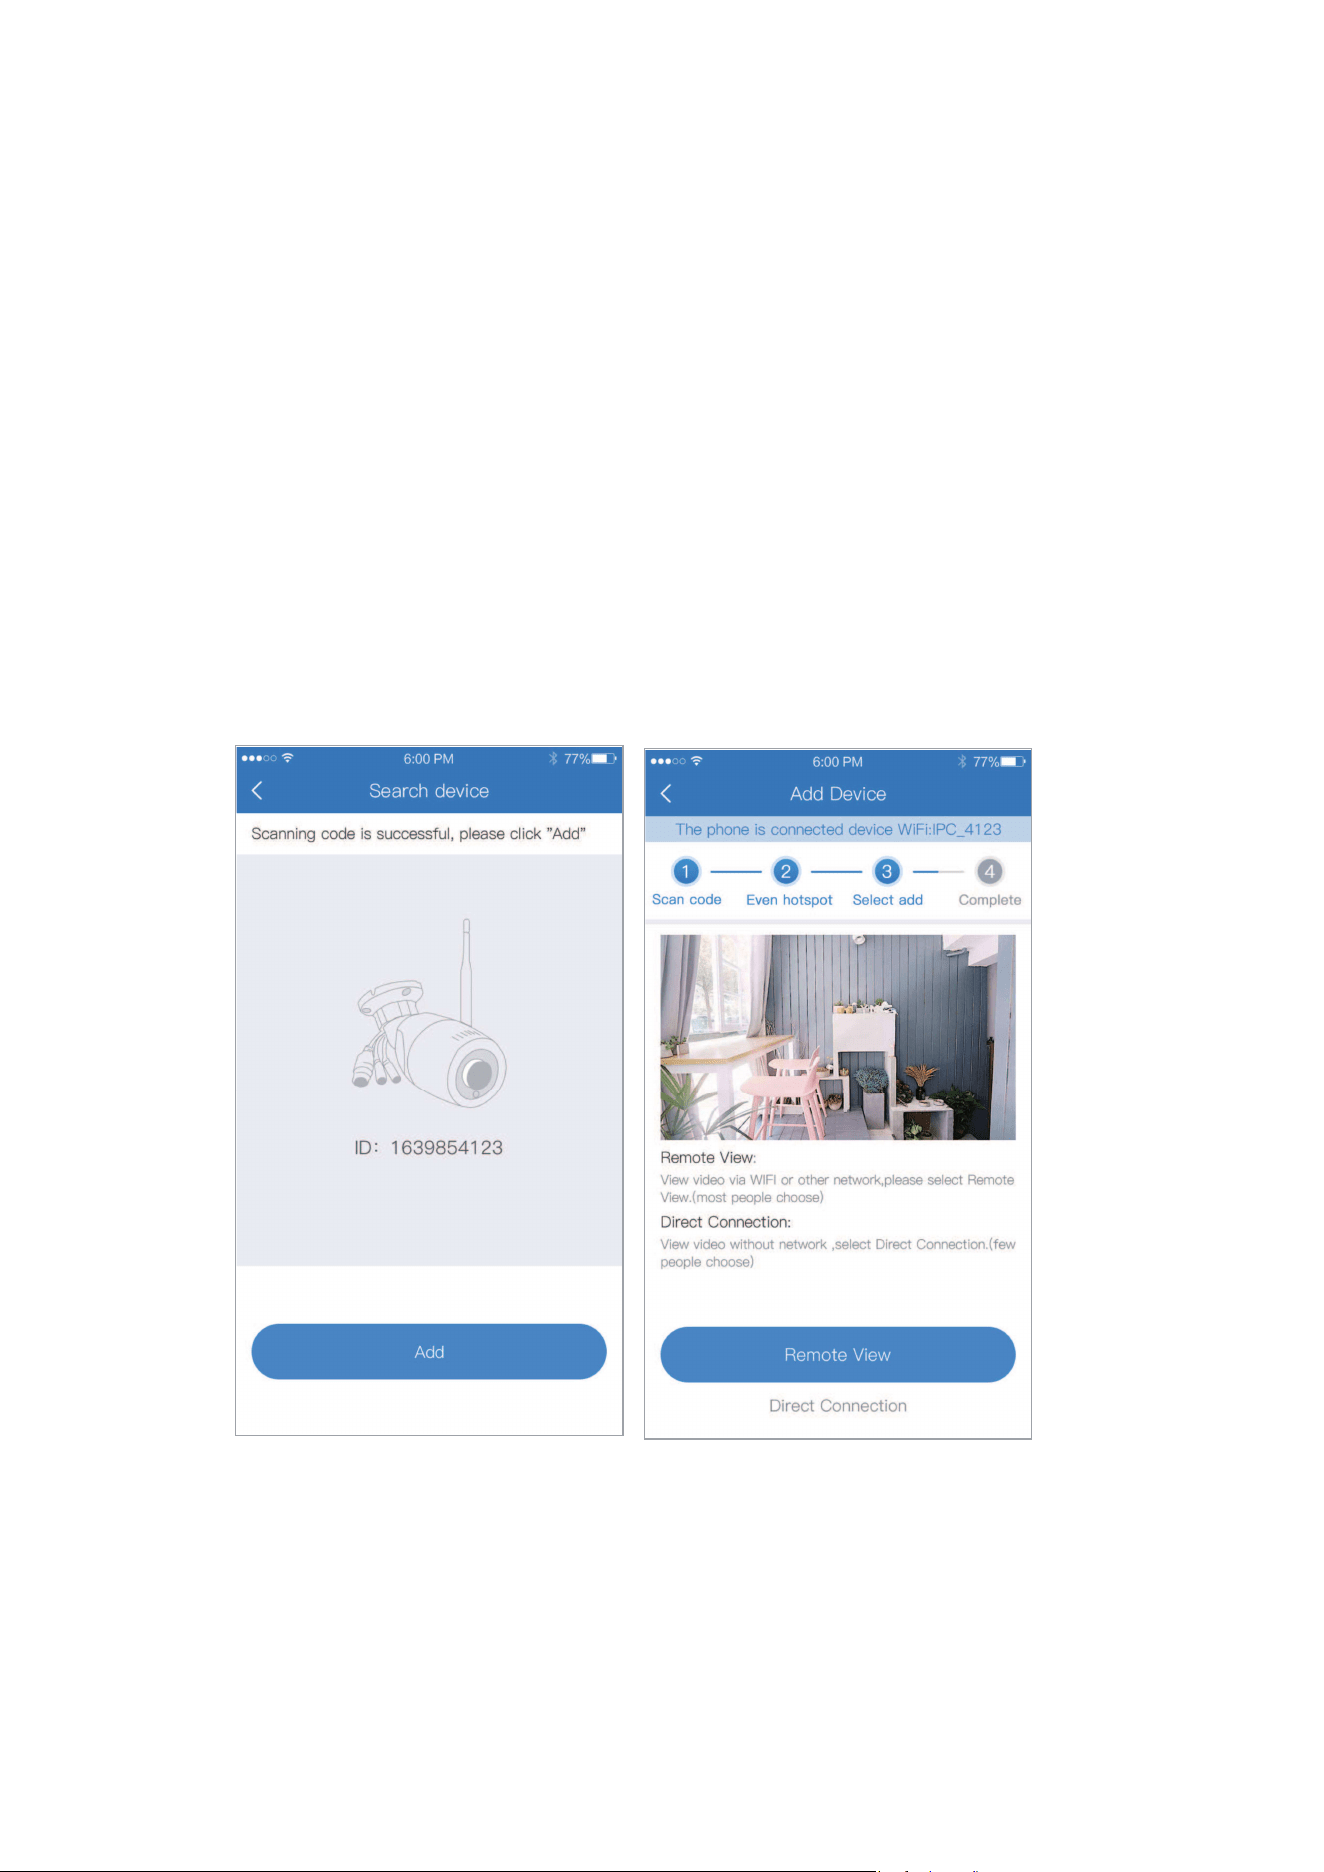
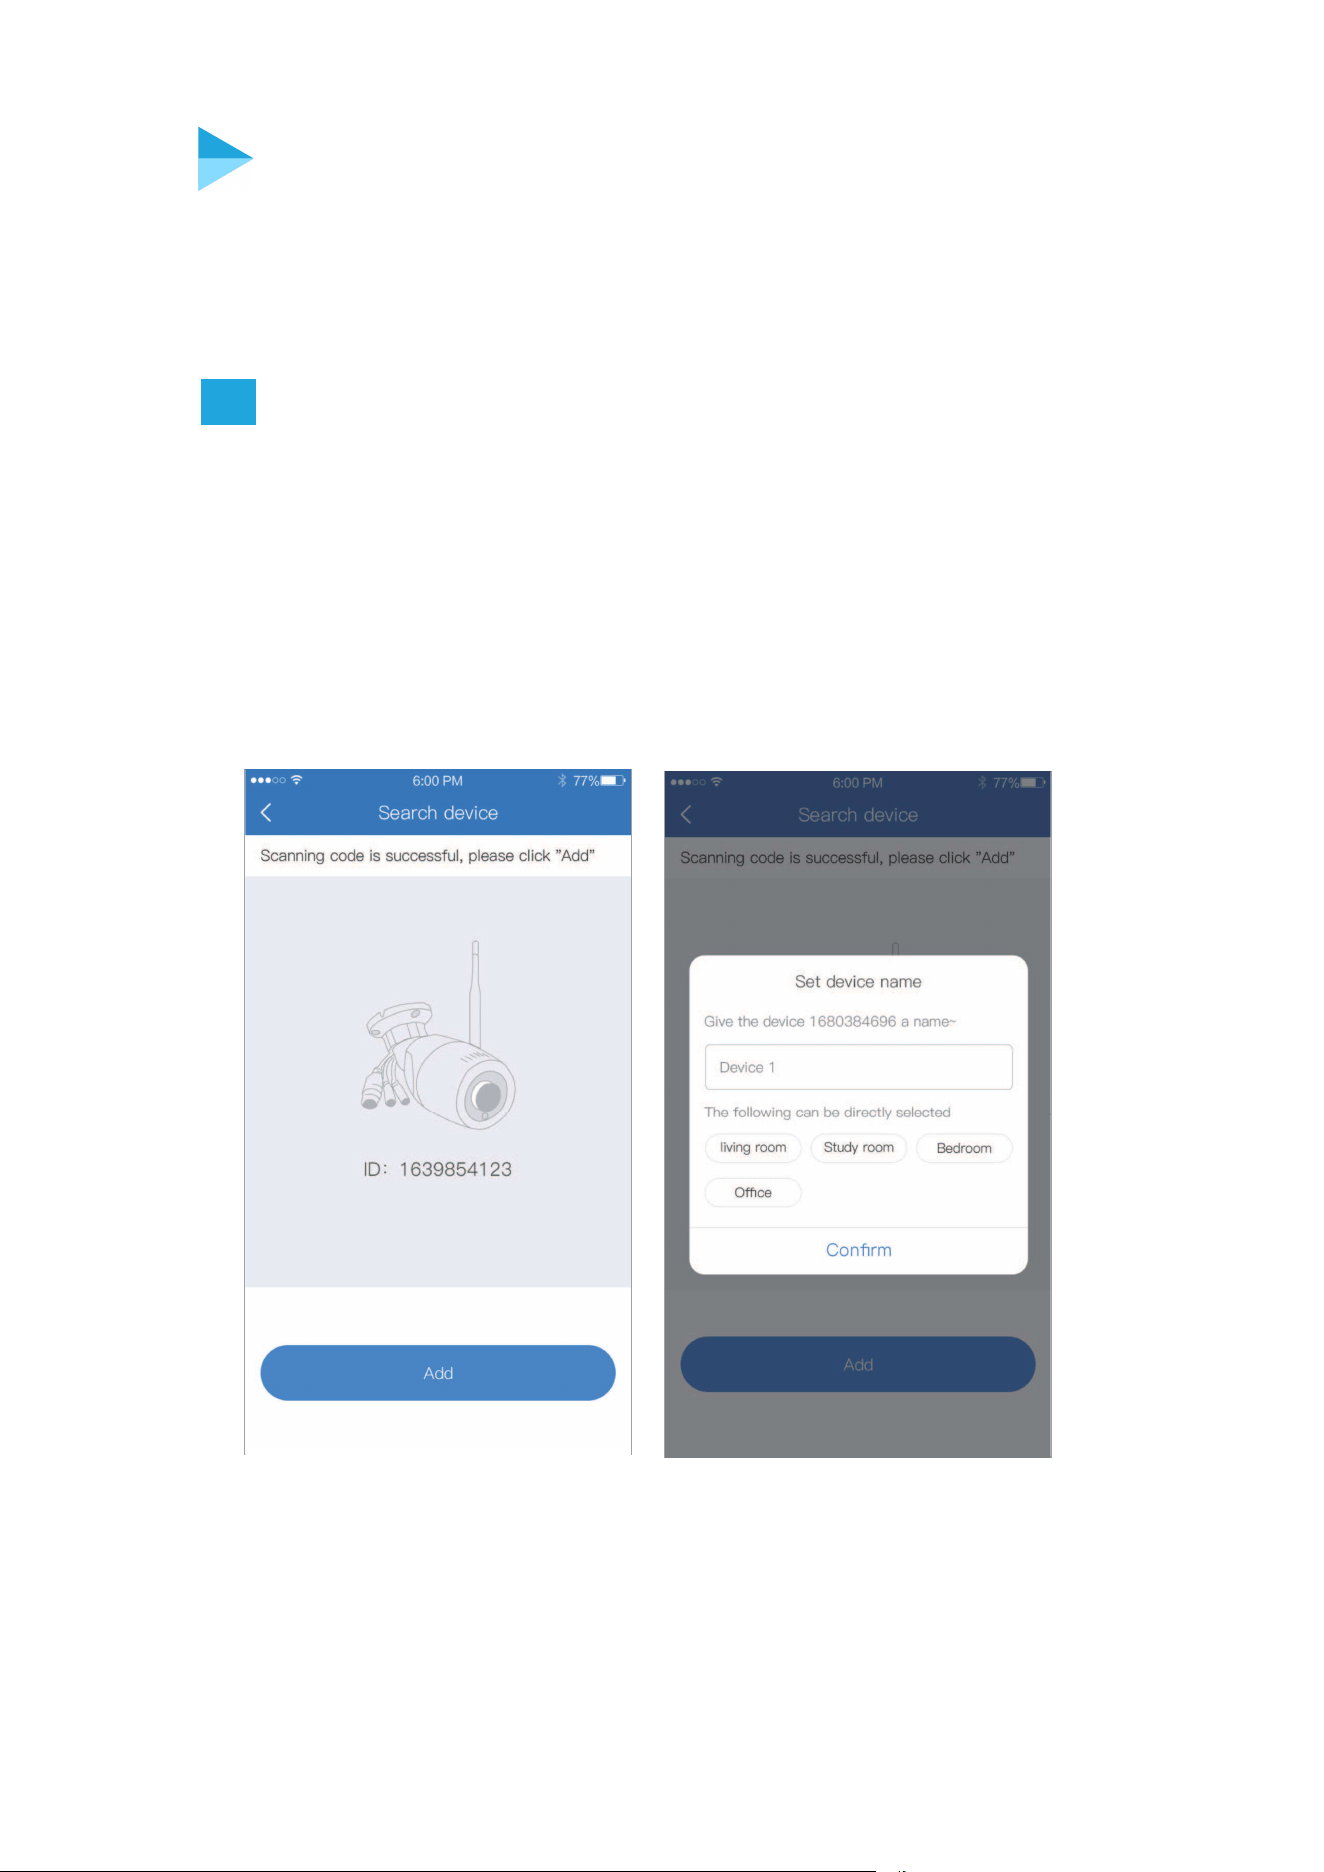
(1). Scan the QR code on the camera ,Click “Add”
(Fig 4).
(2). Please select remote view when view by WiFi or
other network,please click direct connection when
network is not available.(Fig 5).
There is a QR code on the camera
5
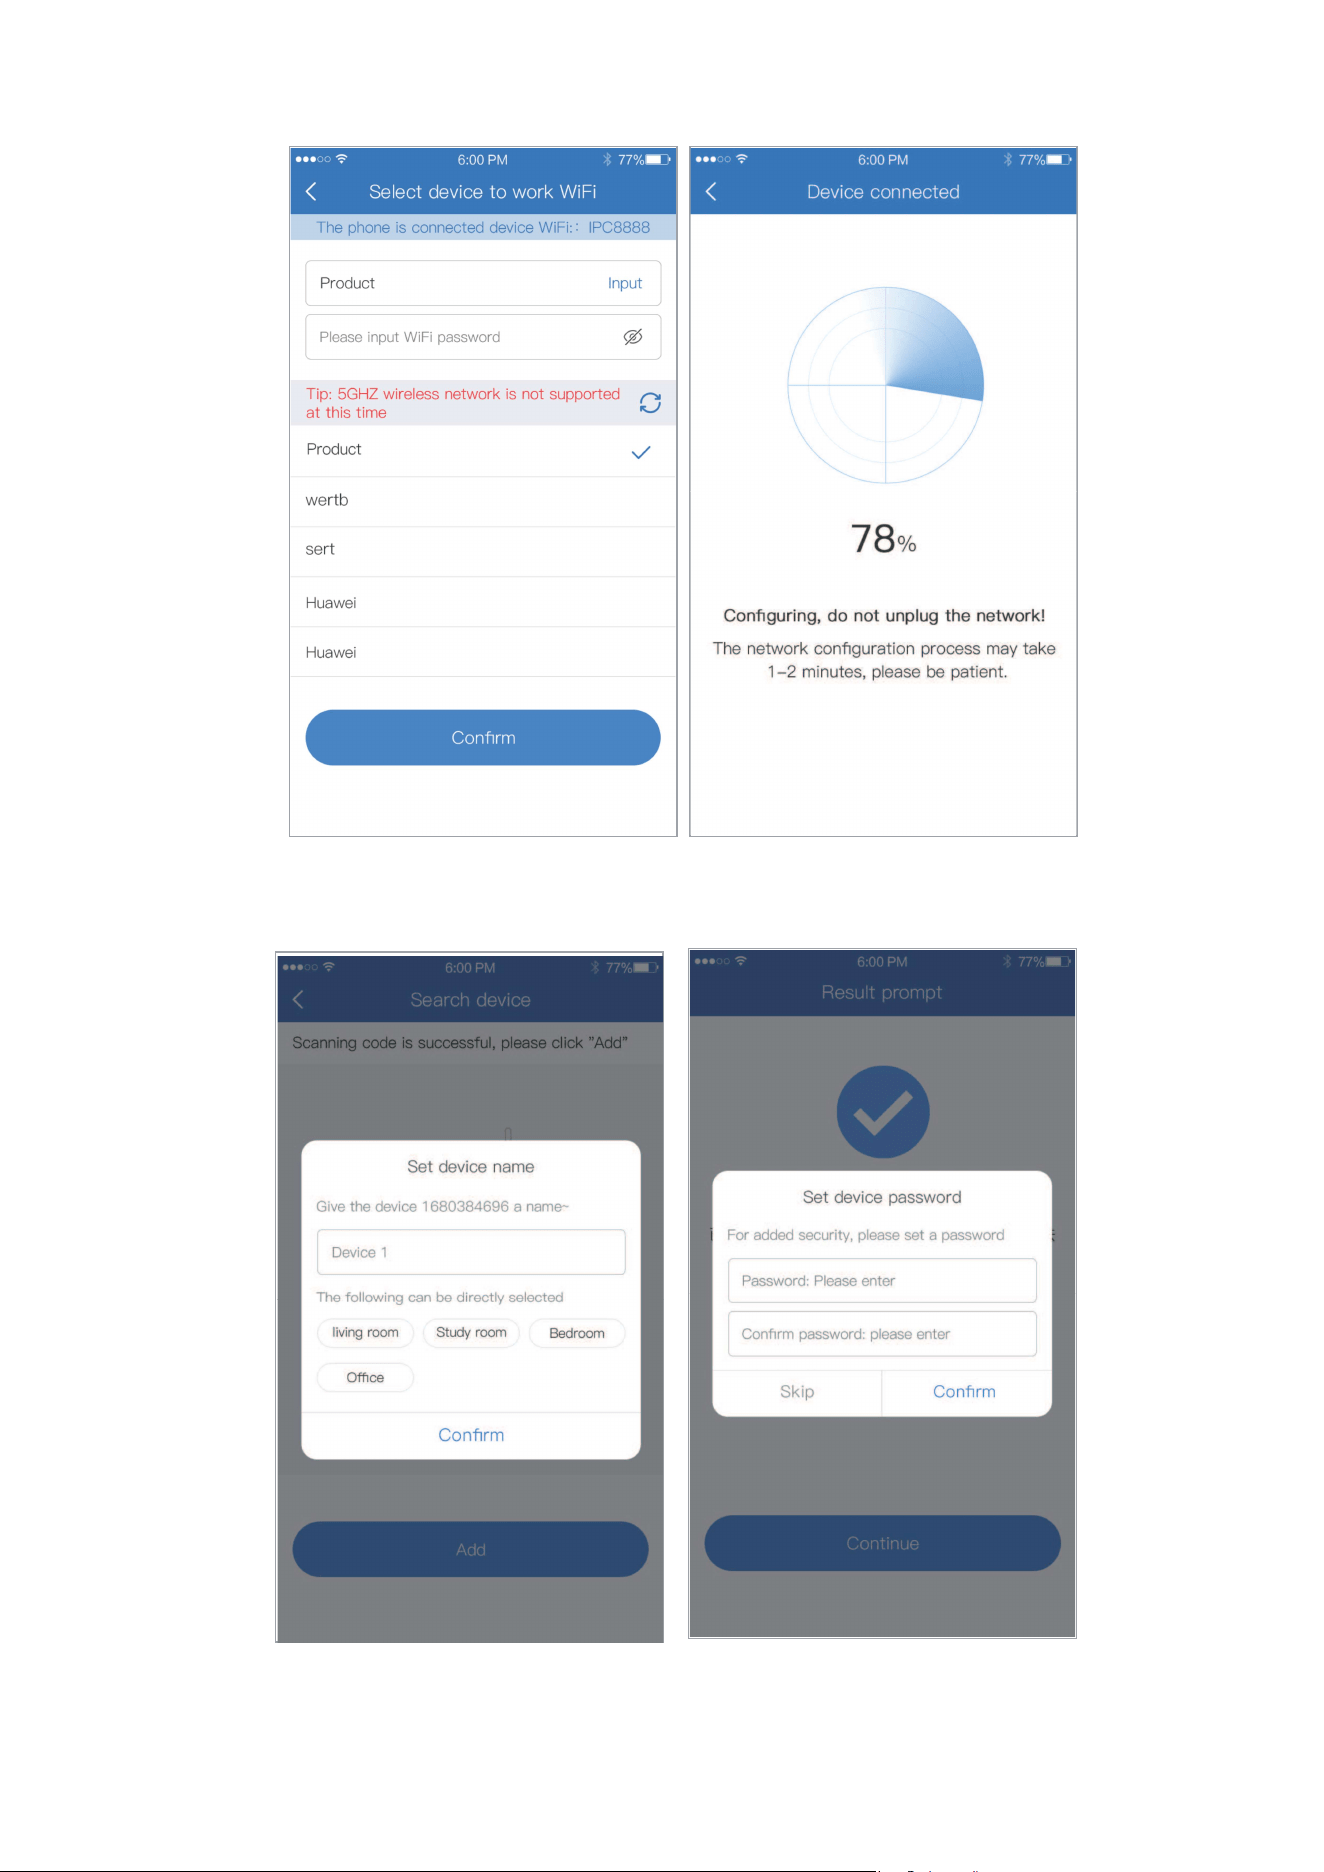
Remote view: Click”remote use”(Fig 5),select WiFi to
configure the network (App will search WiFi nearby
device and show under the interface) (Fig 6),click
confirm and start configuration (Fig 7),follow the
interface instructions to set device name and
password after success configuration (Fig 8 and 9),
return to the device list after adding successfully.
Direct connection: Click”Local use”(Fig 5),follow
interface instructions to set device name and
password(Fig 8 and 9),return to the device list after
adding successfully.
Fig 4 Fig 5
6
Fig 6 Fig 7
Fig 8 Fig 9
7
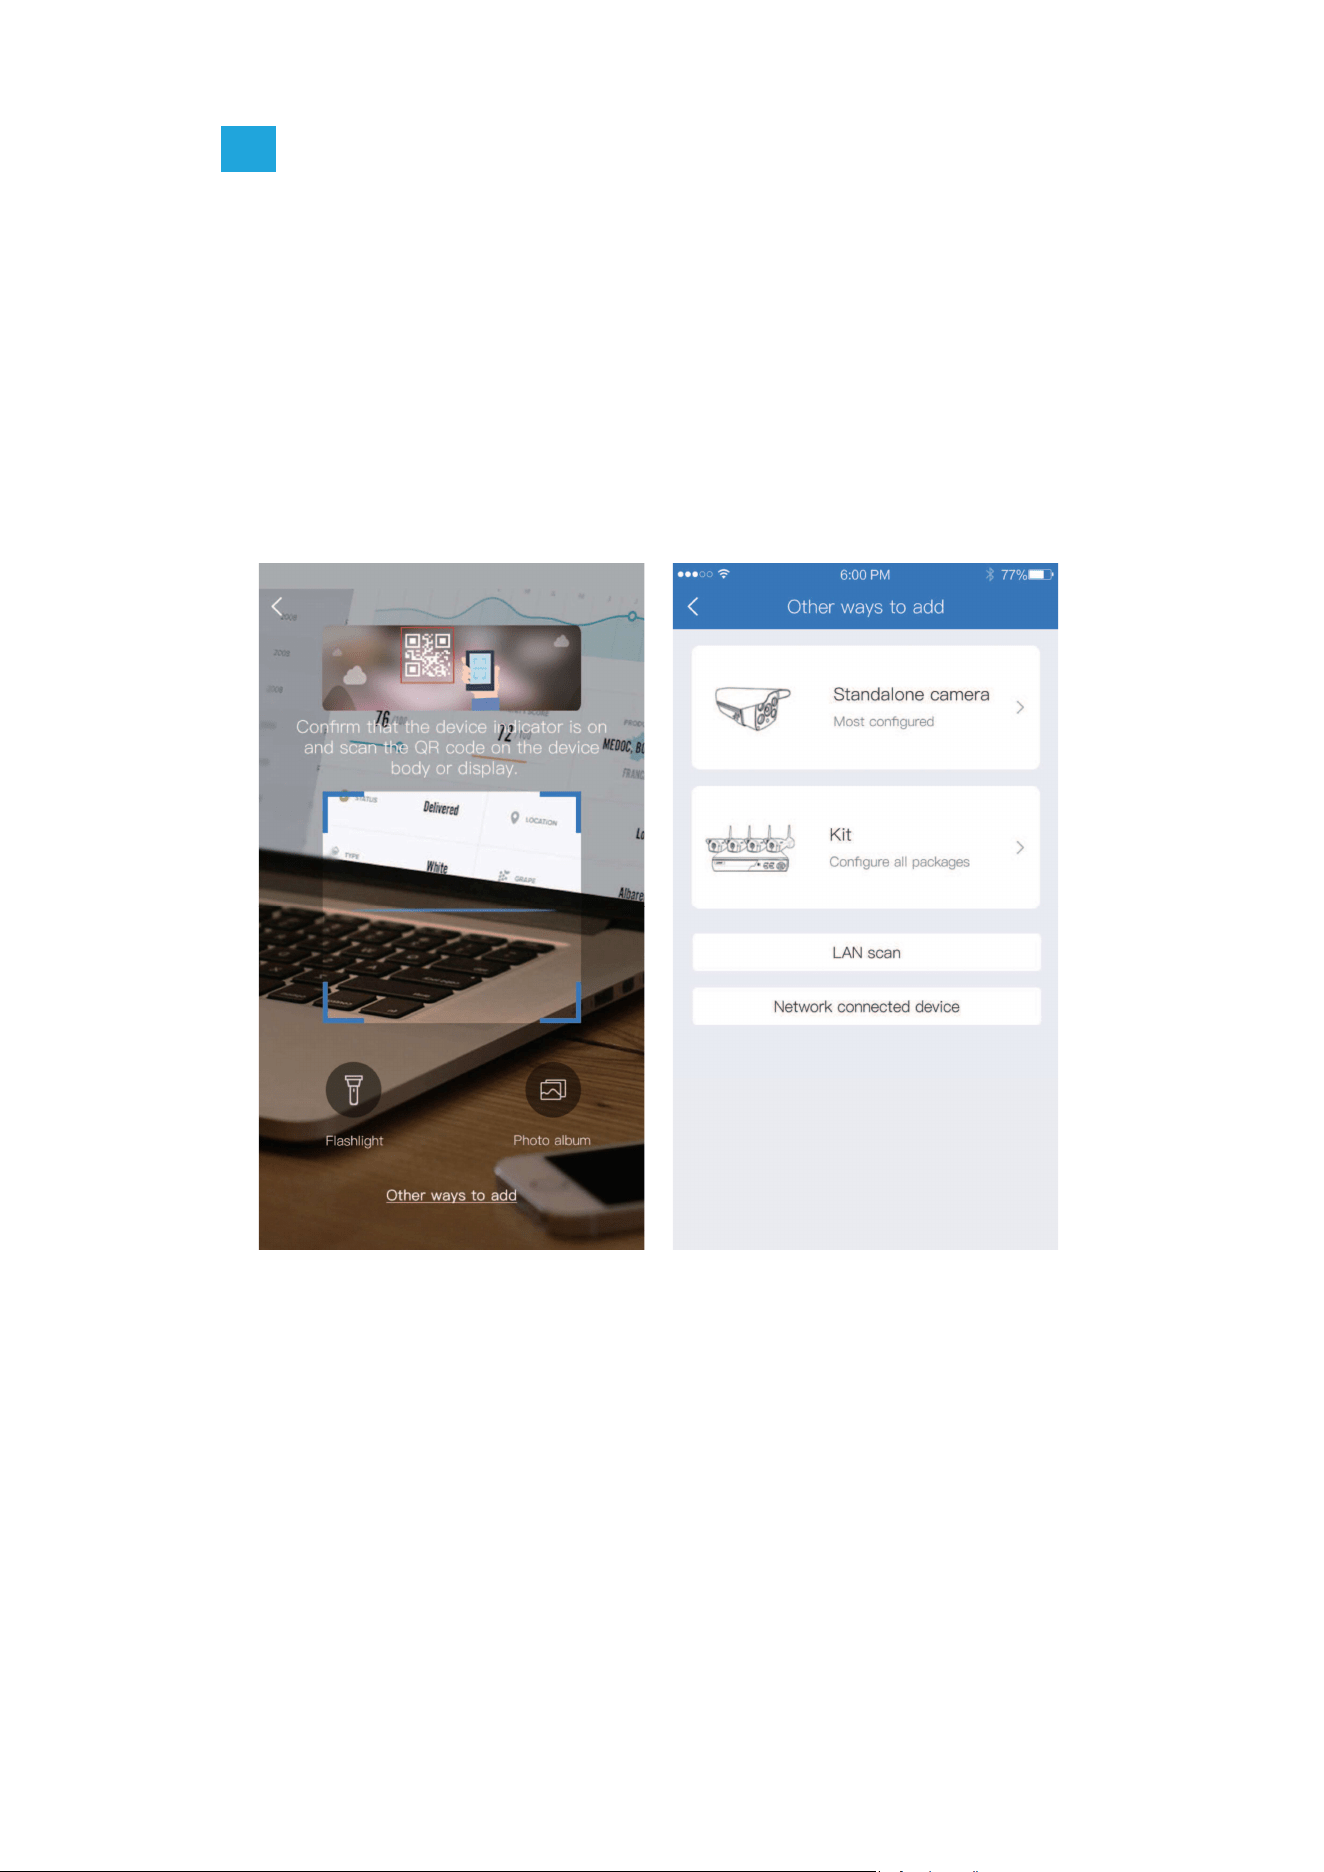
No QR code found on the camera
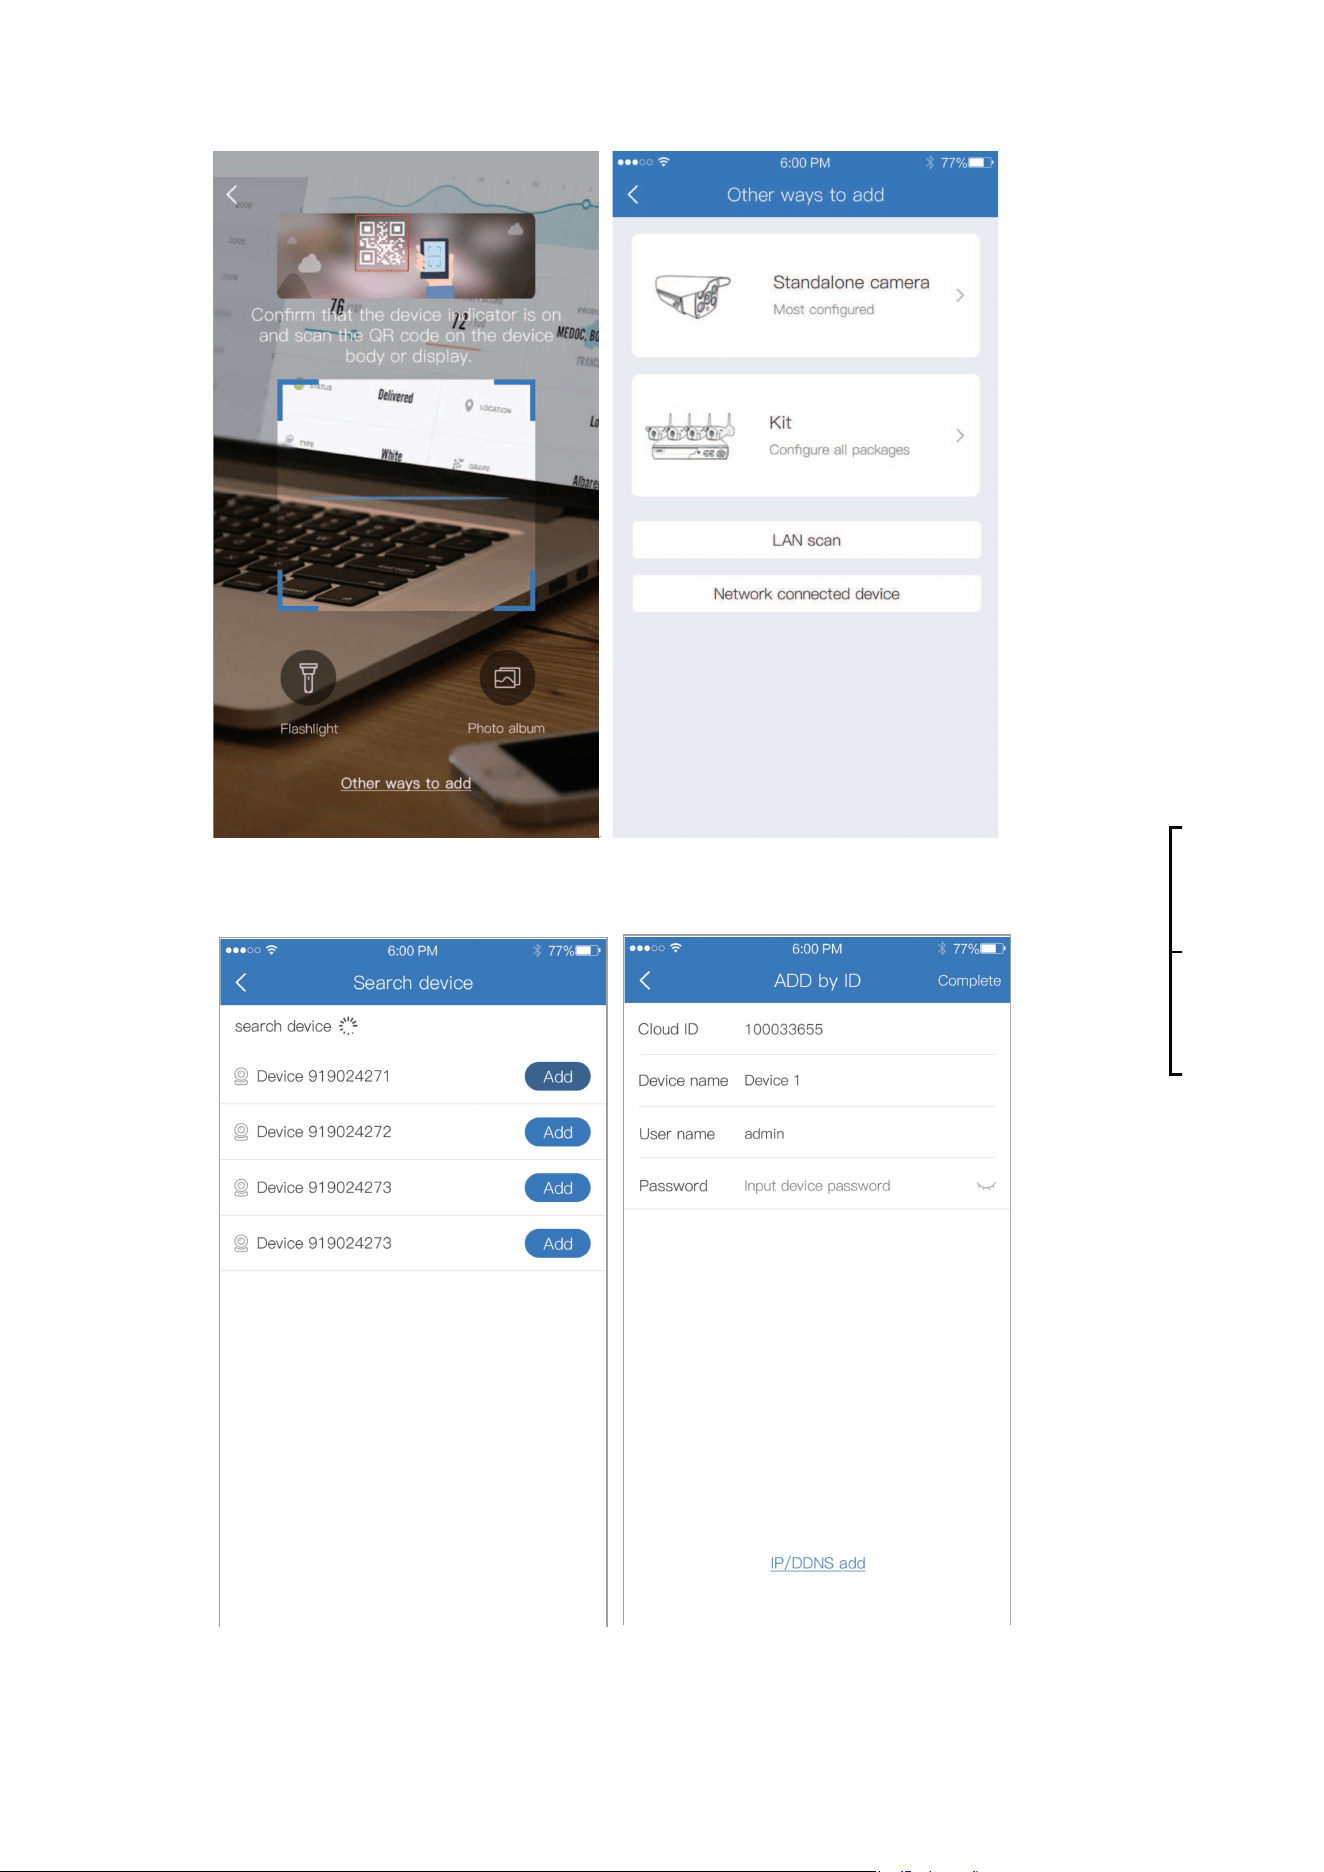
(1). Click other ways to add on QR code scanning
interface (Fig 10);
(2). Select standalone camera (Fig 3), for the
subsequent network configuration steps, please refer
to the adding process in the second step of “ there is
a QR code on the camera ”.
1.2
Fig 10 Fig 11
8
2.Wired add configuration step
Please make sure that the device is connected to an
internet-enabled router through a network cable.
There is a QR code on the camera
(1). Scan the QR code on the camera ,Click “Add”
(Fig 12);
(2). Follow the interface instructions to set device name
and password (Fig 13),return to the device list after
adding successfully.
2.1
Fig 12
Fig 13

9
1.Network connected device adding step
(1). Open APP, enter QR code scanning interface, click
”other ways to add” Fig 14);
(2). Select network connected device Fig 15);
(3). After entering device ID,name and password(Fig 17)
click complete ,prompt toreturn to the device list after
adding successfully.
No QR code found on the camera
2.2
2. LAN scan adding step
(1). Please go to the mobile phone system to set the
currently connected WiFi of the connected device,
and ensure that the mobile phone and the device
are under the same WiFi.
(2). Open Eseecloud APP,enter code scanning
interface,click”other ways to add”(Fig 14);
(3). Click LAN scan(Fig 15);
(4). Select the device ID(Fig 16), click add,input
device name and password,click complete,return
to the device list after adding successfully(Fig 17).
10
Fig 14 Fig 15
Fig 16
Fig 17
11
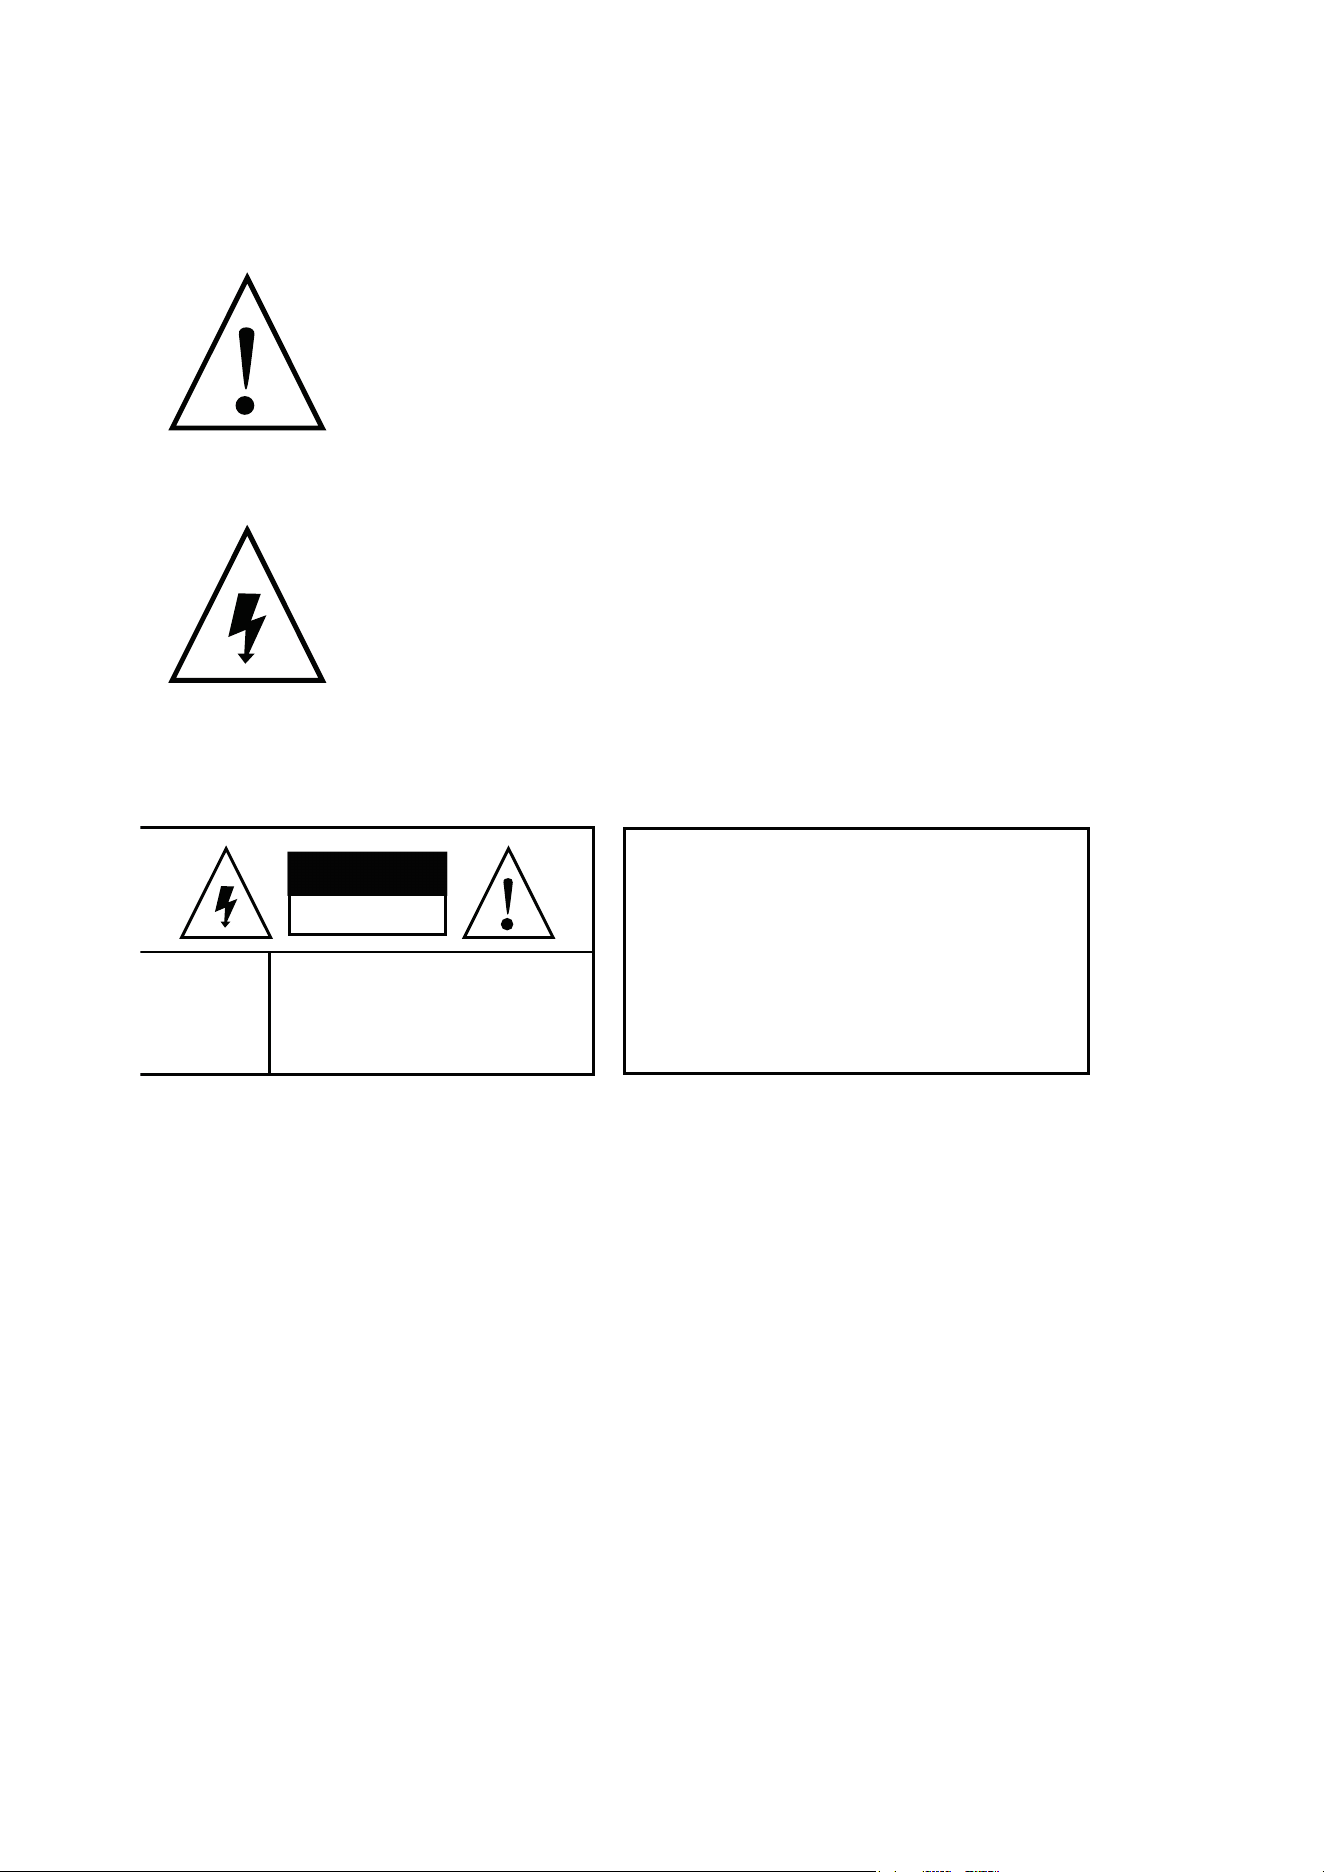
Warning
In case of fire or lightning,pls don’t put
product in damp and raining place,operate
or maintain according to the user manual.
Be careful when you see attachment with
a Dangerous Voltage which might cause
serious electric accident.
Notice:
1. Ensure your equity,pls read the user manual carefully
before you use the product
2. Pls contact professional people if you need install and
maintain the product
3. Working Environment:temperature of -20°C~+60°C,
relative humidity under 85%
4. Pls don’t exceed the user manual’s standard range of
temperature,humidity and voltage.
Warning
Warning
In case of electric shock and fire,
pls don’t use power supply
beyond power list in user manual
Warning
CAUTION RISK OF ELECTRIC
SHOCK DO NOT OPEN
To reduce electric shock,
unprofessional people
please don’t open product
front panel or rear panel
