Loading ...
Loading ...
Loading ...
:_.Turn
.
4.
5.
the Adjusting Scr-ew countbrclockwise
to move the AdjustingPin almost as far
as it will go tothe rear. Figure 7.
Hold chain with cutters facing as shown in
Figure8.
Place chain over and behind the clutch drum,
onto the sprocket. Figure8.
PlacetheGuideBaronthesawwiththelargeslotover
theBarStudand theMountingPins(oneithersideof
theBarStud).Fittheadjustingpinintotheroundhole
beFowthelargeslot.Figure7and9.
NOTE: BesuretheGuideBarispositionedwiththe
adjusting pinholebelowthelargeslot.
6. StartatthetopoftheguidebarandfitthechaJndrive
linksintogroovearound theguide bar.Figure9.
I .C:_.UTION: !Make sure that the tab on the bottom
ofthe fuel tank is allgned in the slot provided in
the fan housing. Figure 10,
7. Hold the Guide Bar against the saw frame and
install the Bar Clamp.
8. Secure the Bar Clamp withthe Bar Clamp Nut,
finger tight only Tighten Bar Clamp Nut after
chain is tensioned.
9..Replace the Rear Bar Clamp Screw and tight-
en securely.
10. Follow "Chain Tension" instructionsbelow.
PIN HOLE
Figure9
D. CHAIN TENSION
• Chain tension is very important:
-- a loose chain will wear the bar and itself.
u a loose chain can jump off the bar while you
are cutting.
--a tight chain can break or damage the saw
and/or bar.
• The chain stretches during use, especially
when new, Check tension.."
each time the saw is used
more frequently when the chain is new
-- as the chain warms up to normal operating
temperature.
• Chain tension is correct when the chain:
can be lifted about 118" from the Guide
Bar at a point near the middle of the bar,
and will move freely around the bar.
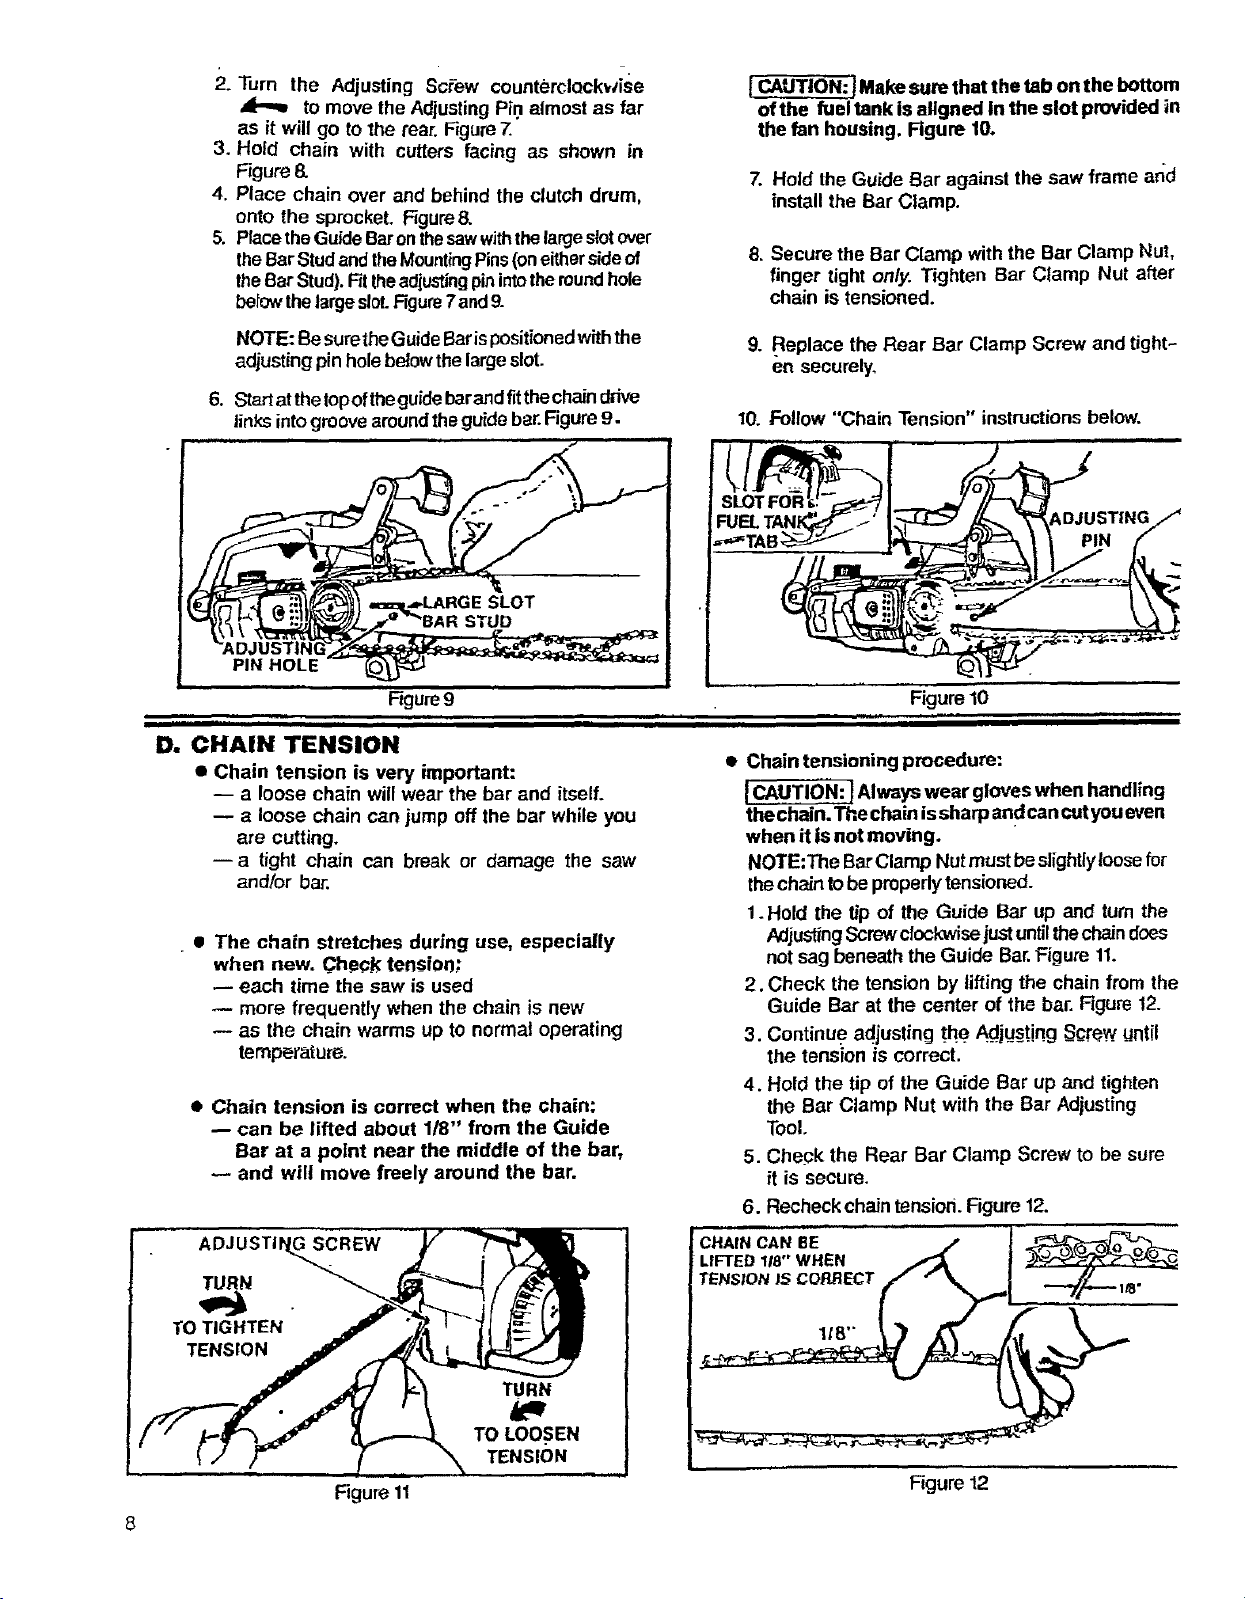
ADJUSTIN,_REW
TURN
TO TIGHTEN
TENSION
TENSION
Figure10
i
• Chain tensioning procedure:
ICAUTION: !Always wear gloves when handling
the chain. The chainissharp andcancutyoueven
when it is not moving.
NOTE:The Bar Clamp Nutmust beslightlyloose for
thechaintobe properlytensioned.
1. Hold the tip of the Guide Bar up and turnthe
AdjustingScrewclockwisejustuntilthechaindoes
not sag beneath the Guide Bar.Figure 11.
2. Check the tension by lifting the chain from the
Guide Bar at the center of the bar. Figure12.
3. Continue adjusting the A_ju_sJing_S_crewuntil
the tension is correct.
4. Hold the tip of the Guide Bar up and tighten
the Bar Clamp Nut with the Bar Adjusting
Tool.
5. Check the Rear Bar Clamp Screw to be sure
it is secure.
6. Recheck chaintension.Figure 12.
Figure 11
Figure12
Loading ...
Loading ...
Loading ...