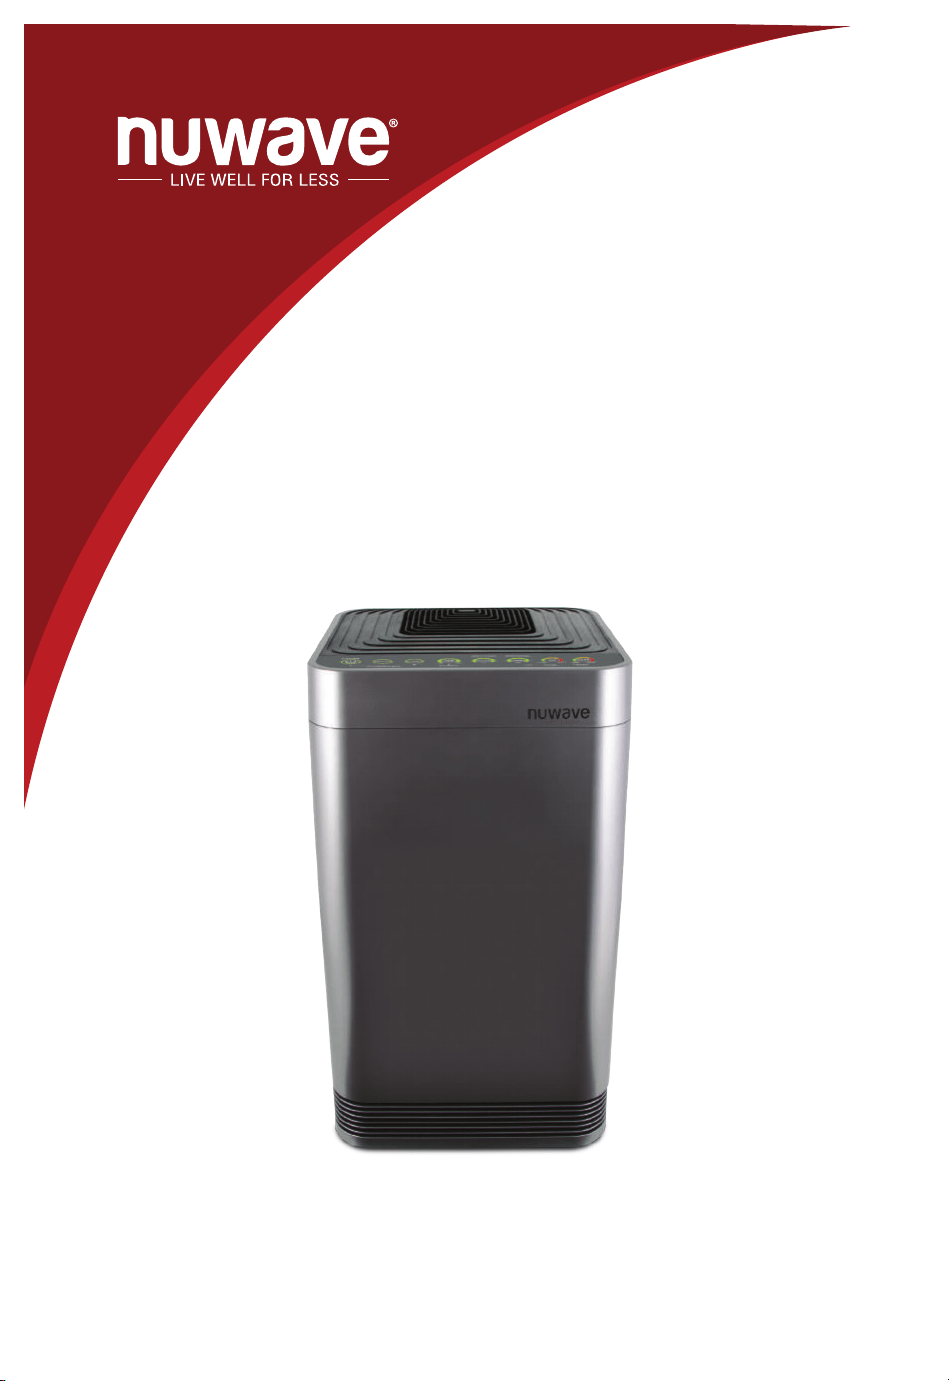
Owner’s Manual
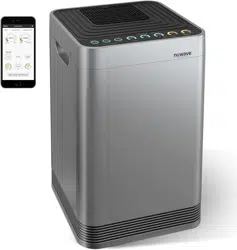
NuWave OxyPure
®
Air Purier

2 • NuWave Electric Skillet Complete Cookbook
As a special thank-you for registering your NuWave unit, you’ll
automatically receive an additional 6 months added to your limited
manufacturer’s warranty!*
All you have to do is follow these
simple steps.
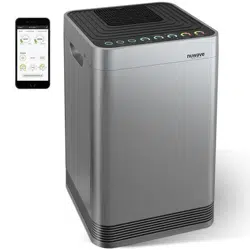
Using your smartphone or
smart device, scan the QR code
located on the unit label on the
back of the unit.
You will be directed to NuWave’s
product registration page with
your unit’s unique serial number
automatically entered in the
appropriate field.
NOTE: If you do not have a
web-enabled smart device,
simply visit nuwavenow.com/QR
and manually enter in your unit’s
serial number.
Fill out the remaining information
and complete the optional survey.
Once you submit your
information, you will receive a
confirmation email containing
your extended warranty details.
1
2
3
4
REGISTER
NOW!
*Register your product within 1 year of date of purchase for a free
6-month extension of your limited warranty.

1
2
3
Open your mobile app store
(App Store, Google Play).
Search for "QR code readers."
Simply download the QR code reader to your phone,
open it, scan the code and you are ready to go.
NOTE: You may need to open your downloaded QR
code reader each time you want to scan a QR code.
DOWNLOAD THE QR CODE
APP TO YOUR MOBILE DEVICE
6
for an additional
months
warranty!
QR code readers
3
4
For more about our innovative products, visit:
www.nuwavenow.com
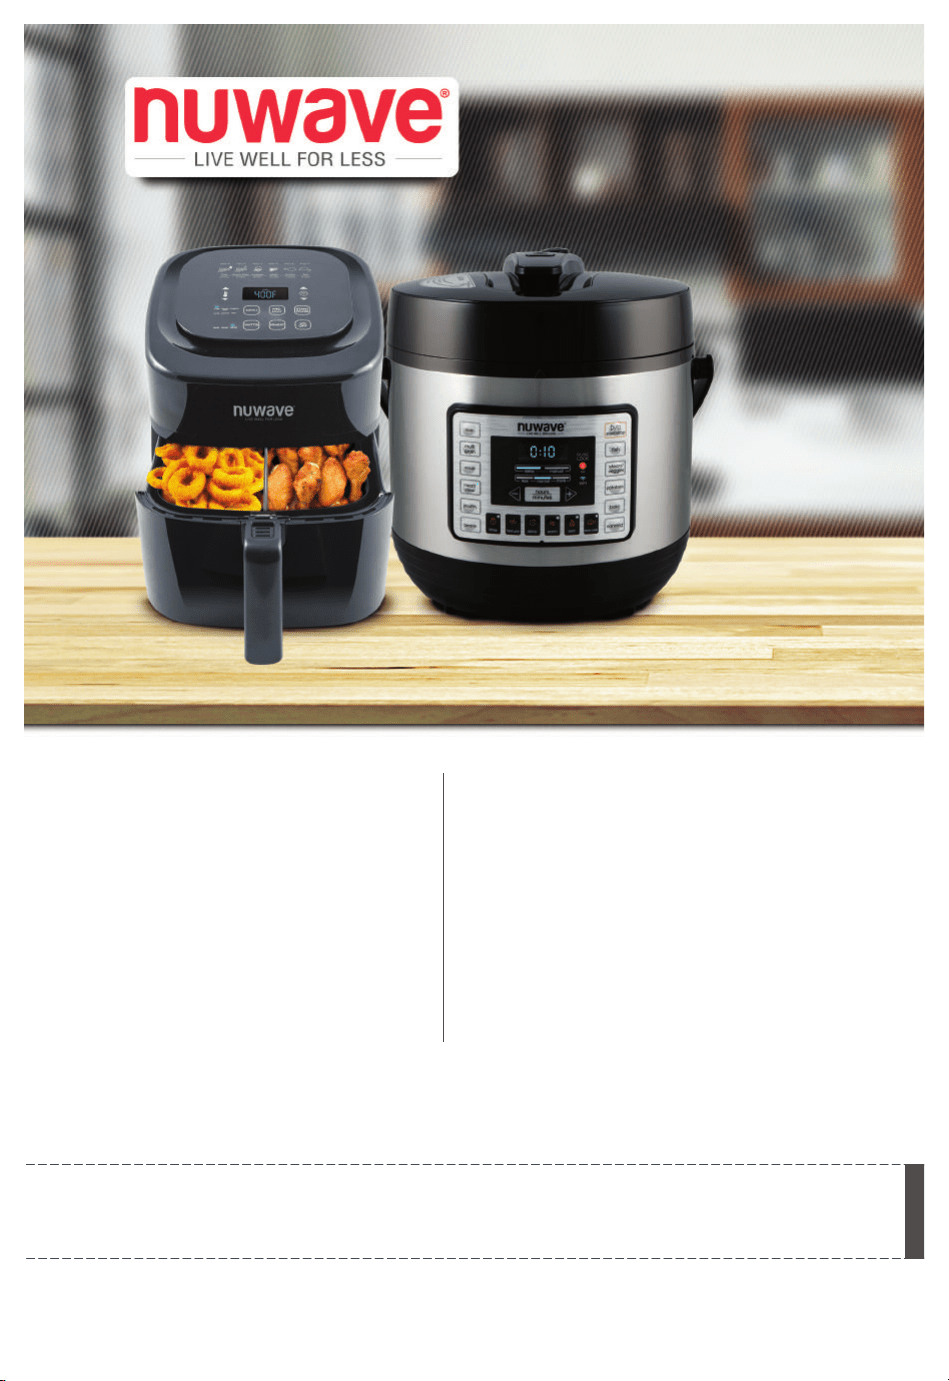
NuWave Brio
®
6Qt
Digital Air Fryer
NuWave
Nutri-Pot
®
6Q
Digital Pressure Cooker
Super-heated air cooks
your food to crispy,
tender perfection.
The digital touch screen
gives you precise
temperature control.
Easily cook rice, poultry,
vegetables and more all
with the press of a button!
The Nutri-Pot’s safety
release valve and hinged
lid make for convenient
and safe operation.
1-877-689-2838
For more about our innovative products, visit:
www.nuwavenow.com
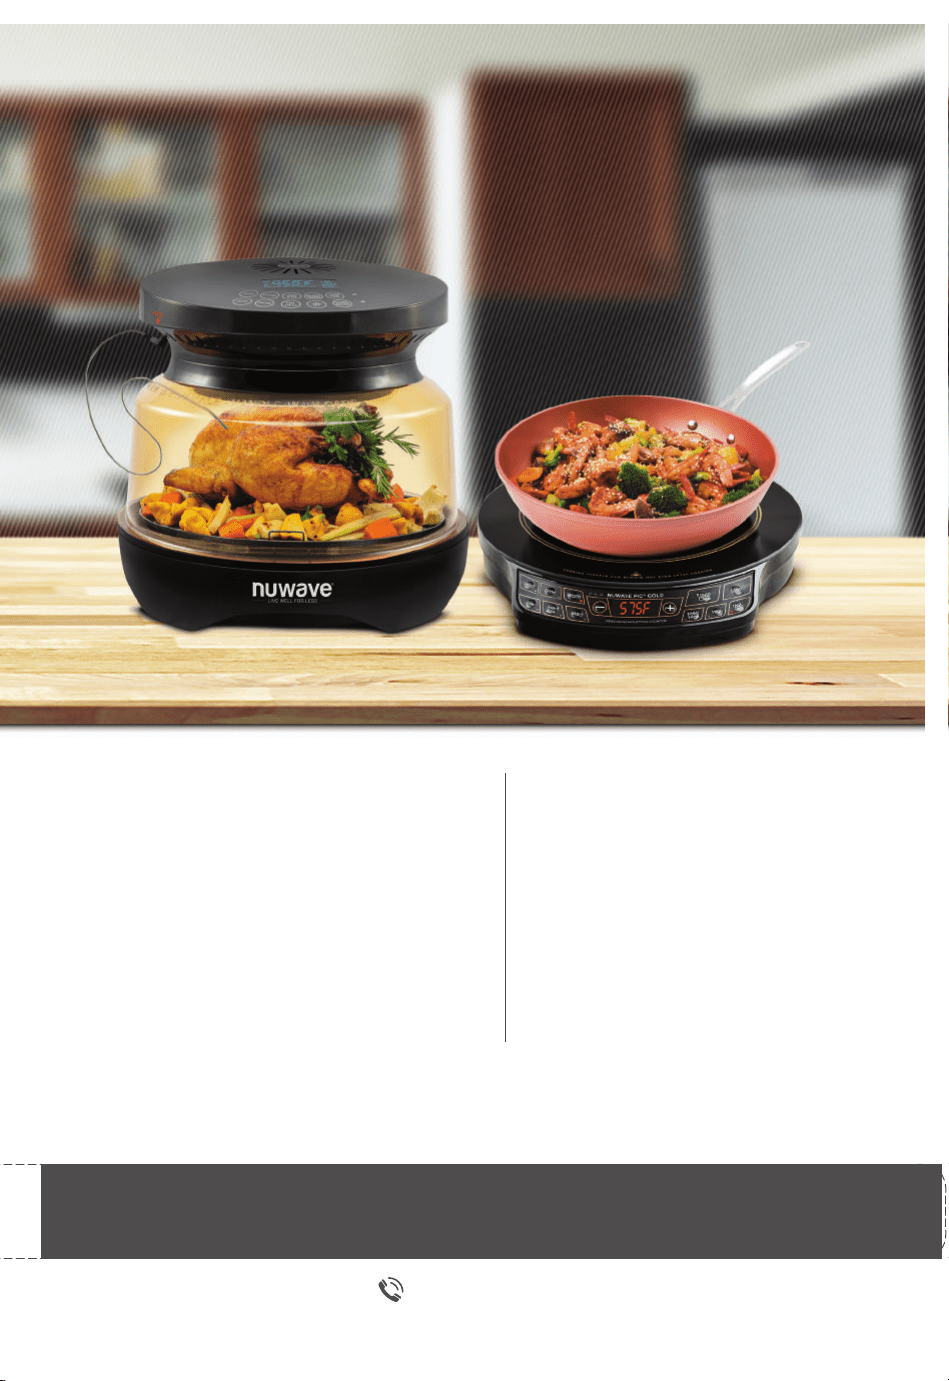
NuWave PIC
®
(Precision Induction
Cooktop)
Cook faster, safer, and
more efficiently than you
ever could on your gas or
electric stovetop.
NuWave Primo
™
Combo Grill
With the NuWave Primo
™
, there’s
no need to worry about hot spots
or dried-out leftovers. The intuitive
controls of this countertop smart oven
make it incredibly easy to cook like a
professional chef. Everything from large
family meals to frozen foods cook with
ease, without preheating or defrosting.

For more about our innovative products, visit:
www.nuwavenow.com
With the simple press of a button, the
NuWave Moxie can remove all the
excess air from the blender.
By vacuuming the air out of the
blender, you can ensure no air is
being mixed with your ingredients
during the blending process,
maximizing the nutritional value and
ensuring your blender creations will
remain fresher longer.
NuWave BruHub
®
Coffee Maker
Quality and convenience at your
ngertips. The NuWave BruHub
accommodates virtually all of your
favorite single-serve pods, but
with more avor. Makes an 8- or
12-ounce cup and full carafe.
The thermal stainless steel carafe
keeps coffee hot for hours.
NuWave Moxie
®
High-Performance
Vacuum Blender
1-877-689-2838
For more about our innovative products, visit:
www.nuwavenow.com
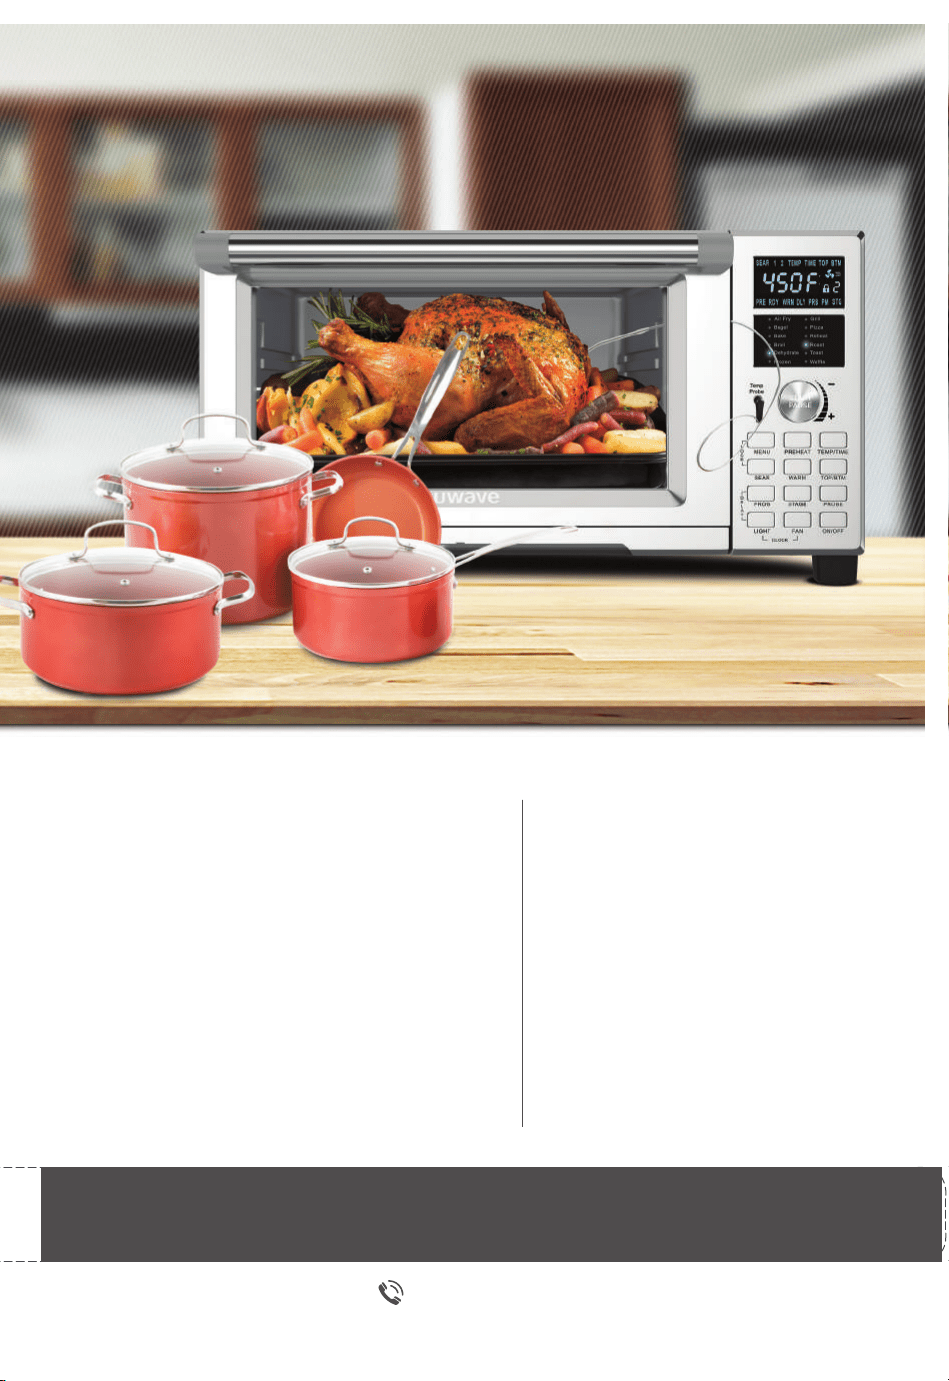
NuWave Duralon
®
Healthy
Ceramic
Non-Stick Cookware
Coated with Duralon Healthy Ceramic
Non-Stick coating for easy cleanup, this
versatile cookware is perfect for use
in ovens or on gas, electric, and even
induction cooktops.
NuWave Bravo
™
XL
The NuWave Bravo™ XL Smart
Oven is an air fryer, toaster, and
convection oven all in one!
The Bravo features an extra-large,
1-cubic-foot capacity. Includes
12 convenient, one-touch pre-
programmed presets. Set precise
temperatures from 100˚F to 450˚F.

TABLE OF CONTENTS
OWNER’S MANUAL
Important Safeguards ..............................................................................9-10
Additional Safeguards ............................................................................ 10-11
Parts Description ......................................................................................... 12
Assembly Guide .......................................................................................... 13
WIFI Connection ......................................................................................... 14
Operating Instructions ............................................................................15-18
Care & Maintenance ..............................................................................18-22
Troubleshooting .....................................................................................22-23
Limited Warranty ....................................................................................23-24
Spanish Manual .......................................................................................25-43
nuwavenow.com
This product complies with the maximum allowable concentration of
ozone of 0.050 parts per million by volume (ppmv) in a 24-hour period.
The Health Canada Guideline 2010 recommends that the maximum
exposure limit, based on an average time of 8 hours, is 0.020 ppmv or
less when tested in a sealed, controlled room approximately 30 m
3
.

9
Owner’s Manual
IMPORTANT SAFEGUARDS
READ ALL INSTRUCTIONS
WARNING: When using the OxyPure, basic safety precautions should
always be followed:
1. To protect against risk of electrical shock, DO NOT immerse cord, plug, or
any part of the OxyPure unit in water or any other liquids.
2. Close supervision is necessary when the OxyPure is used by or near
children. The unit is not intended for use by children, persons with reduced
physical, sensory, or mental capabilities, or those with lack of expertise or
knowledge of this unit.
3. Do not operate OxyPure with a damaged cord, plug, after unit malfunctions,
is dropped, or damaged in any manner. Contact Customer Service
at 1-877-689-2838 or email help@nuwavenow.com for information.
4. Do not run cord under carpeting. DO NOT cover cord with throw rugs,
runners, or other coverings.
5. Do not route cord under furniture or appliances. Arrange cord away from
high-traffic areas where it will not be tripped over.
6. Do not plug OxyPure in outlet or power strip that is being used by
other appliances.
7. Remove any dust or water from the plug, if needed.
8. Set up the OxyPure on flat, stable ground.
9. Do not set up where the OxyPure could be pushed, kicked, or tripped over.
10. Leave at least 2-3 feet of space between the unit’s vents and any walls.
11. Do not install the unit near a heating device.
12. Do not use in locations exposed to moisture or water.
13. Do not use unit near flammable or combustible gases or vapors.
14. Do not operate the OxyPure on its side.
15. NOT INTENDED FOR OUTDOOR USE.
16. Do not place objects on top of the unit.
17. Do not sit or stand on or lean against the unit.
18. Alteration or modification of any part of the OxyPure or the use of
attachments not recommended by the manufacturer may cause fire, injury,
or damage to property.
19. As with most electrical units, electrical parts are live even when the OxyPure
is off. Be sure the unit is unplugged when assembling.
20. Do not use the OxyPure in a factory or industrial setting where machine oil
may be present in the air.
21. Turn the power OFF on the OxyPure before unplugging the unit.

10
Owner’s Manual
22. Turn OFF and unplug the OxyPure from outlet when not in use, before
putting on or taking off parts, when removing or replacing the filters, and
before cleaning.
23. Turn the power OFF and unplug when the unit is unattended for
extended periods.
24. FOR HOUSEHOLD USE ONLY.
25. Keep manual handy for future reference.
Warning: To reduce the risk of electric shock, this equipment has a polarized
plug (one blade is wider than the other). This plug will fit in a polarized outlet
only one way. If the plug does not fit fully in the outlet, reverse the plug. If it still
does not fit, contact qualified personnel to install the proper outlet. Do not alter
the plug in any way.
WARNING! RISK OF ELECTRIC SHOCK:
These servicing instructions are for use by qualified personnel only. To reduce
the risk of electric shock, do not perform any servicing other than that is
contained in the Operating Instructions unless you are qualified to do so.
IMPORTANT SAFEGUARDS (Continued)
Electrical Information
A short power-supply cord (or detachable power-supply cord) is
provided to reduce the risk resulting from becoming entangled in or
tripping over a longer cord. Longer detachable power-supply cords
or extension cords are available and may be used if care is exercised
in their use. If a longer detachable power-supply cord or extension
cord is used:
1. The marked electrical rating of the extension cord should be at least
as great as the electrical rating of the appliance.
2. The longer cord should be arranged so that it will not drape over the
countertop or tabletop where it could be pulled on or tripped over
unintentionally. The OxyPure should be operated on a separate
electrical outlet from other operating appliances due to wattage
limitations. The appliance has a polarized plug (one blade is wider
than the other). To reduce the risk of electric shock, this plug is
intended to fit into a polarized outlet only one way. If the plug does
not fit fully into the outlet, reverse the plug. If it still does not fit,
contact a qualified electrician. Do not attempt to modify the plug in
any way.
3. If the appliance is of the grounded type, the cord set or extension cord
should be a grounding-type 3-wire cord.
SEE CARE AND MAINTENANCE BEFORE USE
ADDITIONAL SAFEGUARDS

11
Owner’s Manual
ADDITIONAL SAFEGUARDS (Continued)
SAVE THESE INSTRUCTIONS
Read and understand the entire manual before using the OxyPure.
1. Do not operate the unit if abnormal sounds or motion is detected.
2. If a hard or foreign object comes into contact with fan, do not operate.
Turn off and unplug unit.
3. Inspect for any loose or missing parts before and after each use. If parts are
loose, damaged, or missing, contact Customer Service at 1-877-689-2838
or email help@nuwavenow.com.
4. Always use extreme caution when operating the OxyPure or any machinery.
5. Children should be supervised to ensure that they do not play
with the appliance.
6. Do not pull, lift, drag, pick up, or carry the unit by its cord.
7. Do not block air inlet or outlet vents.
8. Do not operate the OxyPure without a filter.
DO NOT USE THE UNIT FOR OTHER THAN INTENDED USE.
Note: Put the OxyPure on a surface that is horizontal, even, and stable.
This appliance is intended for normal household use. It is not intended to be
used in environments such as a kitchen staff of shops, offices, farms, or other
work environments. Nor is it intended to be used by clients in hotels, motels,
bed and breakfasts, and non-residential environments.
NOTICE: THE FAILURE TO FOLLOW ANY OF THE IMPORTANT
SAFEGUARDS, ADDITIONAL SAFEGUARDS, OR THE INSTRUCTIONS
FOR SAFE USE IS A MISUSE OF THE OXYPURE THAT CAN VOID YOUR
WARRANTY AND CREATE THE RISK OF SERIOUS INJURY.

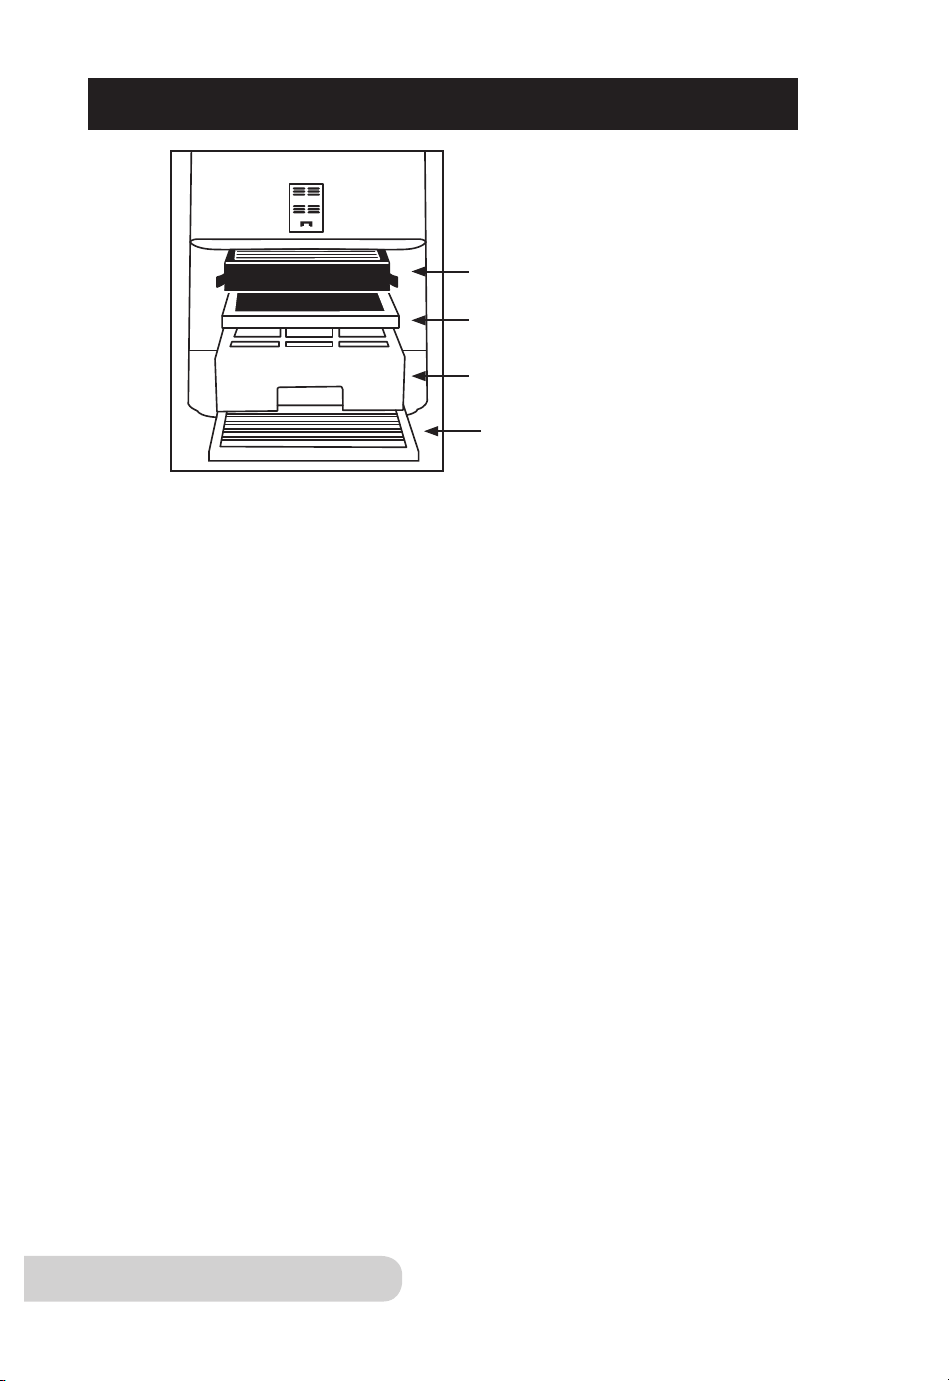
12
Owner’s Manual
Sensor Cover
Part #: 47106
Filter Sensor
Part #: 47107
HEPA/Activated
Carbon Combo Filter
Part #: 47108
Ozone Emission
Removal Filter
Part #: 47109
Bio-Guard
™
Filter
Part #: 47110
Stainless Steel Pre-Filter
Part #: 47111
9a
9b
10
11
12
13
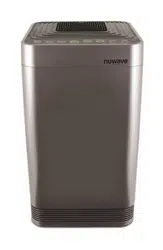
PARTS DESCRIPTION
Top Vent
Part #: 47101
Front Display
Touchpad Panel
Part #: 47102
Handles
Odor Sensor
Base
Part #: 47104
In Flow Vent
Filter Slot Cover
Part#: 47105
Wheels
7
1
2
3
4
5
6
1
2
Front Back
5
9a
9b
7
6
8
10
11
12
13
3
4
8

13
Owner’s Manual
ASSEMBLY GUIDE
Air Filter Assembly
The OxyPure comes with four different
preassembled filters inside the unit.
When filters require replacement or
cleaning, follow all directions when
assembling. See Care & Maintenance.
Filter Functions:
Air purifiers are more effective in operation
when all windows and doors are closed.
Purifies extra-large rooms up to 1,200 sq. ft.
Stainless Steel Pre-Filter
Washable and reusable for up to 20 years.
Captures and collects large particles, pollutants, and allergens including pet
hair, dander, and pollen.
Bio-Guard
™
Filter
Washable and reusable for up to 20 years.
8,000V, positive and negative charges capture and trap pollutants as small as
0.09 microns, including bacteria, mold, viruses, smoke, pollen, and allergens.
Ozone Emission Removal Filter
Reusable for up to 20 years. Not Washable.
Eliminates ozone emissions and other harmful airborne chemicals.
HEPA/Activated Carbon Combo Filter
Lifespan, up to 5 years. Not Washable.
Captures and traps pollen, allergens, industrial emissions, VOCs including
formaldehydes, household fumes, odors and nitrogen dioxides from gas stoves
and car exhausts.
The order of the filters inside the
OxyPure is as follows:
1. Stainless Steel Pre-Filter
2. Bio-Guard
™
Filter
3. Ozone Emission Removal Filter
4. HEPA/Activated Carbon Combo Filter
4
3
2
1

14
Owner’s Manual
WIFI CONNECTION
To set up and activate the WIFI:
1. Download the NuWave Connect app via the Apple Store or Google Play on
your smartphone or device and open the app.
2. Make sure your phone is connected to your network. Open the app and follow
the instructions for the verification process. Once verification is complete,
begin adding devices. To add a device tap "+" then, select "OxyPure."
3. Next, plug the OxyPure into a compatible power outlet. To activate Wi-Fi
Pairing Mode, press and hold the power button on the OxyPure for 2 seconds
until the Wi-Fi light begins to rapidly blink at a rate of about 2 blinks per
second. Once the Wi-Fi light is rapidly blinking, in the app, tap the Finish
Network Configuration button on the bottom of the Add Device page.
4. Next, you will be prompted to either connect to your network or confirm your
existing network password.
Note: To either connect to or change networks, depending on your phone, you
may be removed from the app to complete the network connection. Return
back to the NuWave Connect app and continue with the setup process.
5. When the OxyPure is connected to the WIFI, the "WIFI" light will stop
flashing and stay continuously lit.
• If the OxyPure did not connect to your network, the WIFI light will turn off.
Follow steps 3-4. Make sure to select the proper WIFI network and type
the correct password.
The OxyPure is equipped with WIFI to operate the unit from any location.
WIFI LED Status
Pairing Mode & Standby Mode
Solid Light
The OxyPure is paired with the WIFI and
ready to be used.
Rapid Blinking Light
The OxyPure is in Pairing Mode. The
OxyPure will remain in Pairing Mode for up
to 3 minutes, or until your device is paired.
Slow Blinking Light The OxyPure is in Standby Mode.
No Light The OxyPure’s WIFI is off.
Note: If the light on your unit is blinking slower, the unit is in WIFI Standby
Mode. To exit Standby Mode and initiate the Pairing Mode, press and hold
power for 2 seconds until the WIFI light begins blinking rapidly.
Note: The OxyPure, as with most IoT devices, will only connect to a
2.4GHz* network.
• To reset the OxyPure WIFI, press and hold down “Power” for 3 seconds.
Follow step 4. The OxyPure can now be operated from any location.
*Most routers will broadcast in 2.4GHz. If you need help activating 2.4GHz,
contact your ISP (Internet Service Provider).
15
Owner’s Manual
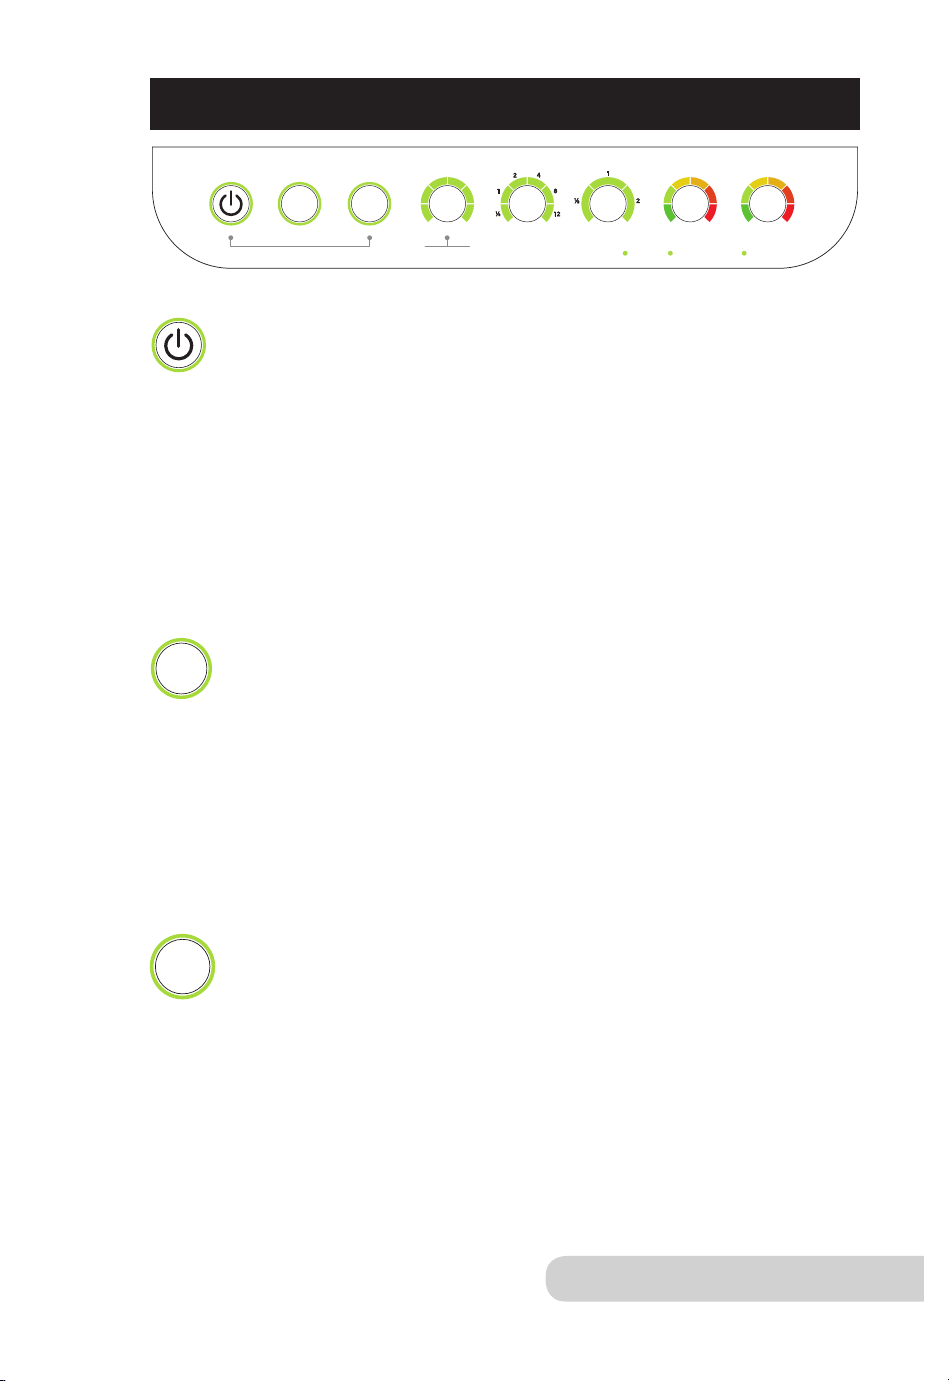
OPERATING INSTRUCTIONS
ODOR
NO
ODOR
STRONG
ODOR
REPLACE
FILTER 4
CLEAN
FILTER 2
WIFI
AIR
SLEEP MODE
AUTO
ULTIMATE
CLEAN
FAN
SPEED
TIMER TURBO
HR CLEAN DIRTY
POWER
HRHIGHLOW
ECO-FRIENDLY MODE
RESET FILTER 2
HOLD FOR 2 SECONDS
RESET FILTER 4
HOLD FOR 2 SECONDS
Power ON/OFF
1. Plug in unit into an outlet. “Power” will be lit in red and unit will
be in standby mode.
2. Press “Power”. Unit will turn on and “Power” will be lit green.
• Press “AUTO”. "AUTO" will illuminate.
• Bars next to “AIR” and “ODOR” will illuminate, measuring
current air quality.
• The fan will start.
3. Press “Power” again to turn unit off.
• When selecting a different mode other than the default
"AUTO" before turning off, the unit will run the previously
selected mode when it is powered back on.
AUTO
When AUTO function is used, the unit will adjust the fan
speed automatically (no time limit).
1. Press "AUTO". "AUTO" will be lit.
ECO-FRIENDLY MODE
OxyPure will turn on automatically once it detects poor air quality.
The fan speed will adjust based on the quality of air.
1. Press “POWER" and "ULTIMATE CLEAN" at the same time.
POWER will be backlit yellow.
2. Press “POWER" and "ULTIMATE CLEAN" again to turn off the
Eco-Friendly Mode. “POWER" will no longer be yellow.
ULTIMATE CLEAN
When in ULTIMATE CLEAN mode, the unit will automatically
adjust to the highest or lowest fan speed based on air quality
(no time limit).
1. Press “ULTIMATE CLEAN”. ULTIMATE CLEAN will be lit green.
2. Press “ULTIMATE CLEAN” to turn off.
ODOR
NO
ODOR
STRONG
ODOR
REPLACE
FILTER 4
CLEAN
FILTER 2
WIFI
AIR
SLEEP MODE
AUTO
ULTIMATE
CLEAN
FAN
SPEED
TIMER TURBO
HR CLEAN DIRTY
POWER
HRHIGHLOW
ECO-FRIENDLY MODE
RESET FILTER 2
HOLD FOR 2 SECONDS
RESET FILTER 4
HOLD FOR 2 SECONDS
ODOR
NO
ODOR
STRONG
ODOR
REPLACE
FILTER 4
CLEAN
FILTER 2
WIFI
AIR
SLEEP MODE
AUTO
ULTIMATE
CLEAN
FAN
SPEED
TIMER TURBO
HR CLEAN DIRTY
POWER
HRHIGHLOW
ECO-FRIENDLY MODE
RESET FILTER 2
HOLD FOR 2 SECONDS
RESET FILTER 4
HOLD FOR 2 SECONDS
ODOR
NO
ODOR
STRONG
ODOR
REPLACE
FILTER 4
CLEAN
FILTER 2
WIFI
AIR
SLEEP MODE
AUTO
ULTIMATE
CLEAN
FAN
SPEED
TIMER TURBO
HR CLEAN DIRTY
POWER
HRHIGHLOW
ECO-FRIENDLY MODE
RESET FILTER 2
HOLD FOR 2 SECONDS
RESET FILTER 4
HOLD FOR 2 SECONDS

16
Owner’s Manual
OPERATING INSTRUCTIONS (Continued)
ULTIMATE CLEAN with TURBO
Cleans at the highest fan speed for ½ hour and will switch to
"ULTIMATE CLEAN" mode.
1. Press "ULTIMATE CLEAN". ULTIMATE CLEAN will be lit green.
2. Press “TURBO”. Default is ½ hour and can adjust from
1 to 2 hours.
3. Press “TURBO” a fourth time to turn off.
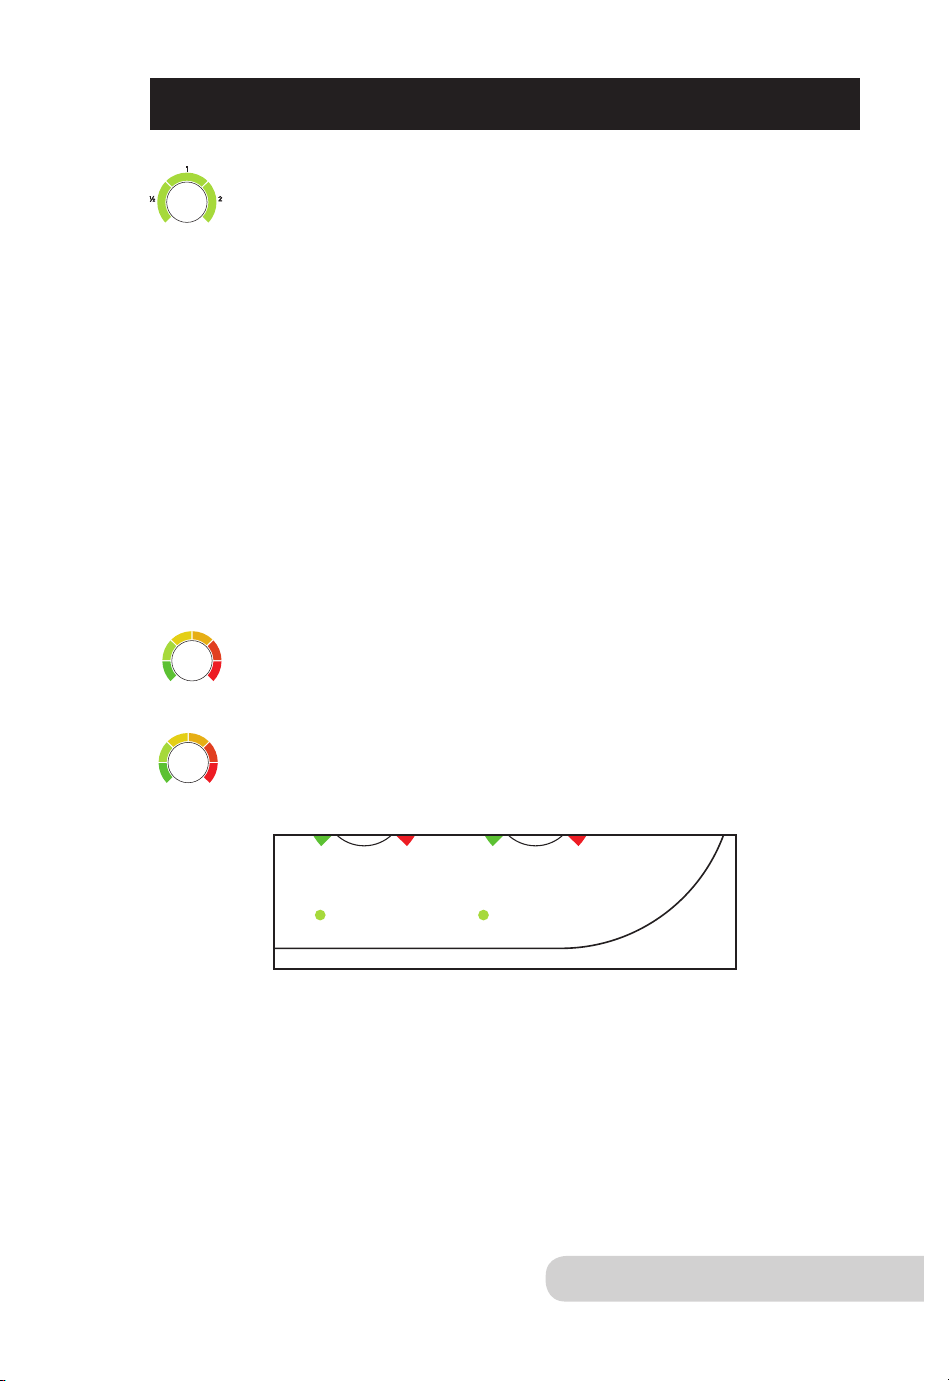
FAN SPEED
Adjust from 6 speeds (LOW to HIGH).
1. Press "FAN SPEED" to adjust.
2. To go back to the lowest level of fan speed, continue to press
"FAN SPEED" until the first bar is lit.
SLEEP MODE
When in Sleep Mode the LED lights will be off but the fan will
still be active. Adjust the fan speed prior to going into
Sleep Mode.
1. Manually adjust FAN SPEED.
2. Press and hold "FAN SPEED" for 2 seconds to activate
SLEEP MODE.
• Unit will run under the fan speed that was previously selected.
3. To turn off Sleep Mode, press any button.
Note: ULTIMATE CLEAN and TURBO will work during Sleep Mode.
TIMER
Use the TIMER function to choose the duration of operation.
1. Press “TIMER”. The bar next to ½ hour will be lit.
• There are 6 preset times to choose from.
2. Press “TIMER” to increase time.
• Choose from ½ hour, 1, 2, 4, 8, or 12 hours.
• After pressing "TIMER" six times, all bars will be lit.
3. Press “TIMER” once more to turn TIMER off.
ODOR
NO
ODOR
STRONG
ODOR
REPLACE
FILTER 4
CLEAN
FILTER 2
WIFI
AIR
SLEEP MODE
AUTO
ULTIMATE
CLEAN
FAN
SPEED
TIMER
TURBO
HR CLEAN DIRTY
POWER
HR
HIGHLOW
ECO-FRIENDLY MODE
RESET FILTER 2
HOLD FOR 2 SECONDS
RESET FILTER 4
HOLD FOR 2 SECONDS
ODOR
NO
ODOR
STRONG
ODOR
REPLACE
FILTER 4
CLEAN
FILTER 2
WIFI
AIR
SLEEP MODE
AUTO
ULTIMATE
CLEAN
FAN
SPEED
TIMER TURBO
HR CLEAN DIRTY
POWER
HR
HIGHLOW
ECO-FRIENDLY MODE
RESET FILTER 2
HOLD FOR 2 SECONDS
RESET FILTER 4
HOLD FOR 2 SECONDS
17
Owner’s Manual
OPERATING INSTRUCTIONS (Continued)
TURBO
The TURBO function cleans the air using the highest fan
speed at selected times.
1. Press “TURBO” to adjust from ½ hour, 1, or 2 hours.
• When the selected time has finished, TURBO will shut
off automatically.
2. To go back to the lowest level, continue to press "TURBO" until
bar next to ½ is lit.
TURBO with TIMER
When using TURBO with TIMER the default time is set
to 2 hours.
1. Press "TIMER" to increase or decrease the time.
• Choose from ½ hour, 1, 2, 4, 8, or 12 hours.
TURBO with AUTO
Use the TURBO function to select desired time limit. Once time
is up, the unit will switch to "AUTO."
1. Press "TURBO" to adjust from ½ hour, 1, or 2 hours.
2. Press "AUTO".
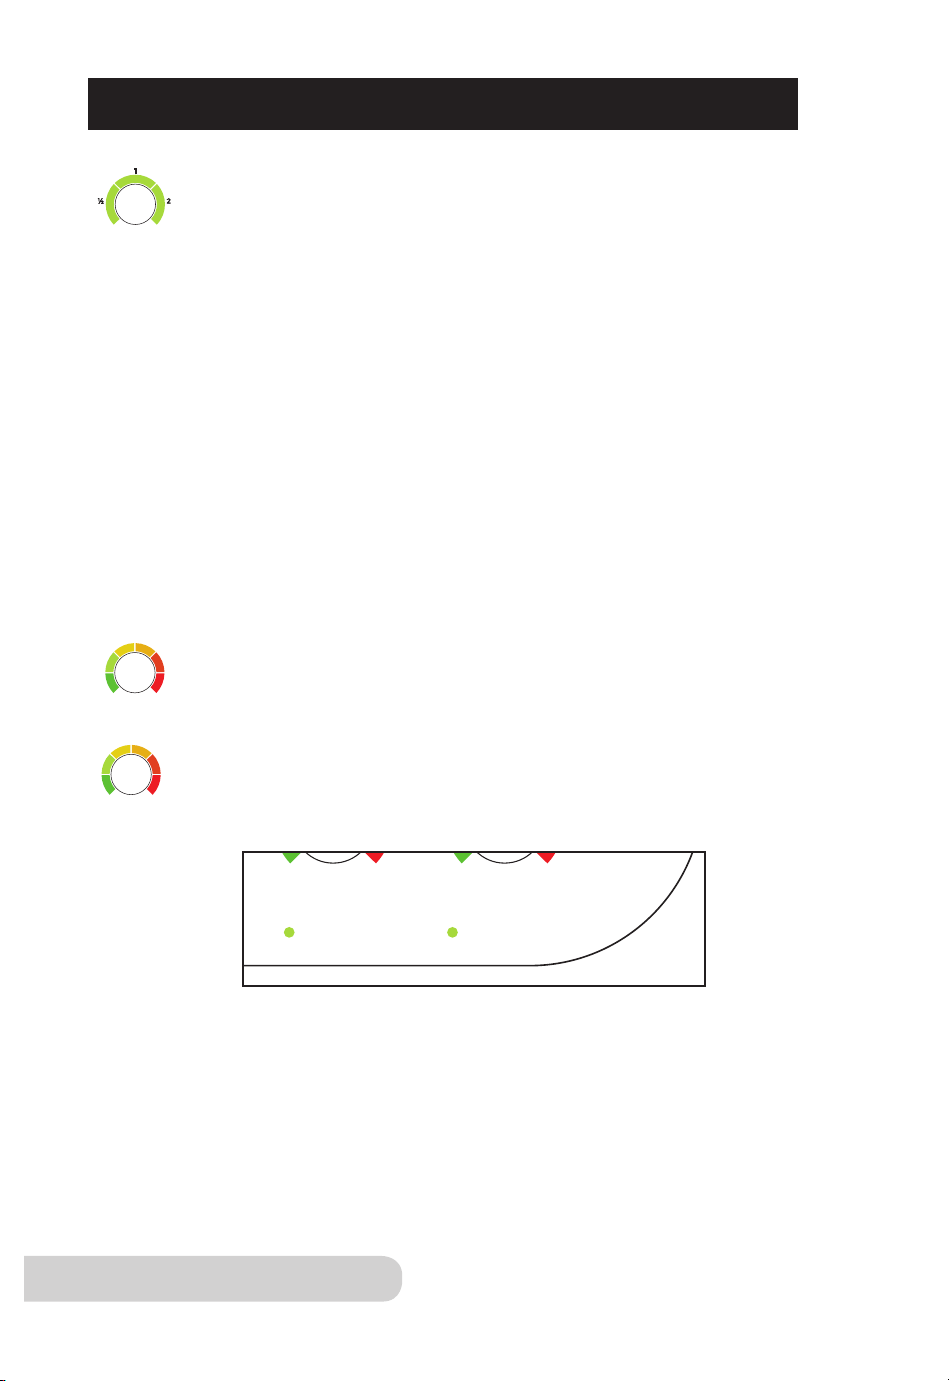
AIR QUALITY INDICATOR
The OxyPure will automatically measure and display the current
air quality in the room.
• The bars will illuminate around “AIR” and “ODOR”, indicating the
current air quality. Bars will increase and decrease, and are color
coded, according to air quality.
ODOR
NO
ODOR
STRONG
ODOR
REPLACE
FILTER 4
CLEAN
FILTER 2
WIFI
AIR
SLEEP MODE
AUTO
ULTIMATE
CLEAN
FAN
SPEED
TIMER
TURBO
HR
CLEAN DIRTY
POWER
HRHIGHLOW
ECO-FRIENDLY MODE
RESET FILTER 2
HOLD FOR 2 SECONDS
RESET FILTER 4
HOLD FOR 2 SECONDS
ODOR
NO
ODOR
STRONG
ODOR
REPLACE
FILTER 4
CLEAN
FILTER 2
WIFI
AIR
SLEEP MODE
AUTO
ULTIMATE
CLEAN
FAN
SPEED
TIMER TURBO
HR
CLEAN DIRTY
POWER
HRHIGHLOW
ECO-FRIENDLY MODE
RESET FILTER 2
HOLD FOR 2 SECONDS
RESET FILTER 4
HOLD FOR 2 SECONDS
ODOR
NO
ODOR
STRONG
ODOR
REPLACE
FILTER 4
CLEAN
FILTER 2
WIFI
AIR
SLEEP MODE
AUTO
ULTIMATE
CLEAN
FAN
SPEED
TIMER TURBO
HR CLEAN DIRTY
POWER
HRHIGHLOW
ECO-FRIENDLY MODE
RESET FILTER 2
HOLD FOR 2 SECONDS
RESET FILTER 4
HOLD FOR 2 SECONDS
CLEAN AND REPLACE FILTER INDICATORS
• The lights next to CLEAN FILTER 2 and REPLACE FILTER 4 will illuminate,
indicating that the filters will need to be cleaned or replaced.
• To reset Indicators, see “Resetting the Filter and Air Quality Indicators” in
Care & Maintenance.
ODOR
NO
ODOR
STRONG
ODOR
REPLACE
FILTER 4
CLEAN
FILTER 2
WIFI
AIR
SLEEP MODE
AUTO
ULTIMATE
CLEAN
FAN
SPEED
TIMER TURBO
HR
CLEAN DIRTY
POWER
HRHIGHLOW
ECO-FRIENDLY MODE
RESET FILTER 2
HOLD FOR 2 SECONDS
RESET FILTER 4
HOLD FOR 2 SECONDS

18
Owner’s Manual
OPERATING INSTRUCTIONS (Continued)
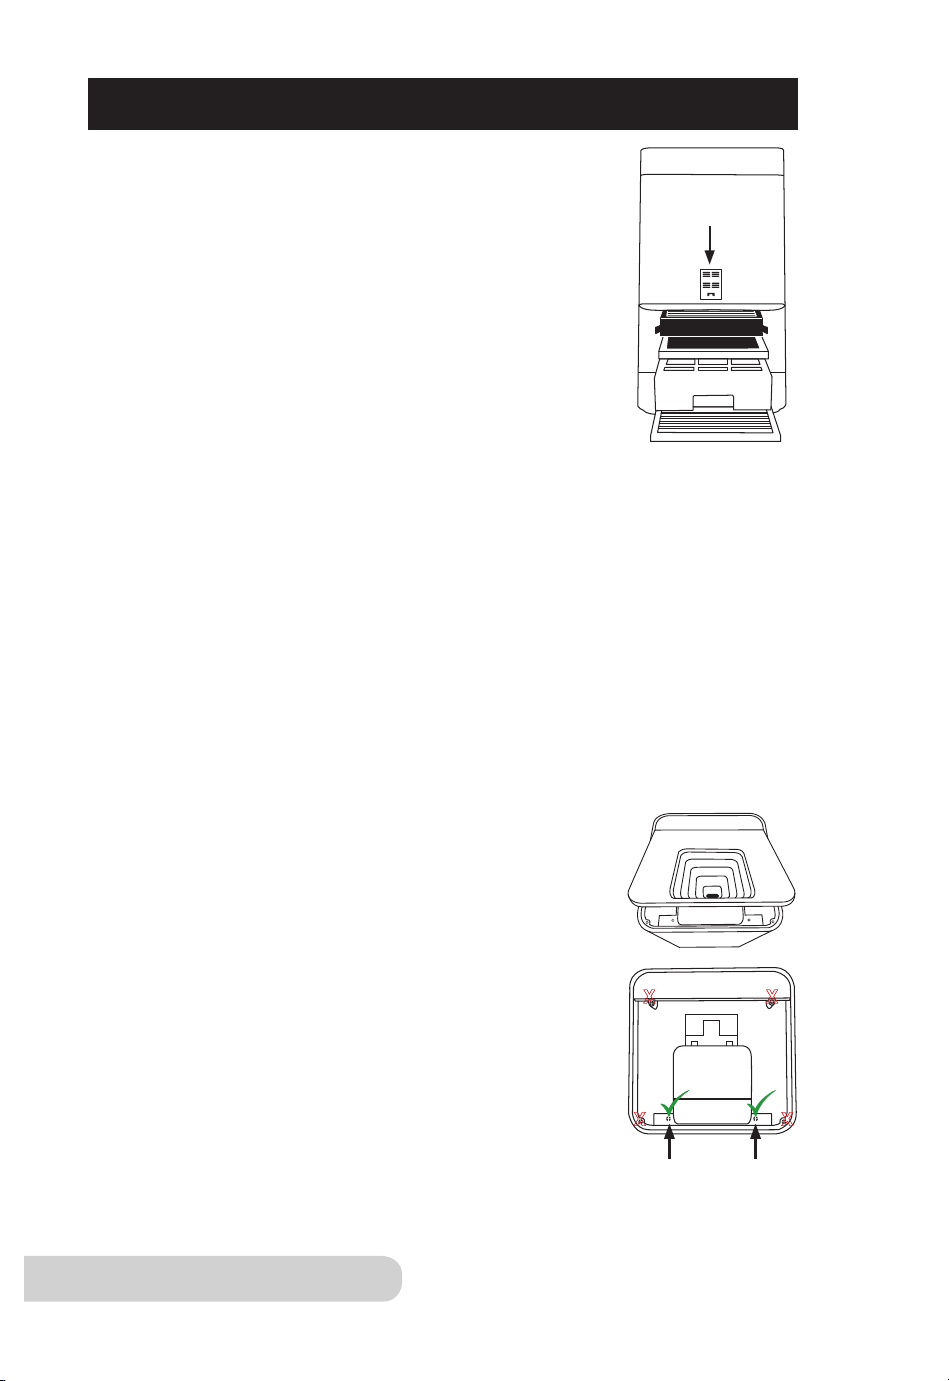
The OxyPure can easily be moved from one location to another. Just hold the
OxyPure by the handles on each side and roll the unit to the chosen location.
The wheels underneath provide extra maneuverability and mobility whenever
it's needed.
CARE & MAINTENANCE
Before First Use
Wipe Top Vent and In Flow Vent with a slightly damp cloth or paper towel.
Dry thoroughly before use.
After Use
The OxyPure should be cleaned periodically and after excessive use to ensure
proper performance and function. To clean the outsides of the OxyPure, use a
cloth or paper towel to remove dust and other particles. For tougher buildup,
use a damp cloth or paper towel and dry thoroughly.
Cleaning the Top Vent and In Flow Vent
1. Use a soft brush to remove dust and debris.
2. If needed, use a slightly wet paper towel or damp cloth to remove larger
buildup. Do not use any harsh abrasives or cleaning pads on Top Vent or
any part of the unit.
Cleaning the Odor Sensor Opening
The Odor Sensor is located on the side corner of the
OxyPure toward the top, under the small grill opening.
• Keep Odor Sensor clear of dust and debris using a
soft cloth to maintain accurate odor readings.
• DO NOT tamper with Odor Sensor or opening over
Sensor. Do not spray inside or near small grill opening
over the Odor Sensor. Doing so may cause the Sensor
to malfunction and can void your warranty.
CAUTION
DO NOT drop any dust or residue into the OxyPure
when cleaning.
Odor Sensor

19
Owner’s Manual
CAUTION
Unplug the OxyPure from the power source before inserting
or removing any parts or attachments and before cleaning.
CARE & MAINTENANCE (Continued)
The CLEAN FILTER 2 indicator will turn blue after 3 to 6 months, indicating
the filter should be cleaned for optimal results (Bio-Guard
™
Filter).
The CLEAN FILTER 2 indicator will turn red after 6 months of use,
indicating the filter needs to be cleaned.
The REPLACE FILTER 4 indicator will turn red when the filter (HEPA/
Activated Carbon Combo Filter) needs to be replaced. The filter will last up
to 5 years depending on how often the unit is running in its environment.
ODOR
NO
ODOR
STRONG
ODOR
REPLACE
FILTER 4
CLEAN
FILTER 2
WIFI
AIR
SLEEP MODE
AUTO
ULTIMATE
CLEAN
FAN
SPEED
TIMER TURBO
HR
CLEAN DIRTY
POWER
HRHIGHLOW
ECO-FRIENDLY MODE
RESET FILTER 2
HOLD FOR 2 SECONDS
RESET FILTER 4
HOLD FOR 2 SECONDS
4
3
2
1
Changing the Filters
The filters inside the filter slot need to be changed or cleaned on schedule
to help the OxyPure maintain optimum, efficient performance.
1. Remove Filter Slot Cover in back rear of the OxyPure using its built-in handle.
2. Slide out filters that need cleaning or replacement.
3. Allow washable filters to dry completely before reinstalling into unit.
• Never place a wet filter into the OxyPure.
• Filter Slot Cover must be secure or unit will not work.
DO NOT WASH Ozone Emission Removal Filter or HEPA/Activated Carbon
Combo Filter. Ozone Emission Removal Filter should be replaced every 20
years. The HEPA/Activated Carbon Combo Filter should be replaced every
5 years, depending on how often the unit is running in its environment.
The order of the filters inside the OxyPure is as
follows (bottom to top):
1. Stainless Steel Pre-Filter (washable)
2. Bio-Guard
™
Filter (washable)
3. Ozone Emission Removal Filter (not washable)
4. HEPA/Activated Carbon Combo Filter
(not washable)
• The OxyPure should be placed on the floor
when assembling the filters.
20
Owner’s Manual
CARE & MAINTENANCE (Continued)
Cleaning the Filters
To clean the Bio-Guard
™
Filter:
1. Remove filter.
2. Spray mild degreaser, let sit for 2-3 minutes.
3. Submerge in warm water, shake, remove.
4. Repeat process until clean.
5. Rinse with warm water.
6. Dry completely before use.
The Pre-Filter collects large particles and will need to be cleaned at least
once every two months depending on use.
1. Use a vacuum or paper towel to remove any dust or lint.
2. Clean with warm soapy water.
3. Rinse thoroughly and remove any soap particles on the filter.
4. Allow filter to dry completely BEFORE placing back into OxyPure
(up to 12-24 hours to dry).
Resetting the Filter and Air Quality Indicators
1. To reset the Air Quality Indicator for AIR, press and hold down “TIMER” for 2
seconds until a beep is heard.
• After a filter is cleaned or replaced and indicator is reset, the first green
bar around AIR will be lit.
2. To reset the Air Quality Indicator for ODOR, press and hold down “TURBO”
for 2 seconds until a beep is heard.
• After a filter is cleaned or replaced and indicator is reset, the first green
bar around ODOR will be lit.
HEPA/Activated
Carbon Combo Filter
Ozone Emission Removal Filter
Bio-Guard
™
Filter
Stainless Steel Pre-Filter

21
Owner’s Manual
CARE & MAINTENANCE (Continued)
Cleaning the Filter Sensor
The Filter Sensor is located on the back,
above the Filter Slot Cover.
1. Open the panel (Sensor Cover).
2. Using a dry cotton swab or small, soft brush,
gently remove any dirt or dust from the Sensor.
3. For more buildup on Sensor, wipe with a slightly
wet cotton swab.
4. Remove any moisture with a dry cotton swab.
• The Filter Sensor requires regular cleaning
(approx. every 3 months) for the unit
to operate efficiently.
• If the OxyPure is set up in an area with high dust accumulation, more
frequent cleaning of the Filter Sensor is needed.
• Do not use the cotton swab on any part or area other than the Filter Sensor.
Cleaning Underneath Top Vent
The Top Vent of the OxyPure can be removed to clean the surface
underneath the Top Vent and the inner vent screen.
To clean the surface underneath and inner vent screen:
1. Turn the OxyPure off and unplug the unit.
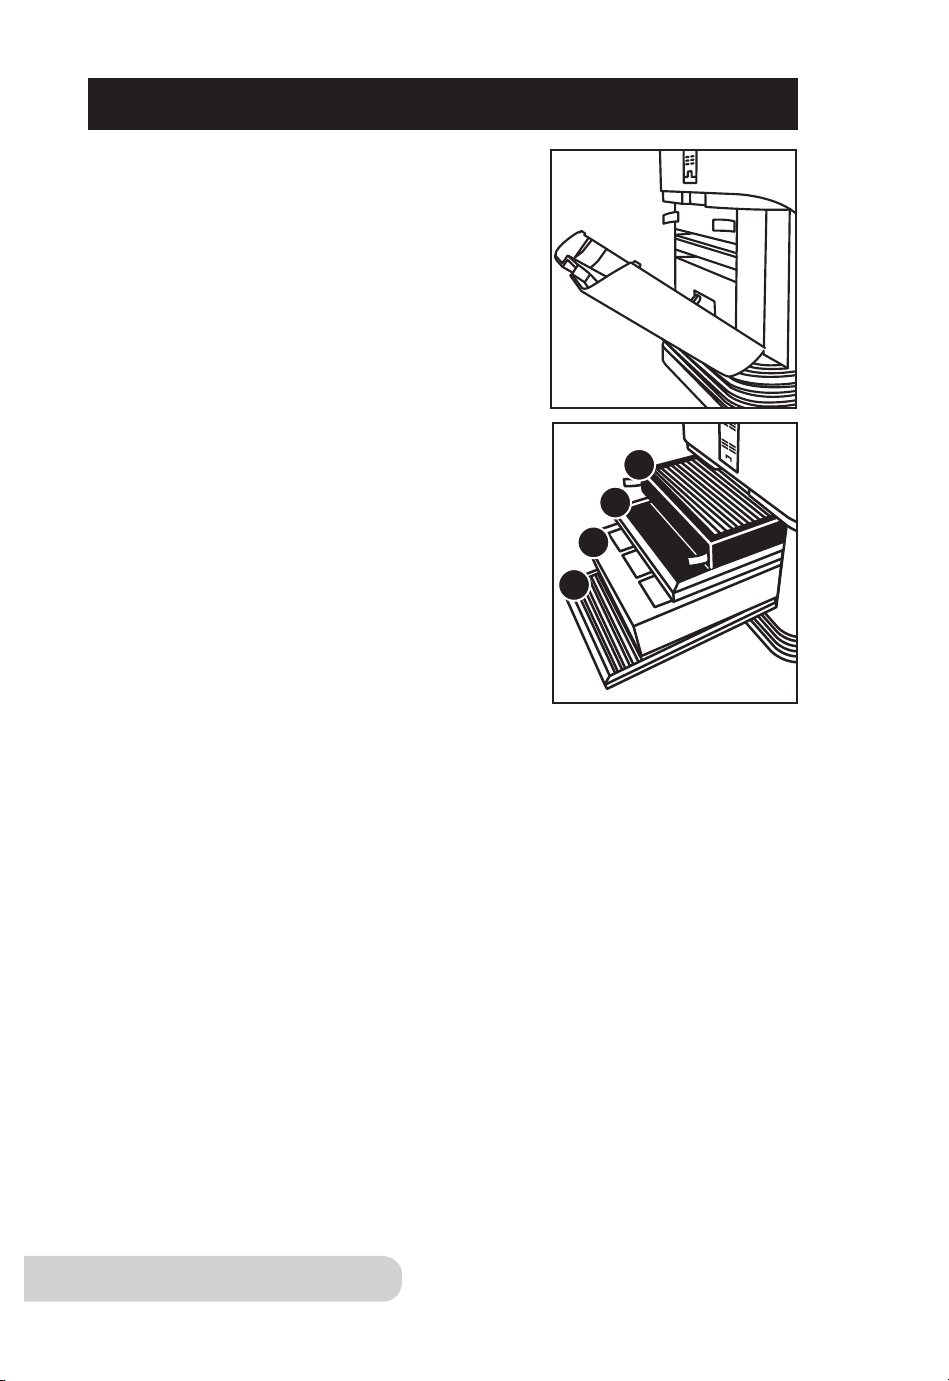
2. Lift the Top Vent using the built-in tab.
3. Using a dry or slightly wet paper towel, wipe up any dust or accumulated
particles off surface and inner vent screen.
To clean the inner wall opposite of the fan or to remove an object that has
fallen through the inner vent:
1. After removing Top Vent, locate the two screws
closest to the end on the inner vent near the grill
opening, underneath the main Top Vent. DO NOT
unscrew the four outer screws.
2. Use a Phillips screwdriver to loosen the two
screws (only).
3. Lift up inner vent.
• Only a portion of the inner vent will lift up.
4. After cleaning inner wall with a soft cloth or paper
towel, reassemble inner vent, retightening the
two screws, and replace Top Vent.
• Make sure all parts are secure before plugging
OxyPure back in and turning on again.
Note: DO NOT unscrew the four outer screws located toward the corners.
Doing so will void your warranty.
Sensor Cover
XX XX
XX XX
22
Owner’s Manual
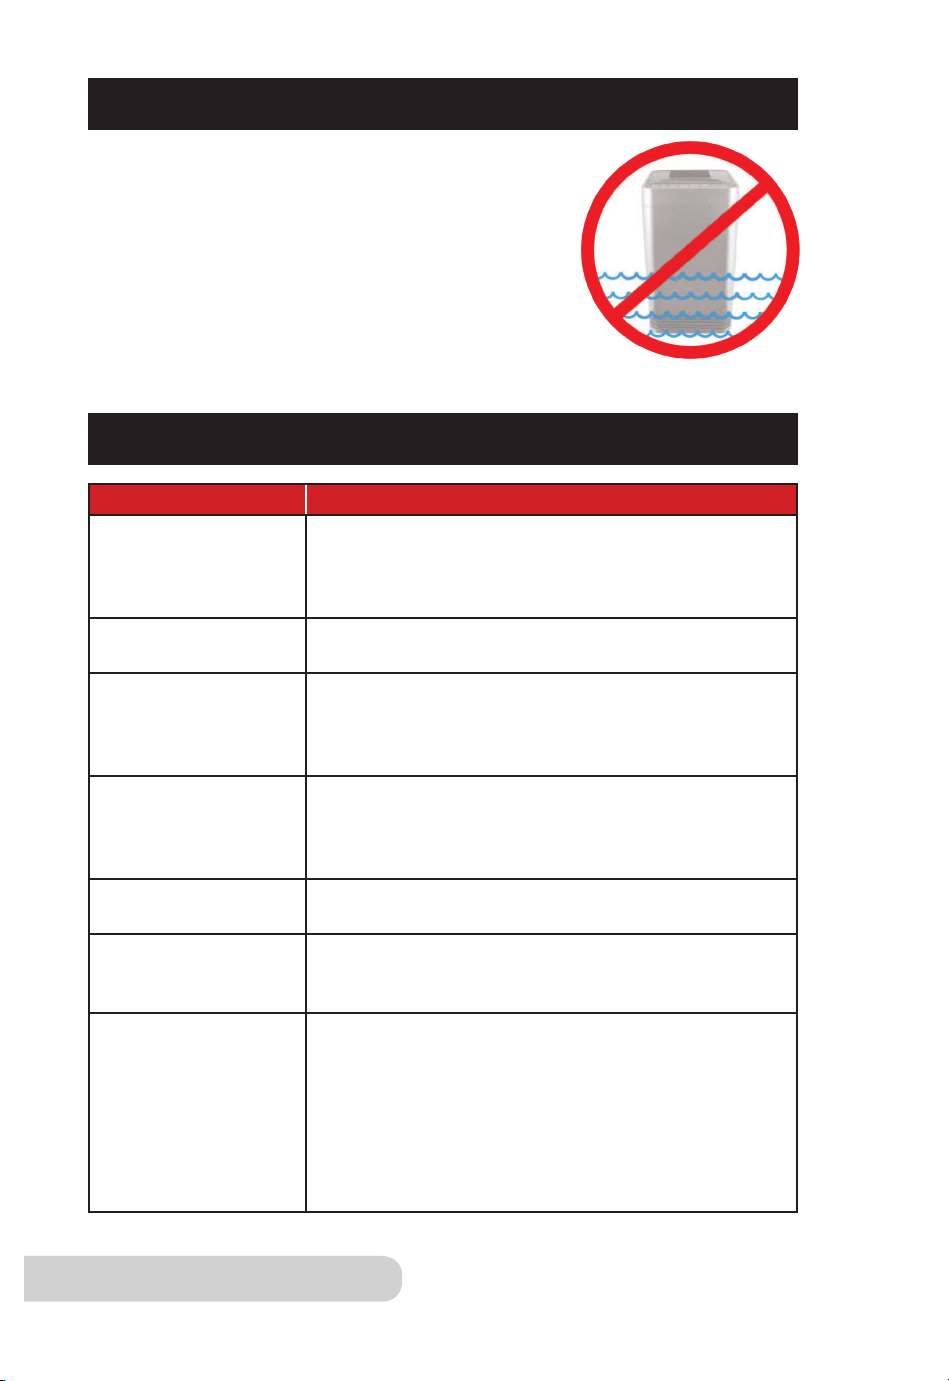
Problem: Solution(s):
Unit does not turn on.
1. The plug is not in the wall outlet. Plug into wall outlet.
2. “Power” on touchpad panel is not on. Press “Power”.
3. The Filter Slot Cover in the back rear is off or
loose. Make sure Filter Slot Cover is on securely.
TIMER does not work
when pressed.
The unit is not reading the function selected.
Press “FAN SPEED” or “AUTO”, then press “TIMER”.
The fans are
not blowing.
1. An appropriate outlet is not being used. Make
sure outlet has appropriate voltage for use.
2. The Filter Slot Cover in back rear is not properly in
place. Make sure Filter Slot Cover is on securely.
Speed of the airflow is
not changing
when “FAN SPEED”
is pressed.
Unit may be in manual AUTO mode. Set the OxyPure
to other operating mode on the touchpad then press
“FAN SPEED”.
Airflow out of Top Vent
is weak.
Air filter(s) are dirty. Change or clean the air filters.
Unit is producing
smoke or odor.
Air filter(s) are dirty. Change or clean the air filters.
If problem continues, contact Customer Service at
1-877-689-2838 or email help@nuwavenow.com.
CLEAN and
REPLACE FILTER
Indicators have not
reset after filter(s) has
been cleaned
or changed.
1. The Filter Sensor is not reading the new filter
installed. Turn unit off then turn on. Press and hold
down “TIMER” for 2 seconds until a beep is heard.
2. Turn unit off, unplug and adjust filter(s). Plug in
and turn the unit ON again.
3. The Filter Slot Cover in back rear is not securely in
place. Make sure Filter Slot Cover is on securely.
4. The Filter Sensor is dirty. Clean the Filter Sensor.
TROUBLESHOOTING
Do not immerse the OxyPure in water.
Clean with a damp sponge or cloth and wipe dry.
Make sure all parts and covers are
securely attached.
CARE & MAINTENANCE (Continued)

23
Owner’s Manual
The NuWave OxyPure
®
Air Purifier
THE MANUFACTURER WARRANTS
NuWave warrants that the OxyPure Air Purifier (except for the filters) will be
free from manufacturer defects under normal household use for 3 years from
the date of purchase. This Warranty covers original owner of this Air Purifier
for personal household use only and when operated in accordance with the
Manufacturer’s written instructions. This Warranty does not apply to products
used for commercial, rental or resale purposes. The Manufacturer will provide the
necessary parts and labor to repair any part of the NuWave OxyPure Air Purifier
at NuWave, LLC Service Department. After the expiration of the warranty, the cost
of the labor and parts will be the responsibility of the owner.
THE WARRANTY DOES NOT COVER
The Limited Warranty is voided if repairs are made by an unauthorized dealer
and/or the serial number data plate is removed and/or defaced. Normal
deterioration of finish due to use or exposure is not covered by this Warranty.
This Limited Warranty does not cover failure, damages or inadequate
performance due to accident, acts of God (such as lightning), fluctuations in
electric power, alterations, abuse, misuse, misapplications, corrosive-type
atmospheres, improper installation, failure to operate in accordance with
the Manufacturer’s written instructions, abnormal use or commercial use.
NuWave, LLC reserves the right to void the Limited Warranty, where allowable
by law, for products purchased from an unauthorized dealer.
LIMITED WARRANTY
Problem: Solution(s):
ULTIMATE CLEAN
does not come on
when pressed.
The unit is not reading the function selected. Turn the
unit ON/OFF by pressing "POWER" twice.
POWER is
blinking red.
1. Filters are not properly installed or are loose.
Turn off unit and unplug. Check that filters are
properly installed and not loose. Plug unit in and
press POWER to turn ON.
2. When the Filter Slot Cover is removed, "Power"
will be backlit solid red. Pressing "Power" will
make it blink; however, as a safety measure, the
unit will not be operational when the Filter Slot
Cover is removed. Ensure that Filter Slot Cover
is installed securely.
Odor Sensor is not
resetting itself and not
clearing all bars.
All bars are flashing.
Contact Customer Service at 1-877-689-2838 or
email help@nuwavenow.com.
TROUBLESHOOTING (Continued)

24
Owner’s Manual
LIMITED WARRANTY (Continued)
TO OBTAIN SERVICE
The owner shall have the obligation and responsibility to: pay for all services
and parts not covered by the warranty; prepay the freight to and from Service
Department for any part or system returned under this warranty; and carefully
package the product using adequate padding material to prevent damage in
transit. The original container is ideal for this purpose. Include in the package
the owner’s name, address, daytime telephone number, a detailed description
of the problem, and your “RGA number.” Call 1-877-689-2838 or email
help@nuwavenow.com to obtain the RGA number (Return Goods
Authorization number). Provide the model & serial number and proof of date
of purchase (a copy of the receipt) when making claims under this warranty.
MANUFACTURER’S OBLIGATION
The Manufacturer’s obligation under this Limited Warranty is limited, to the
extent allowable by law, to repairing or replacing any part covered by this
Limited Warranty which upon examination is found to be defective under
normal use. The Limited Warranty is applicable only within the continental
United States and only to the original purchaser of the manufacturer’s
authorized channels of distribution. THE LIMITED WARRANTY MAY NOT BE
ALTERED, VARIED OR EXTENDED EXCEPT BY A WRITTEN INSTRUMENT
EXECUTED BY THE MANUFACTURER. THE REMEDY OF REPAIR OR
REPLACEMENT AS PROVIDED UNDER THIS LIMITED WARRANTY IS
EXCLUSIVE. IN NO EVENT SHALL THE MANUFACTURER BE LIABLE
FOR ANY CONSEQUENTIAL OR INCIDENTAL DAMAGES TO ANY
PERSON, WHETHER OR NOT OCCASIONED BY NEGLIGENCE OF THE
MANUFACTURER, INCLUDING WITHOUT LIMITATION, DAMAGES FOR
LOSS OF USE, COSTS OF SUBSTITUTION, PROPERTY DAMAGE, OR
OTHER MONEY LOSS.
Some states do not allow the exclusion or limitation of incidental or
consequential damages, so the above limitation exclusions may not apply.
This Limited Warranty gives specific legal rights, and there may also be other
rights which vary from state to state. EXCEPT AS OTHERWISE EXPRESSLY
PROVIDED ABOVE, THE MANUFACTURER MAKES NO WARRANTIES
EXPRESSED OR IMPLIED ARISING BY LAW OR OTHERWISE, INCLUDING
WITHOUT LIMITATION, THE IMPLIED WARRANTIES OF MERCHANTABILITY
AND FITNESS FOR A PARTICULAR PURPOSE TO ANY OTHER PERSON.
READ YOUR OWNER’S MANUAL. IF YOU STILL HAVE ANY QUESTIONS
ABOUT OPERATION OR WARRANTY OF THE PRODUCT, PLEASE
CONTACT NUWAVE, LLC.
READ YOUR OWNER’S MANUAL
If you still have any questions about operation or warranty
of the product, please contact NuWave, LLC at: 1-877-689-2838
or email [email protected].
Manual del Usuario
NuWave OxyPure
®
Puricador de Aire

Como agradecimiento especial por registrar su producto, ¡recibirá
automáticamente 6 meses adicionales a su garantía limitada del
fabricante! *
Todo lo que tiene que hacer es seguir estos simples pasos.
Usando su teléfono inteligente o
dispositivo inteligente, escanee el
código QR ubicado en la etiqueta
de su producto ubicada en la parte
posterior de la unidad.
Se le dirigirá a la página de registro
del producto NuWave con el número
de serie único de su producto que
se ingresa automáticamente en el
campo correspondiente.
NOTA: Si no tiene un dispositivo
inteligente habilitado para la web,
simplemente visite nuwavenow.
com/QR e ingrese manualmente el
número de serie de su producto.
Complete la información restante y
complete la encuesta opcional.
Una vez que envíe su información,
recibirá un correo electrónico de
confirmación con los detalles de la
garantía extendida.
¡REGÍSTRESE
AHORA!
* Registre su producto dentro de 1 año a partir de la fecha de
compra para una extensión gratuita de 6 meses de garantía limitada.
1
2
3
4

1
2
3
Abra su tienda de aplicaciones móviles (App Store,
Google Play).
Busque "lectores de códigos QR".
Simplemente descargue el lector de códigos QR a
su teléfono, ábralo y escanee el código, ya está listo
para comenzar.
NOTA: Es posible que deba abrir el lector de código
QR descargado cada vez que desee escanear un
código QR.
DESCARGUE LA APLICACIÓN QR
CODE EN SU DISPOSITIVO MÓVIL
6
!para una garantía
adicional de
meses
Lectores de códigos QR

28
Owner’s Manual
MEDIDAS DE SEGURIDAD IMPORTANTES
LEE TODAS LAS INSTRUCCIONES
ADVERTENCIA: Cuando use el OxyPure, siempre se deben seguir las
precauciones de seguridad básicas:
1. Para protegerse contra el riesgo de una descarga eléctrica, NO sumerja el cable,
el enchufe ni ninguna parte de la unidad OxyPure en agua u otros líquidos.
2. Es necesaria una supervisión estricta cuando OxyPure es utilizado por
niños o cerca de ellos. La unidad no está diseñada para ser utilizada por
niños, personas con capacidades físicas, sensoriales o mentales reducidas,
o aquellos con falta de experiencia o conocimiento de esta unidad.
3. No opere el OxyPure con un cable o enchufe dañados, después de un
mal funcionamiento de la unidad, o si se ha caído o dañado de cualquier
manera. Contacte a Servicio al Cliente al 1-877-689-2838 o envíe un correo
electrónico a help@nuwavenow.com para obtener más información.
4. No pase el cable debajo de las alfombras. NO cubra el cordón con tapetes
u otras cubiertas.
5. No coloque el cable debajo de muebles o electrodomésticos. Arregle el
cable lejos de áreas de mucho tránsito donde se puedan tropezar.
6. No conecte el OxyPure a una toma de corriente o multicontacto que esté
siendo utilizado por otros electrodomésticos.
7. Retire el polvo o el agua del tapón, si es necesario.
8. Coloque el OxyPure en una superficie plana y estable.
9. No lo coloque dónde se podría empujar, patear o se puedan tropezar con
el OxyPure.
10. Deje al menos 2-3 pies de espacio entre las ventilaciones de la unidad
y las paredes.
11. No instale la unidad cerca de un dispositivo de calentamiento.
12. No lo use en lugares expuestos a humedad o agua.
13. No use la unidad cerca de gases o vapores inflamables o combustibles.
14. No opere el OxyPure de lado.
15. No destinado para uso al aire libre.
16. No coloque objetos encima de la unidad.
17. No se siente ni se pare o se apoye en la unidad.
18. La alteración o modificación de cualquier parte de OxyPure o el uso de
accesorios no recomendados por el fabricante pueden causar incendios,
lesiones o daños a la propiedad.
19. Al igual que con la mayoría de las unidades eléctricas, las piezas eléctricas
están activas incluso cuando el OxyPure está apagado. Asegúrese de que
la unidad esté desenchufada durante el montaje.
20. No use el OxyPure en un entorno industrial o de fábrica donde pueda haber
aceite de máquina en el aire.
21. Apague la corriente en el OxyPure antes de desenchufar la unidad.

29
Owner’s Manual
MEDIDAS DE SEGURIDAD IMPORTANTES (CONT.)
22. APAGUE y desenchufe el OxyPure de la toma de corriente cuando no esté
en uso, antes de colocar o quitar piezas, cuando retiren o reemplacen los
filtros y antes de limpiarlo.
23. APAGUE la alimentación y desenchufe la unidad cuando esté desatendida
por periodos extendidos.
24. Sólo para uso doméstico.
25. Mantenga el manual a la mano para referencia futura.
Advertencia: Para reducir el riesgo de descarga eléctrica, este equipo tiene
un enchufe polarizado (una clavija es más ancha que la otra). Este enchufe
encajará en una toma polarizada de una sola manera. Si el enchufe no encaja
completamente en la toma de corriente, invierta el enchufe. Si todavía no
encaja, póngase en contacto con personal calificado para instalar la toma de
corriente adecuada. No modifique el enchufe de ninguna manera.
¡ADVERTENCIA! RIESGO DE DESCARGA ELÉCTRICA:
Estas instrucciones de mantenimiento son para uso exclusivo del personal
calificado. Para reducir el riesgo de descarga eléctrica, no realice ningún otro
servicio que no sea el que se incluye en las Instrucciones de funcionamiento, a
menos que esté calificado para hacerlo.
MEDIDAS DE SEGURIDAD ADICIONALES
VER CUIDADO Y MANTENIMIENTO ANTES DEL USO
Información eléctrica
Se proporciona un cable de suministro de energía corto (o cable de
suministro de energía desmontable) para reducir el riesgo resultante
de enredarse o tropezar con un cable más largo. Los cables de
alimentación desmontables más largos o los cables de extensión
están disponibles y se pueden usar si se tiene cuidado al hacerlo. Si
se usa un cable de alimentación desmontable más largo o un cable
de extensión:
1. La calificación eléctrica marcada del cable de extensión debe ser al
menos tan grande como la calificación eléctrica del aparato.
2. El cable más largo debe estar dispuesto de modo que no se cuelgue
sobre la encimera o sobre una mesa donde se pueda tirar o tropezar
involuntariamente. La OxyPure debe operarse en una toma eléctrica
separada de otros aparatos operativos debido a limitaciones del voltaje.
El aparato tiene un enchufe polarizado (una cuchilla es más ancha que
la otra). Para reducir el riesgo de descarga eléctrica, este enchufe está
diseñado para encajar en una toma de corriente polarizada de una sola
manera. Si el enchufe no encaja completamente en el tomacorriente,
invierta el enchufe. Si aún así no encaja, comuníquese con un electricista
calificado. No intente modificar el enchufe de ninguna manera.
3. Si el aparato es del tipo con conexión a tierra, el juego de cables o el
cable de extensión debe ser un cable de 3 hilos con conexión a tierra.

30
Owner’s Manual
MEDIDAS DE SEGURIDAD ADICIONALES
GUARDE ESTAS INSTRUCCIONES
Lea y comprenda todo el manual antes de usar el OxyPure.
1. No opere la unidad si detecta sonidos o movimientos anormales.
2. Si un objeto duro o extraño entra en contacto con el ventilador, no lo haga
funcionar. Apague y desenchufe la unidad.
3. Inspeccione si hay partes sueltas o faltantes antes y después de cada uso. Si
hay partes sueltas, dañadas o faltantes, comuníquese con Servicio al Cliente
al 1-877-689-2838 o envíe un correo electrónico a help@nuwavenow.com.
4. Siempre tenga extrema precaución cuando opere el OxyPure
o cualquier maquinaria.
5. Los niños deben ser supervisados para asegurarse de que no jueguen con
el aparato.
6. No tire, levante, arrastre ni transporte la unidad por el cable.
7. No bloquee los orificios de entrada o salida de aire.
8. No opere el OxyPure sin un filtro.
NO UTILICE LA UNIDAD PARA OTRO USO QUE NO SEA
EL PREVISTO.
Nota: Coloque la OxyPure en una superficie que sea horizontal, uniforme y
estable. Este aparato está diseñado para uso doméstico normal. No está diseñado
para usarse en entornos como de personal de cocina de tiendas, oficinas, granjas
u otros entornos de trabajo. Tampoco está destinado a ser utilizado por clientes en
hoteles, moteles, bed and breakfast y entornos no residenciales.
AVISO: EL NO SEGUIR CUALQUIERA DE LAS MEDIDAS DE SEGURIDAD
IMPORTANTES, MEDIDAS DE SEGURIDAD ADICIONALES O LAS
INSTRUCCIONES PARA UN USO SEGURO SIGNIFICARÁ UN USO
INCORRECTO DEL OXYPURE QUE PUEDE ANULAR SU GARANTÍA Y
CREAR EL RIESGO DE LESIONES GRAVES.

31
Owner’s Manual
DESCRIPCIÓN DE LAS PARTES
Cubierta del Sensor
Parte #: 47106
Sensor del Filtro
Parte #: 47107
HEPA/Combo de Filtro
de Carbono Activado
Parte #: 47108
Filtro de Eliminación de
Emisiones de Ozono
Parte #: 47109
Filtro Bio-Guard
™
Parte #: 47110
Prefiltro de Acero
Inoxidable
Parte #: 47111
9a
9b
10
11
12
13
Ventilación Superior
Parte #: 47101
Panel Táctil de la
Pantalla Frontal
Parte #: 47102
Manijas
Sensor de Olores
Base
Parte #: 47104
Ventilación de Flujo
Cubierta de la Ranura
del Filtro
Parte #: 47105
Ruedas
7
1
2
3
4
5
6
1
2
Frente Reverso
5
9a
9b
7
6
8
10
11
12
13
3
4
8
7
32
Owner’s Manual
GUÍA DE MONTAJE
Ensamble del Filtro de Aire
El OxyPure viene con cuatro filtros
preensamblados diferentes dentro
de la unidad. Cuando los filtros
requieren reemplazo o limpieza, siga
todas las instrucciones al ensamblar.
Ver cuidado y mantenimiento.
4
3
2
1
El orden de los filtros dentro de
OxyPure es el siguiente:
1. Prefiltro de Acero Inoxidable
2. Filtro Bio-Guard
™
3. Filtro de Eliminación de Emisiones
de Ozono
4. HEPA/Combo de Filtro
de Carbono Activado
Funciones de Filtro:
Los purificadores de aire son más efectivos
al funcionar cuando todas las ventanas y
puertas están cerradas. Purifica habitaciones
extra grandes de hasta 1,200 pies cuadrados.
Prefiltro de Acero Inoxidable
Lavable y reutilizable hasta por 20 años.
Captura y recoge partículas grandes, contaminantes y alérgenos, incluidos el
pelo de mascotas, la caspa y el polen.
Filtro Bio-Guard
™
Lavable y reutilizable por hasta 20 años.
8,000V, cargas positivas y negativas capturan y atrapan contaminantes
tan pequeños como 0.09 micras, incluyendo bacterias, moho, virus, humo,
polen y alérgenos.
Filtro de Eliminación de Emisiones de Ozono
Reutilizable por hasta 20 años. No lavable
Elimina las emisiones de ozono y otros químicos dañinos en el aire.
HEPA/Combo de Filtro de Carbono Activado
Vida útil, hasta 5 años. No lavable
Captura y atrapa el polen, los alérgenos, las emisiones industriales, los
compuestos orgánicos volátiles (COV), incluidos los formaldehídos, los vapores
domésticos, los olores y los dióxidos de nitrógeno de las estufas de gas y los
escapes de los automóviles.

33
Owner’s Manual
CONEXIÓN WIFI
Para configurar y activar el WIFI:
1. Descargue la aplicación NuWave Connect a través de Apple Store o Google Play en
su teléfono inteligente o dispositivo y abra la aplicación.
2. Asegúrese de que su teléfono esté conectado a su red. Abra la aplicación y siga
las instrucciones para el proceso de verificación. Una vez que se complete la
verificación, comience a agregar dispositivos. Para agregar un dispositivo, pulse "+".
Ubique y pulse "OxyPure".
3. A continuación, conecte el OxyPure a una toma de corriente compatible. Para activar
el modo de emparejamiento de WI-FI , mantenga presionado el botón de encendido
de OxyPure durante 2 segundos hasta que la luz de WI-FI comience a parpadear
rápidamente a una velocidad de aproximadamente 2 parpadeos por segundo. Una vez
que la luz de WI-FI está parpadeando rápidamente, en la aplicación, toque el botón
Finalizar configuración de red en la parte inferior de la página Agregar dispositivo.
4. A continuación, se le solicitará que se conecte a su red o confirme su contraseña de
red existente.
Nota: Para conectarse o cambiar de red, dependiendo de su teléfono, es posible que
lo elimine de la aplicación para completar la conexión de red. Regrese a la aplicación
NuWave Connect y continúe con el proceso de configuración.
5. Cuando el OxyPure esté conectado a WIFI, la luz "WIFI" dejará de parpadear y
permanecerá continuamente encendida.
• Si el OxyPure no se conectó a su red, la luz de WIFI se apagará. Siga los pasos 3-4.
Asegúrese de seleccionar la red WIFI adecuada y escriba la contraseña correcta.
El OxyPure está equipado con WIFI para operar la unidad desde
cualquier ubicación.
Nota: Si la luz de la unidad parpadea más lentamente, la unidad se encuentra
en el Modo de Espera WIFI. Para salir del Modo de Espera e iniciar el Modo de
Emparejamiento, mantenga presionado el botón de encendido durante 2 segundos
hasta que la luz de WIFI comience a parpadear rápidamente.
Nota: El OxyPure, como con la mayoría de los dispositivos IoT, sólo se conectará a una
Red 2.4GHz.
• Para reiniciar el OxyPure WIFI, presione y mantenga presionado "Power" durante 3
segundos. Siga el paso 4. El OxyPure ahora puede manejarse desde cualquier ubicación.
*La mayoría de los enrutadores emitirán en 2.4GHz. Si necesita ayuda para activar
2.4GHz, comuníquese con su proveedor de servicios de internet.
Estado de WIFI LED
Modo de emparejamiento y modo de espera
Luz Solida
El OxyPure se empareja
con el WIFI.
Luz Parpadeante Rápida
El OxyPure está en modo de emparejamiento.
El OxyPure permanecerá en modo de
emparejamiento por hasta 3 minutos, o hasta
que su dispositivo esté emparejado.
Luz de Parpadeo Lento El OxyPure está en modo
de espera.
Sin Luz El WIFI de OxyPure
está apagado.

34
Owner’s Manual
INSTRUCCIONES DE FUNCIONAMIENTO
ODOR
NO
ODOR
STRONG
ODOR
REPLACE
FILTER 4
CLEAN
FILTER 2
WIFI
AIR
SLEEP MODE
AUTO
ULTIMATE
CLEAN
FAN
SPEED
TIMER TURBO
HR CLEAN DIRTY
POWER
HRHIGHLOW
ECO-FRIENDLY MODE
RESET FILTER 2
HOLD FOR 2 SECONDS
RESET FILTER 4
HOLD FOR 2 SECONDS
Encendido/Apagado
1. Enchufe la unidad a una toma de corriente. "Power" se
iluminará en rojo y la unidad estará en modo de espera.
2. Presione "Power". La unidad se encenderá y "Power" se
iluminará en verde.
• Presione "AUTO". "AUTO" se iluminará.
• Las barras al lado de "AIR" y "ODOR" se iluminarán,
midiendo la calidad del aire actual.
• El ventilador iniciará.
3. Presione "Power" nuevamente para apagar la unidad.
• Cuando seleccione un modo diferente al predeterminado
"AUTO" antes de apagarla, la unidad ejecutará el modo
previamente seleccionado cuando se vuelva a encender.
AUTO
Cuando se usa la función AUTO, la unidad ajustará la velocidad
del ventilador automáticamente (sin límite de tiempo).
1. Presione "AUTO". "AUTO" se encenderá.
MODO ECOLÓGICO
OxyPure se encenderá automáticamente una vez que detecte
la mala calidad del aire. La velocidad del ventilador se ajustará
según el nivel de mal aire.
1. Presione "POWER" y "ULTIMATE CLEAN" al mismo tiempo.
POWER se iluminará en amarillo.
2. Presione "POWER" y "ULTIMATE CLEAN" otra vez para apagar
el modo ecológico. "POWER" ya no estará en amarillo.
LIMPIEZA DEFINITIVA
Cuando se encuentre en modo LIMPIEZA DEFINITIVA, la
unidad automáticamente se ajustará a la velocidad del
ventilador más alta o más baja en función de la calidad del aire
(Sin límite de tiempo).
1. Presione "ULTIMATE CLEAN". ULTIMATE CLEAN se iluminará
en verde.
2. Presione "ULTIMATE CLEAN" para apagarlo.
ODOR
NO
ODOR
STRONG
ODOR
REPLACE
FILTER 4
CLEAN
FILTER 2
WIFI
AIR
SLEEP MODE
AUTO
ULTIMATE
CLEAN
FAN
SPEED
TIMER TURBO
HR CLEAN DIRTY
POWER
HRHIGHLOW
ECO-FRIENDLY MODE
RESET FILTER 2
HOLD FOR 2 SECONDS
RESET FILTER 4
HOLD FOR 2 SECONDS
ODOR
NO
ODOR
STRONG
ODOR
REPLACE
FILTER 4
CLEAN
FILTER 2
WIFI
AIR
SLEEP MODE
AUTO
ULTIMATE
CLEAN
FAN
SPEED
TIMER TURBO
HR CLEAN DIRTY
POWER
HRHIGHLOW
ECO-FRIENDLY MODE
RESET FILTER 2
HOLD FOR 2 SECONDS
RESET FILTER 4
HOLD FOR 2 SECONDS
ODOR
NO
ODOR
STRONG
ODOR
REPLACE
FILTER 4
CLEAN
FILTER 2
WIFI
AIR
SLEEP MODE
AUTO
ULTIMATE
CLEAN
FAN
SPEED
TIMER TURBO
HR CLEAN DIRTY
POWER
HRHIGHLOW
ECO-FRIENDLY MODE
RESET FILTER 2
HOLD FOR 2 SECONDS
RESET FILTER 4
HOLD FOR 2 SECONDS

35
Owner’s Manual
INSTRUCCIONES DE FUNCIONAMIENTO (CONT.)
ULTIMATE CLEAN con TURBO
Limpia a la velocidad más alta del ventilador durante ½ hora
y cambiará al modo "LIMPIEZA DEFINITIVA".
1. Presione "ULTIMATE CLEAN". ULTIMATE CLEAN se
iluminará en verde.
2. Presione "TURBO". El valor predeterminado es ½ hora
y puede ajustarse 1 a 2 horas.
3. Presione "TURBO" por cuarta vez para apagar.
VELOCIDAD DEL VENTILADOR
Ajuste a 6 velocidades (BAJA a ALTA).
1. Presione "FAN SPEED" para ajustar.
2. Para volver al nivel más bajo de la velocidad del ventilador,
continúe presionando "FAN SPEED" hasta que se encienda la
primera barra.
MODO DE SUEÑO
Cuando esté en modo de suspensión, las luces LED se
apagarán pero el ventilador seguirá activo. Ajuste la velocidad
del ventilador antes de entrar en Modo de Sueño.
1. Ajuste manualmente la VELOCIDAD DEL VENTILADOR.
2. Mantenga presionado "FAN SPEED" durante 2 segundos para
activar el MODO DE SUEÑO.
3. La unidad funcionará a la velocidad del ventilador que se
seleccionó previamente.
4. Para desactivar el Modo de Sueño, presione cualquier botón.
Nota: Ultimate Clean y Turbo funcionarán durante el modo de sueño.
RELOJ
Use la función TIMER para elegir la duración de la operación.
1. Presione "TIMER". La barra al lado de ½ hora se encenderá.
• Hay 6 tiempos preestablecidos para elegir.
2. Presione "TIMER" para aumentar el tiempo.
• Elija entre ½ hora, 1, 2, 4, 8 o 12 horas.
• Después de presionar "TIMER" seis veces, todas las barras
se encenderán.
3. Presione "TIMER" una vez más para apagar el temporizador.
ODOR
NO
ODOR
STRONG
ODOR
REPLACE
FILTER 4
CLEAN
FILTER 2
WIFI
AIR
SLEEP MODE
AUTO
ULTIMATE
CLEAN
FAN
SPEED
TIMER
TURBO
HR CLEAN DIRTY
POWER
HR
HIGHLOW
ECO-FRIENDLY MODE
RESET FILTER 2
HOLD FOR 2 SECONDS
RESET FILTER 4
HOLD FOR 2 SECONDS
ODOR
NO
ODOR
STRONG
ODOR
REPLACE
FILTER 4
CLEAN
FILTER 2
WIFI
AIR
SLEEP MODE
AUTO
ULTIMATE
CLEAN
FAN
SPEED
TIMER TURBO
HR CLEAN DIRTY
POWER
HR
HIGHLOW
ECO-FRIENDLY MODE
RESET FILTER 2
HOLD FOR 2 SECONDS
RESET FILTER 4
HOLD FOR 2 SECONDS
36
Owner’s Manual
INSTRUCCIONES DE FUNCIONAMIENTO (CONT.)
TURBO
La función TURBO limpia el aire usando la mayor velocidad
del ventilador en los momentos seleccionados.
1. Presione "TURBO" para ajustar desde ½ hora, 1 ó 2 horas.
Cuando el tiempo seleccionado haya terminado, TURBO se
apagará automáticamente.
2. Para volver al nivel más bajo, continúe presionando "TURBO"
hasta que se ilumine la barra al lado de ½.
TURBO con TIMER
Cuando se usa TURBO con TIMER se establece el tiempo
predeterminado a 2 horas.
1. Presione "TIMER" para aumentar o disminuir el tiempo.
2. Elija entre ½ hora, 1, 2, 4, 8 o 12 horas.
TURBO con AUTO
Use la función TURBO para seleccionar el límite de tiempo
deseado. Una vez que se acabe el tiempo, la unidad
cambiará a "AUTO".
1. Presione "TURBO" para ajustar desde ½ hora, 1 ó 2 horas.
2. Presione "AUTO".
INDICADOR DE CALIDAD DEL AIRE
El OxyPure automáticamente medirá y mostrará la calidad del
aire actual en la habitación.
• Las barras se iluminarán alrededor de "AIR" y "ODOR", lo
que indica la calidad del aire actual. Las barras aumentarán y
disminuirán, y están codificadas por colores, de acuerdo con la
calidad del aire.
ODOR
NO
ODOR
STRONG
ODOR
REPLACE
FILTER 4
CLEAN
FILTER 2
WIFI
AIR
SLEEP MODE
AUTO
ULTIMATE
CLEAN
FAN
SPEED
TIMER TURBO
HR
CLEAN DIRTY
POWER
HRHIGHLOW
ECO-FRIENDLY MODE
RESET FILTER 2
HOLD FOR 2 SECONDS
RESET FILTER 4
HOLD FOR 2 SECONDS
ODOR
NO
ODOR
STRONG
ODOR
REPLACE
FILTER 4
CLEAN
FILTER 2
WIFI
AIR
SLEEP MODE
AUTO
ULTIMATE
CLEAN
FAN
SPEED
TIMER TURBO
HR
CLEAN DIRTY
POWER
HRHIGHLOW
ECO-FRIENDLY MODE
RESET FILTER 2
HOLD FOR 2 SECONDS
RESET FILTER 4
HOLD FOR 2 SECONDS
ODOR
NO
ODOR
STRONG
ODOR
REPLACE
FILTER 4
CLEAN
FILTER 2
WIFI
AIR
SLEEP MODE
AUTO
ULTIMATE
CLEAN
FAN
SPEED
TIMER TURBO
HR CLEAN DIRTY
POWER
HRHIGHLOW
ECO-FRIENDLY MODE
RESET FILTER 2
HOLD FOR 2 SECONDS
RESET FILTER 4
HOLD FOR 2 SECONDS
ODOR
NO
ODOR
STRONG
ODOR
REPLACE
FILTER 4
CLEAN
FILTER 2
WIFI
AIR
SLEEP MODE
AUTO
ULTIMATE
CLEAN
FAN
SPEED
TIMER
TURBO
HR
CLEAN DIRTY
POWER
HRHIGHLOW
ECO-FRIENDLY MODE
RESET FILTER 2
HOLD FOR 2 SECONDS
RESET FILTER 4
HOLD FOR 2 SECONDS
LIMPIAR Y REEMPLAZAR LOS INDICADORES DEL FILTRO
• Las luces al lado de CLEAN FILTER 2 y REPLACE FILTER 4 se iluminarán,
lo que indica que los filtros deberán ser limpiados o reemplazados.
• Para restablecer los indicadores, consulte "Restablecimiento del filtro y los
indicadores de calidad del aire" en Cuidado y Mantenimiento.

37
Owner’s Manual
Antes del primer uso
Limpie la Ventilación Superior y la Ventilación de Flujo con un paño ligeramente
húmedo o una toalla de papel.
Seque bien antes de usar.
Después de su uso
El OxyPure se debe limpiar periódicamente y después de un uso excesivo para
garantizar un funcionamiento y desempeño adecuados. Para limpiar la parte
exterior del OxyPure, use un paño o toalla de papel para eliminar el polvo y
otras partículas. Para una acumulación más dura, use un paño húmedo o toalla
de papel y seque completamente.
Limpieza de la Ventilación Superior y la Ventilación de Flujo
1. Use un cepillo suave para eliminar el polvo y la suciedad.
2. Si es necesario, use una toalla de papel ligeramente mojada o un paño
húmedo para eliminar una mayor acumulación. No use abrasivos o
almohadillas de limpieza en la Ventilación Superior ni en ninguna parte de
la unidad.
Limpieza del sensor de olores
El sensor de olor está ubicado en la esquina lateral de OxyPure hacia la
parte superior, debajo de la pequeña abertura de la parrilla.
• Mantenga el sensor de olor libre de polvo y
residuos con un paño suave para mantener
lecturas precisas de olor.
• No manipule el sensor de olor o la abertura sobre
el sensor. No rocíe dentro o cerca de la abertura
de la parrilla pequeña sobre el sensor de olor. Si
lo hace, puede provocar un mal funcionamiento
del sensor y anular su garantía.
INSTRUCCIONES DE FUNCIONAMIENTO (CONT.)
CUIDADO Y MANTENIMIENTO
El OxyPure se puede mover fácilmente de un lugar a otro. Simplemente
sostenga el OxyPure por las asas de cada lado y ruede la unidad a la ubicación
elegida. Las ruedas debajo proporcionan maniobrabilidad y movilidad extra
cada vez que es necesario.
PRECAUCIÓN
NO arroje ningún polvo o residuo en el OxyPure
al limpiarlo.
sensor de olores

38
Owner’s Manual
CUIDADO Y MANTENIMIENTO (CONT.)
El orden de los filtros dentro de OxyPure
es como sigue (de abajo hacia arriba):
1. Prefiltro de Acero Inoxidable (lavable)
2. Filtro Bio-Guard
™
(lavable)
3. Filtro de Eliminación de Emisiones de
Ozono (no lavable)
4. HEPA/ Combo de Filtro de Carbón
Activado (no lavable)
• El OxyPure debe colocarse en el piso
al ensamblar los filtros.
ODOR
NO
ODOR
STRONG
ODOR
REPLACE
FILTER 4
CLEAN
FILTER 2
WIFI
AIR
SLEEP MODE
AUTO
ULTIMATE
CLEAN
FAN
SPEED
TIMER TURBO
HR
CLEAN DIRTY
POWER
HRHIGHLOW
ECO-FRIENDLY MODE
RESET FILTER 2
HOLD FOR 2 SECONDS
RESET FILTER 4
HOLD FOR 2 SECONDS
El indicador CLEAN FILTER 2 se volverá azul después de 3 a 6 meses, lo
que indica que el filtro debe limpiarse para obtener resultados óptimos
(filtro Bio-Guard
™
). El indicador CLEAN FILTER 2 se volverá rojo después
de 6 meses de uso, lo que indica que el filtro debe limpiarse.
El indicador REPLACE FILTER 4 se volverá rojo cuando deba
reemplazarse el filtro (HEPA/Combo de Filtro de Carbono Activado).
El filtro durará hasta 5 años, dependiendo de la frecuencia con que la
unidad funcione en su entorno.
Cambiar los Filtros
Los filtros dentro de la ranura del filtro deben cambiarse o limpiarse a tiempo
para ayudar a que el OxyPure mantenga un rendimiento óptimo y eficiente.
1. Retire la cubierta de la ranura del filtro en la parte posterior del OxyPure
con su manija incorporada.
2. Deslice los filtros que necesitan limpieza o reemplazo.
3. Permita que los filtros lavables se sequen por completo antes de
reinstalarlos en la unidad.
• Nunca coloque un filtro húmedo en el OxyPure.
• La tapa de la ranura del filtro debe estar segura o la unidad
no funcionará.
No lave el filtro de eliminación de emisiones de ozono ni el HEPA/Combo
de Filtro de Carbono Activado. El filtro de eliminación de emisiones de
ozono debe reemplazarse cada 20 años. El filtro HEPA/Combo de Filtro de
Carbono Activado se debe reemplazar cada 5 años, según la frecuencia
con que la unidad se use en su entorno.
PRECAUCIÓN
Desenchufe el OxyPure de la fuente de alimentación
antes de insertar o quitar cualquier pieza o accesorio y
antes de limpiarlo.
4
3
2
1

39
Owner’s Manual
CUIDADO Y MANTENIMIENTO (CONT.)
HEPA/ Combo de Filtro de Carbón Activado
Filtro de Eliminación de Emisiones de Ozono
Filtro Bio-Guard
™
Prefiltro de Acero Inoxidable
Limpiando los filtros
Para limpiar el Bio-Guard
™
filtro:
1. Retire el filtro.
2. Rocíe un desengrasante suave y déjelo reposar de 2 a 3 minutos.
3. Sumerja en agua tibia, agite ligeramente y levante.
4. Repita el proceso hasta que esté limpio.
5. Haga funcionar el filtro en agua tibia.
6. Permita que el filtro se seque completamente antes de uso.
El prefiltro recoge partículas grandes y deberá limpiarse al menos una vez
cada dos meses, dependiendo del uso.
1. Use una aspiradora o toalla de papel para eliminar el polvo o la pelusa.
2. Limpie con agua jabonosa tibia.
3. Enjuague bien y elimine las partículas de jabón en el filtro.
4. Permita que el filtro se seque completamente ANTES de volver a colocarlo
en OxyPure (hasta 12-24 horas para secarse).
Restablecer el filtro y los indicadores de calidad del aire
1. Para reiniciar el Indicador de Calidad del Aire para AIR, presione y mantenga
presionado "TIMER" por 2 segundos hasta que escuche un pitido.
• Después de limpiar o reemplazar un filtro y restablecer el indicador, se
encenderá la primera barra verde alrededor de AIR.
2. Para restablecer el indicador de calidad del aire para ODOR, presione y
mantenga presionado "TURBO" durante 2 segundos hasta que escuche
un pitido.
• Después de limpiar o reemplazar un filtro y restablecer el indicador, se
encenderá la primera barra verde alrededor de ODOR.
40
Owner’s Manual
Limpieza del sensor del filtro
El sensor del filtro está ubicado en la parte posterior,
sobre la cubierta de la ranura del filtro.
1. Abra el panel (Cubierta del sensor).
2. Usando un hisopo de algodón seco o un cepillo
pequeño y suave, quite suavemente la suciedad
o el polvo del sensor.
3. Para obtener más acumulación en el Sensor,
limpie con un hisopo de algodón un poco mojado.
4. Elimine la humedad con un hisopo de algodón seco.
• El sensor de filtro requiere una limpieza regular
(aproximadamente cada 3 meses) para que la
unidad funcione eficientemente.
• Si el OxyPure se instala en un área con alta acumulación de polvo, se
necesita una limpieza más frecuente del Sensor de filtro.
• No use el hisopo de algodón en ninguna parte o área que no sea el
Sensor de filtro.
Limpieza debajo de la ventilación superior
La ventilación superior del OxyPure se puede quitar para limpiar
la superficie debajo de la ventilación superior y la pantalla de
ventilación interna. Para limpiar la superficie debajo y la pantalla de
ventilación interior:
1. Apague el OxyPure y desenchufe la unidad.
2. Levante la ventilación superior usando la pestaña incorporada.
3. Con una toalla de papel seca o ligeramente mojada, limpie el polvo o las
partículas acumuladas de la superficie y la rejilla de ventilación interior.
Para limpiar la pared interna opuesta al ventilador o para quitar un objeto
que ha caído a través del respiradero interior:
1. Después de quitar la ventilación superior, ubique los
dos tornillos más cercanos al extremo en la ventilación
interna cerca de la abertura de la parrilla, debajo de
la ventilación superior principal. NO desenrosque los
cuatro tornillos exteriores.
2. Use un destornillador Phillips para aflojar los
dos tornillos (solo).
3. Levante la ventilación interna.
• Solo una porción de la ventilación interna se levantará.
4. Después de limpiar la pared interna con un paño
suave o una toalla de papel, vuelva a montar la
ventilación interna, vuelva a apretar los dos tornillos y
reemplace la ventilación superior.
• Asegúrese de que todas las piezas estén seguras
antes de volver a enchufar el OxyPure y
encenderlo nuevamente.
Nota: NO desatornille los cuatro tornillos exteriores ubicados hacia las
esquinas. Hacerlo anulará su garantía.
CUIDADO Y MANTENIMIENTO (CONT.)
Cubierta del
Sensor
XX XX
XX XX

41
Owner’s Manual
CUIDADO Y MANTENIMIENTO (CONT.)
Problema: Solución(es):
La unidad no enciende.
1. El enchufe no está en la toma de corriente.
Enchúfelo al tomacorriente.
2. Power" en el panel táctil no está activado.
Presiona "Power".
3. La cubierta de la ranura del filtro en la parte posterior
trasera está suelta o floja. Asegúrese de que la
Cubierta de la Ranura del Filtro esté asegurada.
TIMER no funciona
cuando se presiona.
La unidad no está leyendo la función seleccionada.
Presione "FAN SPEED" o "AUTO", luego
presione "TIMER".
Los ventiladores
no trabajan.
1. No se está utilizando una salida adecuada.
Asegúrese de que el tomacorriente tenga la
tensión adecuada para su uso.
2. La cubierta de la ranura del filtro en la parte
trasera no está colocada correctamente.
Asegúrese de que la Cubierta de la Ranura del
Filtro esté en forma segura.
La velocidad del flujo de
aire no está cambiando
cuando "FAN SPEED"
se presiona.
La unidad puede estar en el modo AUTO manual.
Establezca el OxyPure en otro modo de funcionamiento
en el panel táctil y luego presione "FAN SPEED".
El flujo de aire fuera
de la Ventilación
Superior es débil.
Los filtros de aire están sucios. Cambie o limpie los
filtros de aire.
La unidad produce
humo u olor.
Los filtros de aire están sucios. Cambie o limpie los
filtros de aire. Si el problema continúa, comuníquese
con Servicio al Cliente al 1-877-689-2838 o envíe un
correo electrónico a help@nuwavenow.com.
Los indicadores
de LIMPIAR y
REEMPLAZAR EL
FILTRO no se han
reiniciado después de
limpiar o cambiar el
(los) filtro(s).
1. sensor del filtro no está leyendo el nuevo filtro
instalado. Apague la unidad y luego enciéndala.
Mantenga presionado "TIMER" durante 2 segundos
hasta que escuche un pitido. Apague la unidad,
desenchufe y ajuste el (los) filtro (s). Enchufe y
encienda la unidad nuevamente.
2. La cubierta de la ranura del filtro en la parte trasera
no está bien colocada. Asegúrese de que la Cubierta
de la Ranura del Filtro esté en forma segura.
3. El sensor del filtro está sucio. Limpie el sensor de filtro.
SOLUCIÓN DE PROBLEMAS
No sumerja el OxyPure en agua.
Limpie con una esponja o paño húmedo y seque.
Asegúrese de que todas las partes y cubiertas estén
ensambladas de forma segura.

42
Owner’s Manual
SOLUCIÓN DE PROBLEMAS (CONT.)
GARANTÍA LIMITADA
Problema: Solución(es):
ULTIMATE CLEAN no
se enciende cuando
se presiona.
La unidad no está leyendo la función seleccionada.
Encienda/apague la unidad presionando "POWER"
dos veces.
POWER está
parpadeando en rojo.
1. Los filtros no están instalados correctamente o
están sueltos. Apague la unidad y desenchúfela.
Compruebe que los filtros estén correctamente
instalados y no sueltos. Enchufe la unidad y
presione POWER para encenderla.
2. Cuando se retire la cubierta de la ranura del filtro,
"Power" se iluminará en rojo sólido. Presionando
"Power" hará que parpadee; sin embargo,
como medida de seguridad, la unidad no estará
operativa cuando se retire la Cubierta de la
Ranura del Filtro. Asegúrese de que la Cubierta
de la Ranura del Filtro esté bien instalada.
El sensor de olores no
se está reiniciando ni
borrando todas
las barras.
Todas las barras están
parpadeando.
Comuníquese con Servicio al Cliente al 1-877-689-2838
o envíe un correo electrónico a help@nuwavenow.com.
El Purificador de Aire NuWave OxyPure
®
LOS GARANTÍAS DEL FABRICANTE
El Purificador de Aire NuWave OxyPure (excepto los filtros) estará libre de
defectos del fabricante bajo uso doméstico normal durante 3 años a partir
de la fecha de compra. Esta garantía cubre al propietario original de este
purificador de aire para uso doméstico personal únicamente y cuando se opera
de acuerdo con las instrucciones escritas del fabricante. Esta garantía no se
aplica a los productos utilizados con fines comerciales, de alquiler o de reventa.
El fabricante proporcionará las piezas y el trabajo necesarios para reparar
cualquier parte del Purificador de Aire NuWave OxyPure en el departamento de
servicio de NuWave, LLC. Después de la expiración de la garantía, el costo de
la mano de obra y las partes será responsabilidad del propietario.
LA GARANTÍA NO CUBRE
La garantía limitada se anula si las reparaciones son realizadas por un
distribuidor no autorizado y/o la placa de datos del número de serie es
eliminada y/o desfigurada. El deterioro normal del acabado debido al uso o la
exposición no está cubierto por esta garantía. Esta Garantía Limitada no cubre
fallas, daños o rendimiento inadecuado debido a accidentes, fenómenos de
fuerza mayor (como rayos), fluctuaciones en la energía eléctrica, alteraciones,
abuso, uso indebido, aplicaciones incorrectas, atmósferas de tipo corrosivo,
instalación incorrecta, falla al operar de acuerdo con las instrucciones escritas
del fabricante, uso anormal o uso comercial. NuWave, LLC se reserva
el derecho de anular la Garantía Limitada, cuando lo permita la ley, para
productos comprados a un distribuidor no autorizado.

43
Owner’s Manual
GARANTÍA LIMITADA (CONT.)
PARA OBTENER SERVICIO
El propietario tendrá la obligación y la responsabilidad de: pagar todos los
servicios y piezas no cubiertos por la garantía; prepagar el envío hacia y desde
el Departamento de Servicio para cualquier pieza o sistema devuelto bajo esta
garantía; y empacar cuidadosamente el producto utilizando material de relleno
adecuado para evitar daños en el tránsito. El empaque original es ideal para
este propósito. Incluya en el paquete el nombre del propietario, la dirección, el
número de teléfono durante el día, una descripción detallada del problema y su
"número de RGA". Llame al 1-877-689-2838 o envíe un correo electrónico
a help@nuwavenow.com para obtener el número de RGA (número de
autorización de devolución de mercancías). Proporcione el número de
modelo y de serie y el comprobante de la fecha de compra (una copia del
recibo) cuando presente una reclamación bajo esta garantía.
OBLIGACIÓN DEL FABRICANTE
La obligación del fabricante en virtud de esta Garantía Limitada está limitada,
en la medida en que lo permita la ley, a la reparación o sustitución de cualquier
parte cubierta por esta Garantía Limitada que, tras la revisión, se considere
defectuosa durante el uso normal. La Garantía Limitada solo se aplica dentro
de los Estados Unidos continentales y solo al comprador original de los
canales de distribución autorizados por el fabricante. LA GARANTÍA LIMITADA
NO PUEDE SER ALTERADA, VARIADA O EXTENDIDA, EXCEPTO POR
UN INSTRUMENTO ESCRITO EJECUTADO POR EL FABRICANTE. EL
RECURSO DE REPARACIÓN O REEMPLAZO SEGÚN LO DISPUESTO BAJO
ESTA GARANTÍA LIMITADA ES EXCLUSIVO. EL FABRICANTE NO SERÁ
RESPONSABLE EN NINGÚN CASO DE NINGÚN DAÑO CONSECUENTE O
INCIDENTAL PARA NINGUNA PERSONA, YA SEAN O NO OCASIONADOS
POR LA NEGLIGENCIA DEL FABRICANTE, INCLUYENDO SIN LIMITACIÓN,
DAÑOS POR PÉRDIDA DE USO, COSTES DE SUSTITUCIÓN, DAÑO A LA
PROPIEDAD U OTRA PÉRDIDA DE DINERO.
Algunos estados no permiten la exclusión o limitación de daños incidentales o
consecuentes, por lo que las exclusiones de limitación anteriores pueden no
ser aplicables. Esta Garantía Limitada otorga derechos legales específicos,
y también puede haber otros derechos que varían de estado a estado. CON
EXCEPCIÓN DE LO DISPUESTO EXPRESAMENTE CON ANTERIORIDAD,
EL FABRICANTE NO OFRECE GARANTÍAS EXPRESAS O IMPLÍCITAS
DERIVADAS DE LA LEY O DE CUALQUIER OTRA ÍNDOLE, INCLUIDAS,
ENTRE OTRAS, LAS GARANTÍAS IMPLÍCITAS DE COMERCIABILIDAD E
IDONEIDAD PARA UN PROPÓSITO EN PARTICULAR CON CUALQUIER
OTRA PERSONA. LEA SU MANUAL DEL PROPIETARIO. SI AÚN TIENE
ALGUNA PREGUNTA ACERCA DE LA OPERACIÓN O GARANTÍA DEL
PRODUCTO, COMUNÍQUESE CON NUWAVE, LLC.
LEA SU MANUAL DEL PROPIETARIO
Si aún tiene alguna pregunta sobre el funcionamiento o la garantía del
producto, contáctese con NuWave, LLC al: 1-877-689-2838 o envíe un correo
electrónico a help@nuwavenow.com.

Item No: BM47001
Rev. 11-TH
11-27-18
Model: 47001, 120V, 60Hz, 125 Watts
For patent information please go to: www.nuwavenow.com/legal/patent
Designed & Developed in USA by:
NuWave, LLC
1795 N. Butterfield Road
Libertyville, IL 60048, U.S.A.
Customer Service:
1-877-689-2838 • help@nuwavenow.com
Made in China
©2018 NuWave, LLC • All Rights Reserved.
www.nuwavenow.com
FOR HOUSEHOLD USE ONLY