Loading ...
Loading ...
Loading ...
5
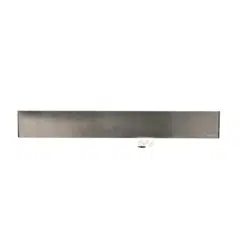
STEP 2 INSTALL ANTI-TIP BRACKET (cont.)
ALL REFRIGERATOR, ALL FREEZER
“X” MODELS ONLY
Remove Grilles for Access to Power Cord and Anti-tip
Locking Hooks
Power Cord
Locate the power cord inside the left cavity. If it has not
been adjusted so the plug is easily accessible, do so now.
Freezer Unit
• Open the access door.
• Using a 1/4" hex driver, remove the 2 screws
at the bottom of the grille on the right.
• Pull the bottom of the grille forward, down and out
to remove.
• Using a 1/4" hex driver, remove the screw on the left
side of the grille.
• The grille is aluminum and will bend easily. Gently pull
forward on the left side of the grille to open for access.
This grille will not be completely removed.
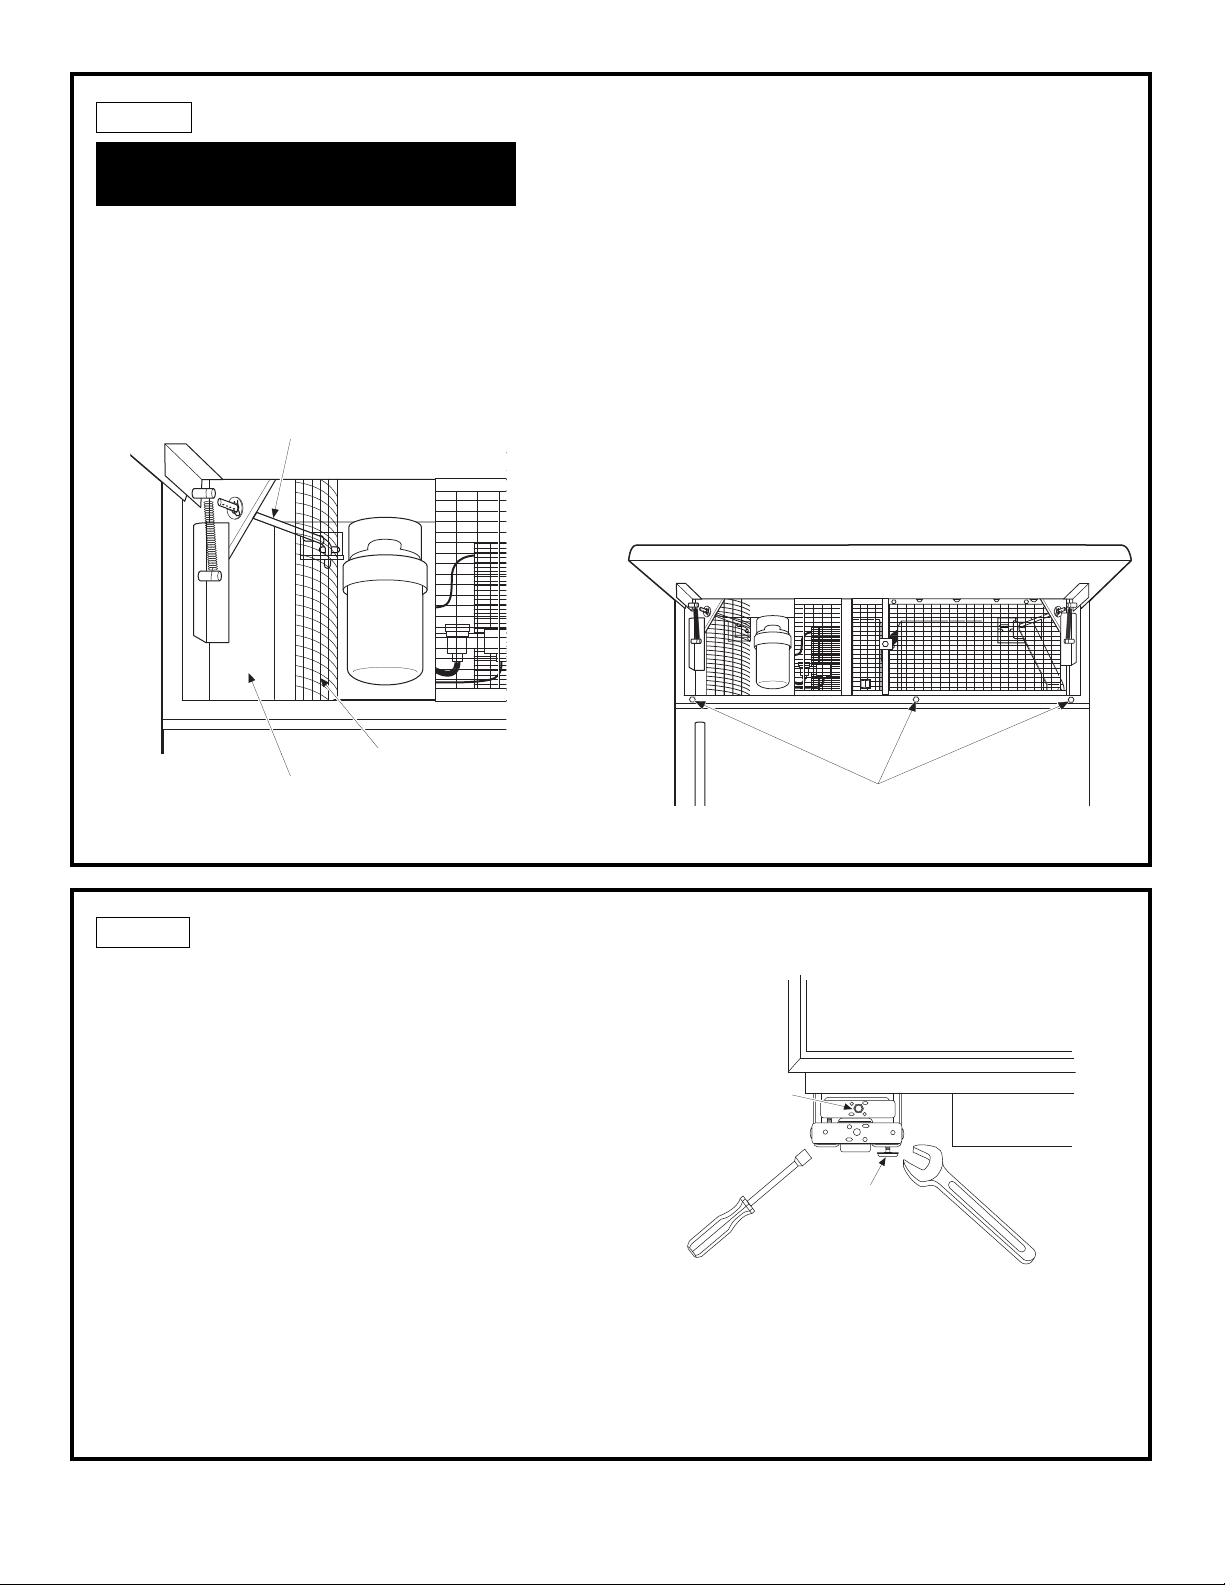
STEP 3 LEVEL REFRIGERATORS
Both products MUST BE LEVEL AND PLUMB with each
other and with adjacent cabinetry on each side.
• Adjust carefully. Both models have 4-point leveling.
The front is supported by leveling legs, the rear
is supported by wheels. Both are accessible from
the front of the refrigerator.
• For bottom-mount refrigerator models only, turn
the 7/16" hex nut located above the front wheels
to raise or lower the back of the refrigerator until
it just barely touches the 2 x 4 blocks.
• For All Refrigerator/All Freezer models, turn the 7/16”
hex nut located above the front wheels to raise
or lower the unit to close the gap at the top
of the cabinets.
• For front leveling, use a 1-1/4" open-ended wrench
to turn the leveling legs.
The inside case trims must be aligned without gaps
at the top and bottom.
“L” Bolt
Power Cord Location
Left Grille Open
Screws
Hex Nut Adjusts
Rear Wheels
Leveling Leg
Loading ...
Loading ...
Loading ...