Loading ...
Loading ...
3
STEP 2 INSTALL ANTI-TIP BRACKET
ALL REFRIGERATOR, ALL FREEZER
“X” MODELS ONLY
WARNING: ANTI-TIP PRECAUTIONS
The unit is top-heavy and must be secured to prevent
the possibility of tipping forward.
ATTENTION : PRECAUTIONS CONTRE
LES BASCULEMENTS
L’appareil ménager est beaucoup plus lourd en haut
et il faut le maintenir en place pour éviter la possibilité
de son basculement vers l’avant.
• The kit supplied with the unit contains 3 (2 required,
1 extra) lag bolts and 5 (4 required, 1 extra) toggles
with bolts. The wall bracket will be attached
to the wall in 4 places.
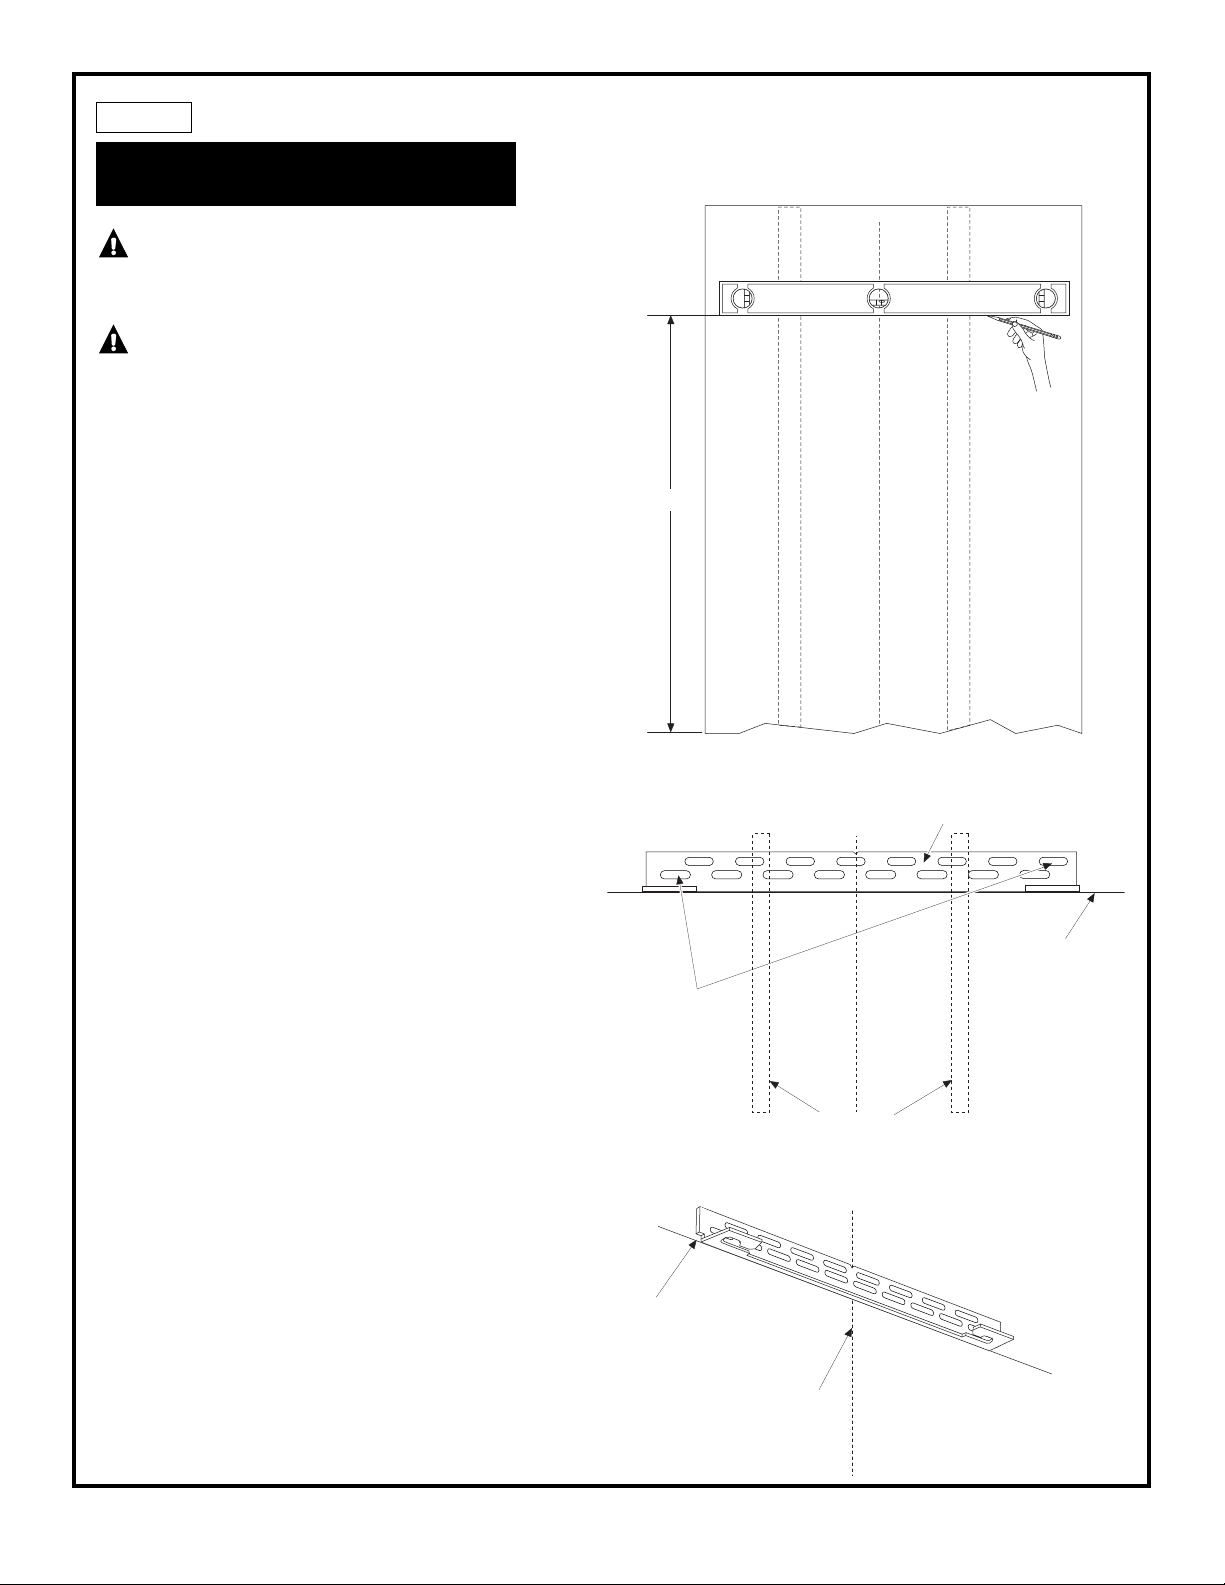
• Measure the opening where the unit is to be installed.
Mark the center with a vertical line.
• Measure up 81-1/2" from the floor. Mark this point
on the wall.
• Using a level, draw a horizontal line on the wall
at this height.
• Locate at least 2 studs on the back wall. Mark these
points on the horizontal line.
• Place the bottom of the wall bracket with tabs
on the horizontal line. Align the center notch
on the bracket with the center line on the wall.
• The anti-tip wall bracket has a series of holes.
Select 2 holes that match with the located studs.
Make sure the holes selected are on the center
of the studs. Mark the wall at these points.
• Mark an additional hole at each end of the bracket.
If one of the studs is closer to the end of the bracket,
mark an additional hole towards the center
of the bracket.
• Drill 1/2" holes into the wallboard at the locations
marked for the toggles to be mounted (not the stud
markings).
• Drill 3/16" holes into wooden studs where marked.
If steel stud construction, drill 1/2" holes into the studs
where marked. You will use 2 toggles with the metal
studs.
Line on Wall
Center
81-1/2"
To Floor
Center
Wall Bracket
Line on Wall
Wall Studs
Two Additional
Hole Locations at
Ends of Brackets
Loading ...
Loading ...
Loading ...