Loading ...
Loading ...
Loading ...
25
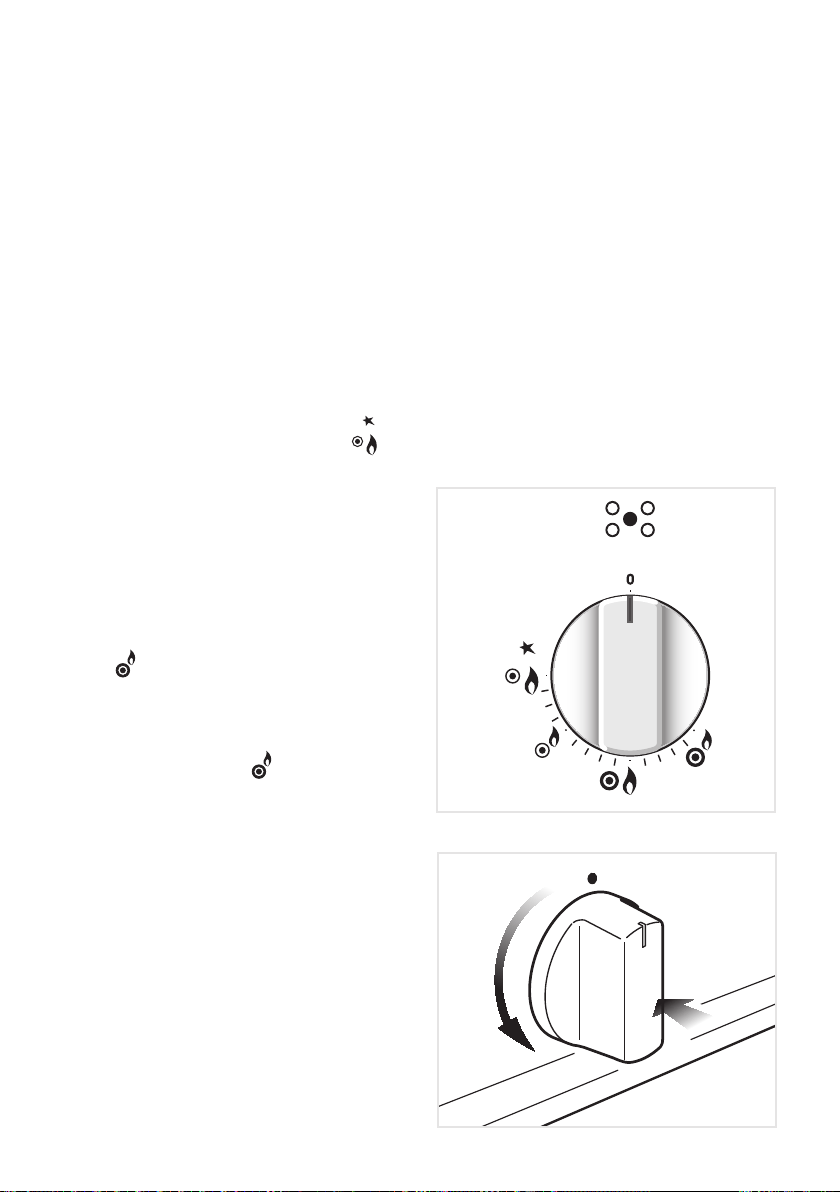
■ Note that, if you are using a burner at the minimum setting, you turn the knob clockwise
past the maximum setting before reaching the “0” (off) position.
■ To switch off, turn the knob clockwise until you hear the safety click (“0” off position).
Note: When the range is not being used, set the gas knobs to their closed position
and also close the gas shut-off valve placed on the main gas supply line.
Caution! The range becomes very hot during operation. Keep children well out of reach.
LIGHTING GAS BURNERS FITTED WITH FLAME FAILURE SAFETY DEVICE
AND ELECTRONIC IGNITION (Dual)
1. Check that the electricity is switched on to allow spark ignition.
2. The gas ow to the burner is controlled by a tap with safety cut-out device.
If the burner ame should go out, the safety cut-off valve will automatically stop the gas
ow. The switch for the electric ignition is incorporated in the knob.
3. To ignite automatically, push the required knob down and turn it to the maximum
position of inner crown only (
- gs. 26, 27), keeping the knob down until the
burner lights.
When the ame is lit, wait for about ten
seconds with the knob down (safety cut-
off activation delay).
4. Whenever the lighting of the burner is
difcult due to peculiar conditions of
the gas features or supply, it is advised
to repeat the ignition with the knob on
minimum position of inner crown only
(
).
5. If when lighting the burner an abnormal
ame appears, switch the burner off
and relight using the minimum setting of
inner crown only (
).
6. If the ame is still not correct, turn the
burner off and call our Customer Service
center for your nearest Authorized
Delonghi Service Agent.
7. In the case of a mains failure light the
burner with a match or lighted taper.
8. Adjust the gas valve to the desired
position.
If the burner ames should go out
for some reason, the safety valve will
automatically stop the gas ow.
To re-light the burner, return the knob to
the closed (off) position, wait for at least
1 minute and then repeat the lighting
procedure.
Figure 26
Figure 27
Loading ...
Loading ...
Loading ...