Loading ...
Loading ...
Loading ...
en
11
WARNING
Excessive Weight Hazard
Use two or more people to move and install
range hood.
Failure to do so can result in back or other injury
ASSEMBLY INSTRUCTIONS
HOOD WITH EXTERNAL EXTRACTION
An assembly jig is attached to the hood for transportation to avoid any damage. To install the hood, you must
first remove this jig according to the following indications but, before doing so, you must imperatively prepare
the hood support structure according to our instructions.
For Hoods with Ferrule leave at Least 150mm between Ceiling and Top Screws (V)
1. Prepare the external extraction ventilation shaft in the wall or in the ceiling.
To guarantee the best smoke extraction results, the hood must be centred in relation to the cooking.
To facilitate mounting, start by tracing the cook top’s central axis. If there are no constraints, respect a
height of approximately 900 mm (+/- 50mm) between the cook top and the hood (minimum 30" on electric
and minimum 36" on gas).
Depending on the installation conditions, we recommend you to leave a slight space between the top of the
hood and the ceiling to facilitate ferrule assembly.
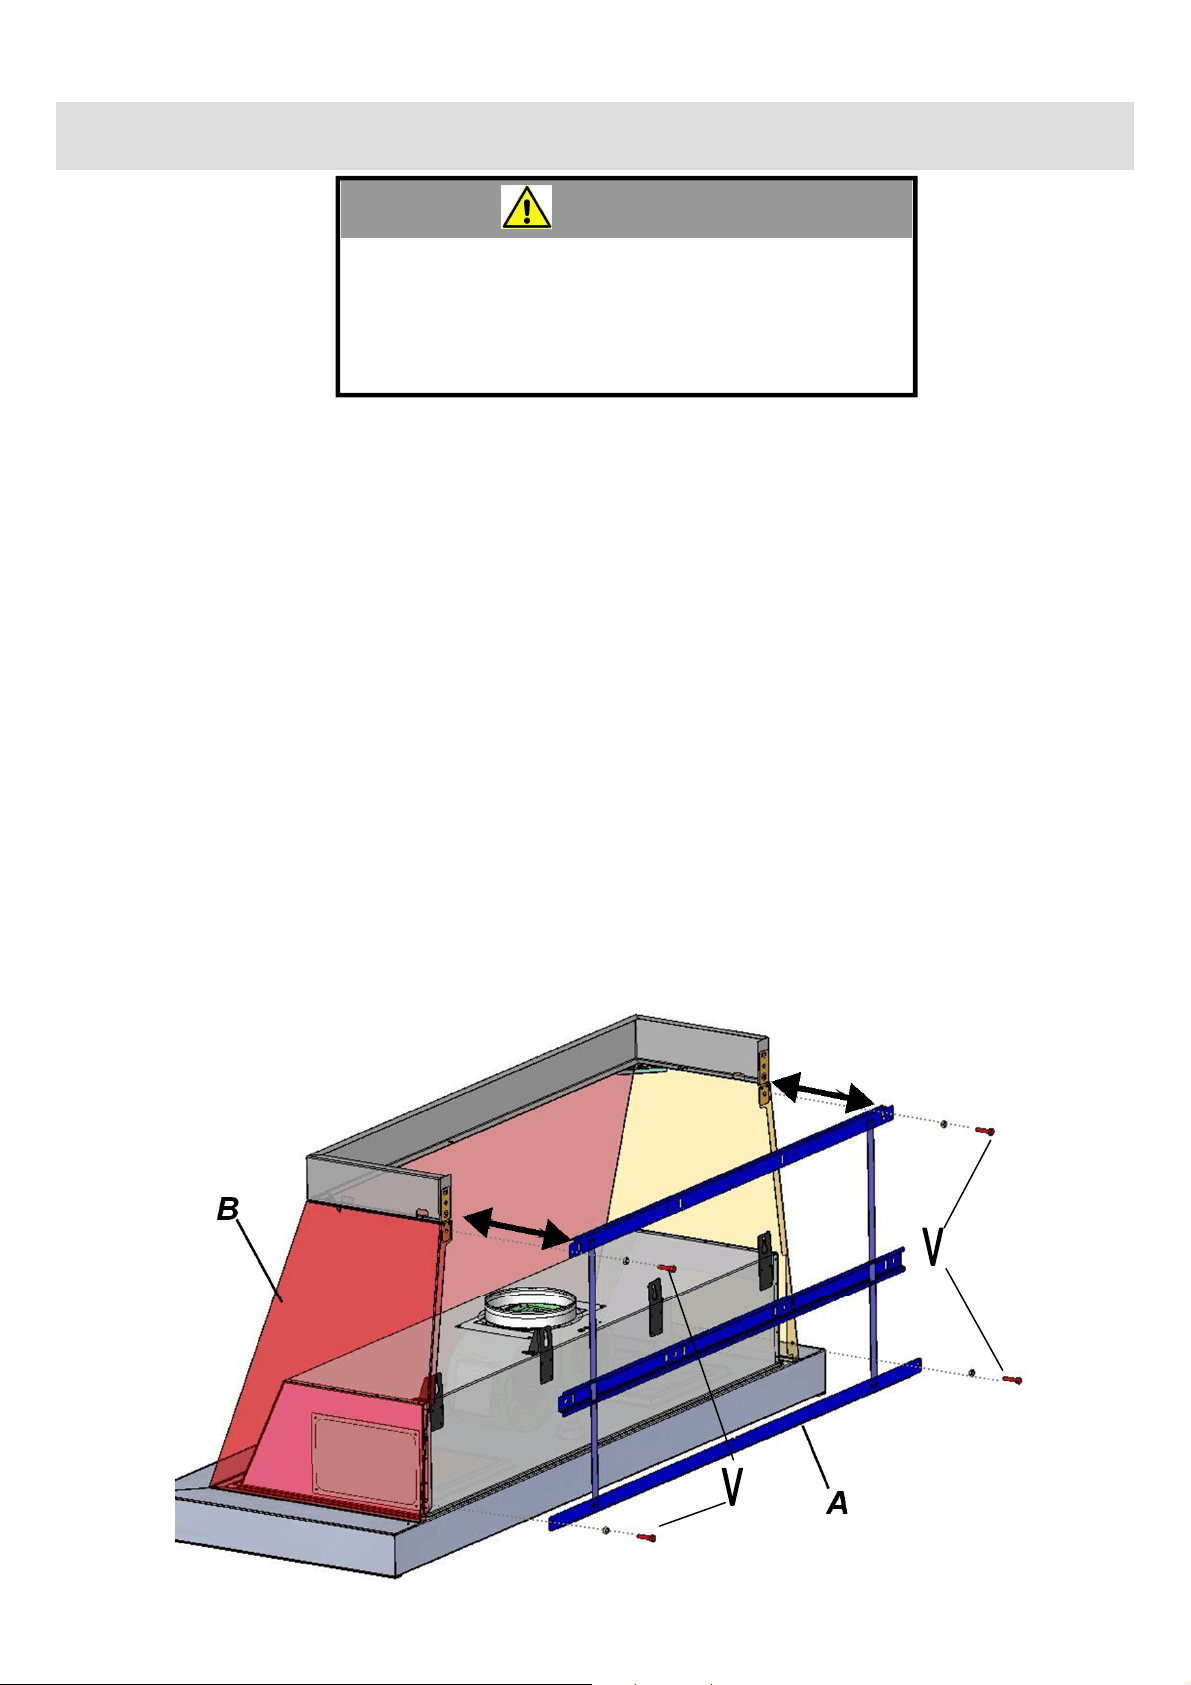
2. Unscrew the assembly jig (A) from the hood and remove the hexagonal head screws (V). These screws will
be replaced by the threaded rods supplied in the packaging with the hood. Then remove the hood mantel
(B) from Body.
Loading ...
Loading ...
Loading ...