Loading ...
Loading ...
Loading ...
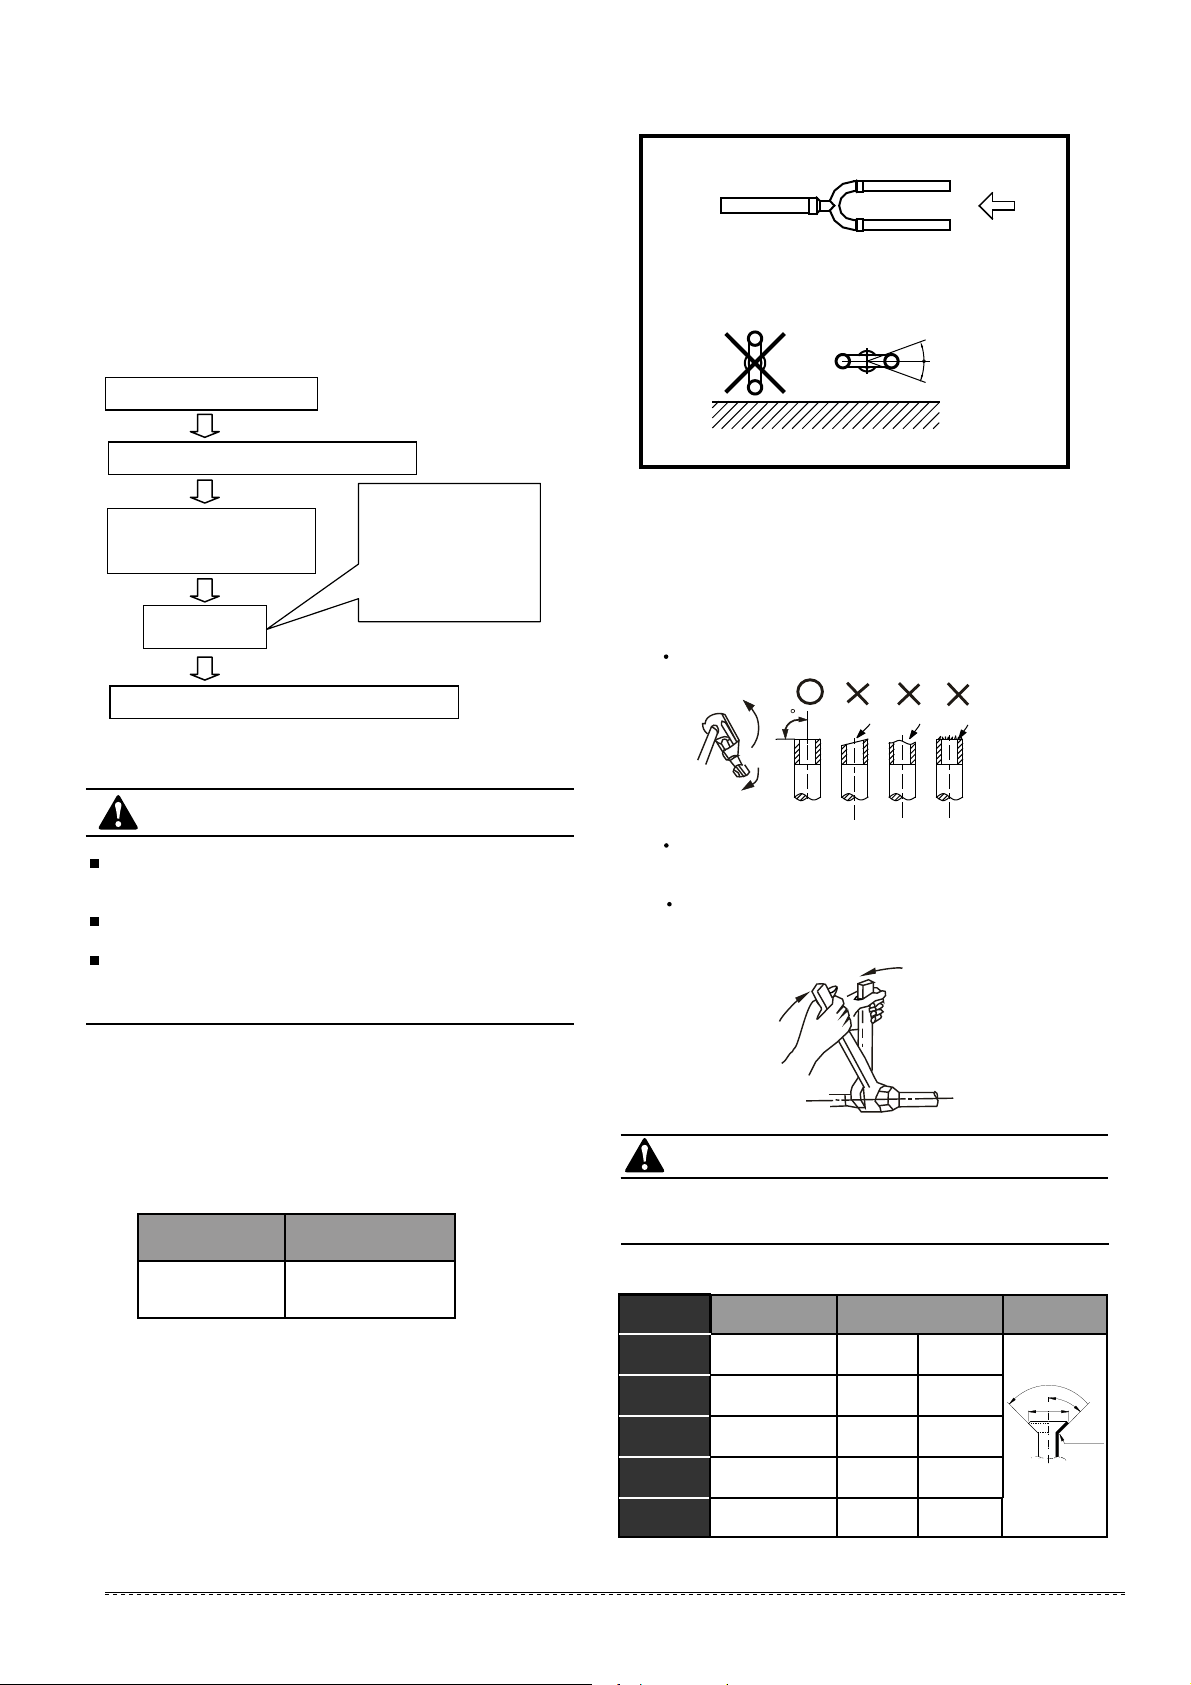
Fig.8-2
10°
10°
A
Fig.8-3
The branching pipe must be installed horizontally, error angle
of it should not large than 10°. Otherwise, malfunction will be
caused.
CorrectWrong
U-shaped branching pipe
Horizontal surface
A direction view
1)
Use the vacuum pump which vacuum level lower than
-0.1MPa and the air discharge capacity above 40L/min.
The outdoor unit is not necessary to vacuum, don’t open the
outdoor unit gas and liquid pipe shut-off valves.
Make sure the vacuum pump could result as -0.1MPa or
below after 2 hrs or above operation. If the pump operated 3
hrs or above could not achieve to -0.1MPa or below, please
check whether water mix or gas leak inside of the pipe.
8.4 Vacuum with vacuum pump
1)
2)
3)
CAUTION
8.5 Refrigerant amount to be added
Calculate the added refrigerant according to the diameter and
the length of the liquid side pipe of the outdoor/indoor unit
connection. The refrigerant is R410A.
Pipe size on
liquid side
Refrigerant to
be Added per meter
Φ6.35/0.25in
Φ9.52/0.375in
0.015kg/0.033lb
0.030kg/0.066lb
Table.8-4
Don’t mix up the different refrigerants or abuse the tools and
measurements which directly contact with refrigerants.
Don’t adopt refrigerant gas for air vacuuming.
If vacuum level could not get to -0.1MPa, please check whether
resulted by leakage and confirm the leakage site.If no leakage,
please operate the vacuum pump again 1 or 2 hrs.
Connect with vacuum pump
Perform the pump (last for 2 hrs or above)
When get the vacuum level
-0.1MPa, the pump should
keep running for 20-60 mins
Shut down the
vaccun pump
Place the vaccum state unused (1 hrs or above)
1. Close-off the valve of
vacuum meter.
2. Cut off the connection
between pressure meter
and vacuum pump.
3. Close the vacuum
pump.
CAUTION
Flaring
1
Cut a pipe with a pipe cutter. (Refer to Fig.9-1)
Table 9-1
Insert a flare nut into a pipe and flare the pipe.
Fig.9-1
(mm)
Ø6.35/0.25in 0.327in/8.3 0.343in/8.7
Ø9.52/0.375in 0.472in/12.0 0.488in/12.4
Ø12.7/0.5in 0.606in/15.4 0.622in/15.8
Ø15.9/0.626in
Ø19.1/0.725in
0.732in/18.6 0.748in/19.0
0.902in/22.9 0.917in/23.3
R0.4~0.8
45
°
±
2
90
°
±
4
A
min max
Pipe gauge
Tightening torque
Flare dimensin A
Flare shape
97.2~118.6 N.m
(990~1210 kgf.cm)
(630~770 kgf.cm)
61.8~75.4 N.m
49.5~60.3 N.m
(504~616 kgf.cm)
32.7~39.9 N.m
(333~407 kgf.cm)
14.2~17.2 N.m
(144~176 kgf.cm)
9.1 Expel The Air
Fasten the nut
2
Put the connecting pipes at the proper position,
wrench the nuts with hands then fasten it with
two wrenches simultaneously. (Refer to Fig.9-2)
Fig.9-2
Too large torque will harm the bellmouthing and too small will
cause leakage. Please determine the torque according to
Table 9-1.
9. REFRIGERANT PIPE CONNECTION
90
Lean crude burr
17
installation manual
For more details visit www.mrcool.com
Loading ...
Loading ...
Loading ...