Loading ...
Loading ...
Loading ...
General Cleaning
continued)
The door is heavy. For
safe, temporary storage, lay the door
flat with the inside of the door facing
down.
To Remove and Replace Oven Door
To Remove Oven Door:
1. Open the door.
2. Remove screw "A" located on the inside of the oven door near the
hinges (one on each side,)
3. Closethe door to the quarter-open position. Grasp the door firmly on
both sides and lift up and off the hinges.
4, To clean oven door, follow the instructions provided in the cleaning
chart under General Cleaning
Lift door straight off 2 door hinges
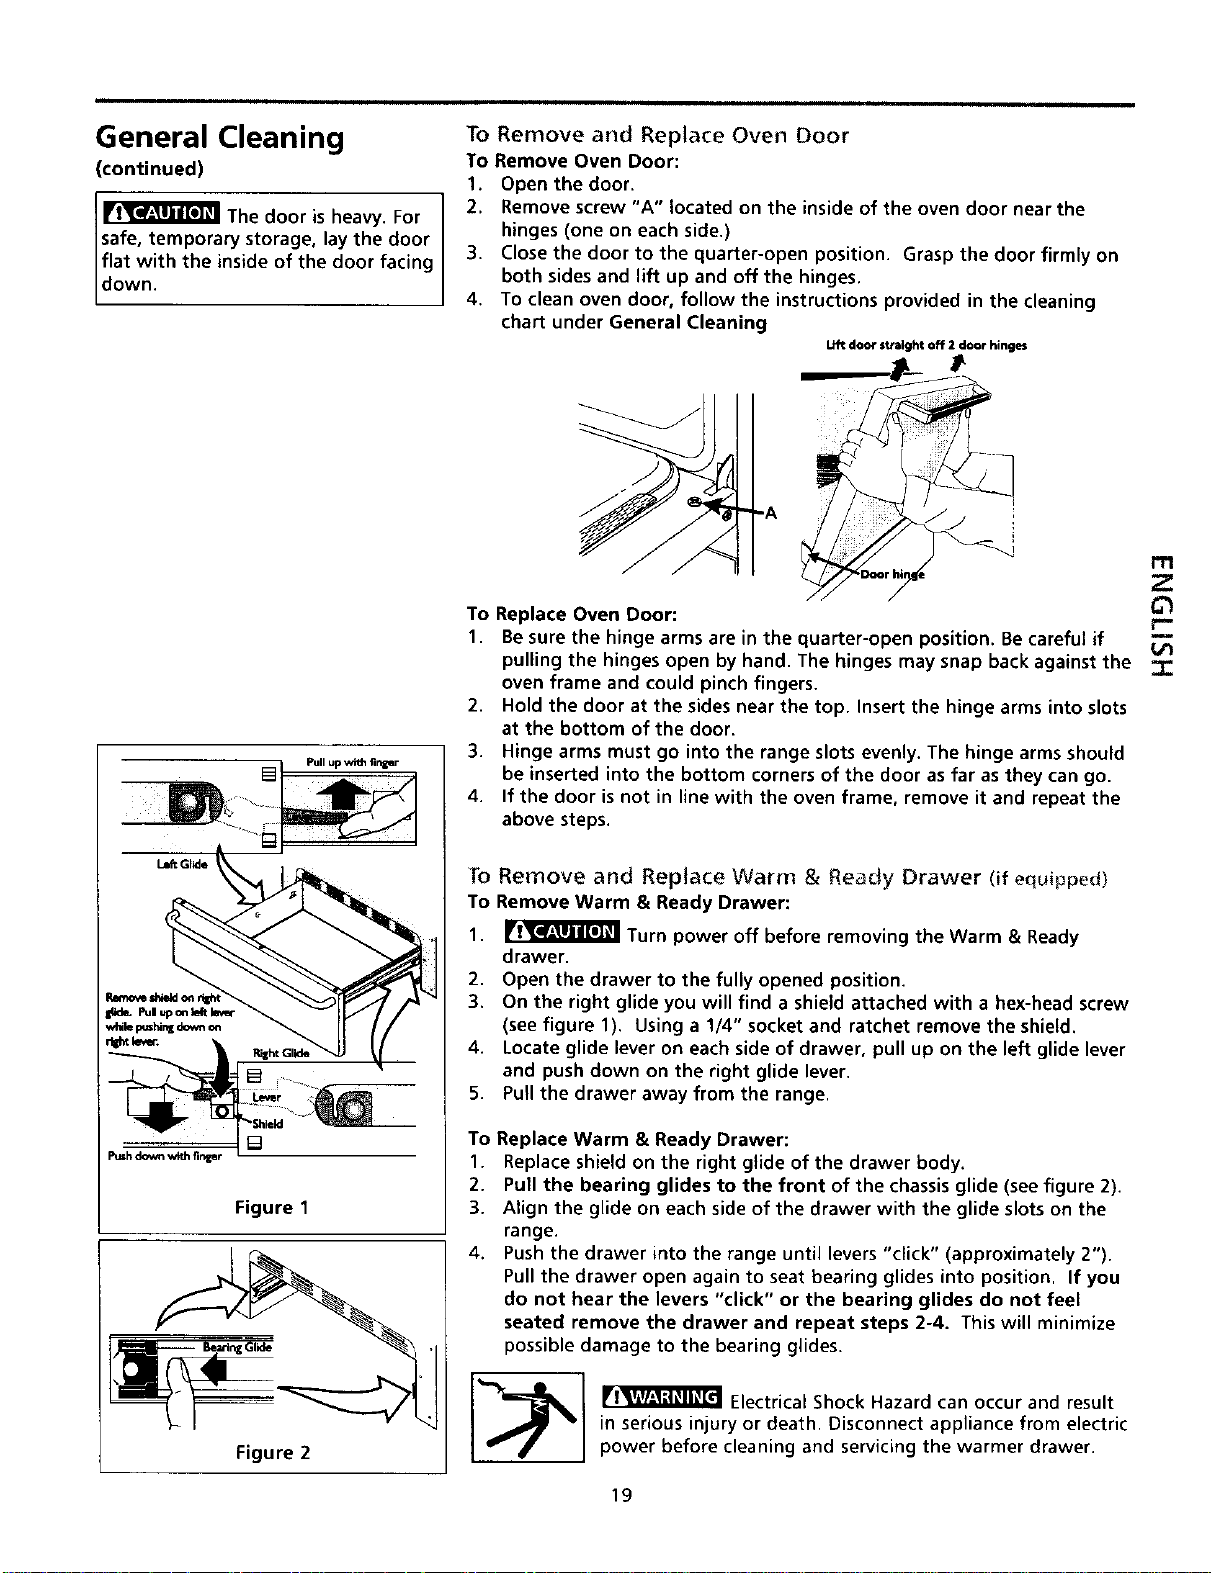
Pull upwith finer
Figure 1
-A
m
Z
m
To Replace Oven Door:
1. Besure the hinge arms are in the quarter-open position, Becareful if
pulling the hinges open by hand. The hinges may snap backagainst the I
oven frame and could pinch fingers.
2. Hold the door at the sides near the top. Insert the hinge arms into slots
at the bottom of the door.
3. Hinge arms must go into the range slots evenly. The hinge arms should
be inserted into the bottom corners of the door as far as they can go.
4. If the door is not in line with the oven frame, remove it and repeat the
above steps.
To Remove and Replace Warm & Ready Drawer (if equipped)
To Remove Warm & Ready Drawer:
1. _ Turn power off before removing the Warm & Ready
drawer.
2. Open the drawer to the fully opened position.
3. On the right glide you will find a shield attached with a hex-head screw
(see figure 1). Using a 1/4" socket and ratchet remove the shield.
4. Locate glide lever on each side of drawer, pull up on the left glide lever
and push down on the right glide lever.
5. Pull the drawer away from the range.
To Replace Warm & Ready Drawer:
1. Replaceshield on the right glide of the drawer body.
2. Pull the bearing glides to the front of the chassisglide (see figure 2).
3. Align the glide on each side of the drawer with the glide slotson the
range.
4. Push the drawer into the range until levers"click" (approximately 2").
Pull the drawer open again to seat bearing glides into position, If you
do not hear the levers "click" or the bearing glides do not feel
seated remove the drawer and repeat steps 2-4. Thiswill minimize
possible damage to the bearing glides.
_1 _lli,AV.,l;l_ll_[el Electrical Shock Hazard can occur and result
in serious injury or death. Disconnect appliance from electric
power before cleaning and servicing the warmer drawer.
19
Loading ...
Loading ...
Loading ...