Loading ...
Loading ...

Installation Manual
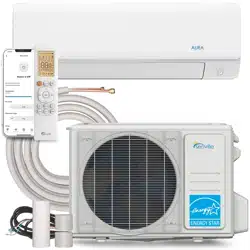
Accessories
...................... .....................................................................17
Unit Parts..............................................................................................19
Indoor Unit Installation .......................................................................20
1.Select installation location...........................................................................................................20
2.Attach mounting plate to wall....................................................................................................20
3.Drill wall hole for connective piping...........................................................................................20
4.
Prepare r efrigerant piping................................................................................................................22
5.Connect drain hose.......................................................................................................................24
6.Connect signal and power cables................................................................................................25
7.
W rap piping and cables...................................................................................................................26
8.
Mount indoor unit........................... ...................................................................................................27
Outdoor Unit Installation.........................................................................28
1.
Select installation location...............................................................................................................28
2.
Install drain joint.............................................................................................................................29
3.
Anchor outdoor unit.......................................................................................................................29
4.
Connect signal and power cables....................................................................................................30
Refriger ant Piping Connection.........................................................32
A.
Note on Pipe Length.....................................................................................................................32
B.
Connection Instructions –Refrigerant Piping..................................................................................32
1.
Cut pipe..................................................................................................................................32
2.
Remove burrs..........................................................................................................................33
3.
Flar e pipe ends........................................................................................................................33
4.
Connect pipes.........................................................................................................................33
Air Evacuation...................................................................................35
1.
Evacuation Instructions.................................................................................................................35
2.
Refrigerant Release.......................................................................................................................35
Electrical and Gas Leak Checks........................................................37
Packing and unpacking the unit .....................................................39
T
est Run.............................................................................................38
Installation Summary - Indoor Unit
..................................................18
3. Note on Adding Refrigerant..........................................................................................................36
Loading ...
Loading ...
Loading ...