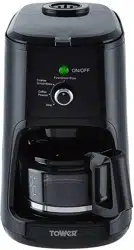
T13005
Bean to Cup
Coffee Maker
SAFETY AND INSTRUCTION MANUAL
PLEASE READ CAREFULLY
*Subject to registering your Extended Guarantee online at www.towerhousewares.co.uk.
2
GREAT BRITISH DESIGN, INNOVATION
AND EXCELLENCE SINCE 1912
Since the turn of the 20th century, Tower has been designing,
developing and manufacturing housewares and small
appliances used by millions of households throughout the
UK and beyond. During the 1960s, the rise in popularity
of pressure cooking saw Tower become the UK’s largest
producer of pressure cookers, right through into the late
1980s. In recent years the Tower brand has been reborn with
an exciting and varied range of housewares and electrical
appliances that have quickly reinstated the brand’s richly
deserved status as a household name.
Visit
www.towerhousewares.co.uk
for more fantastic products.
3
Contents:
Thank you for purchasing this Coffe Maker from the
Tower range.
It has been designed to provide many years of
trouble-free use.
Please read this manual carefully BEFORE using the
Coffe Maker for your own safety.
There are many benefits to using a Tower Coffee
Maker:
• Easy to use – just fill with water and your favourite
coffee blend
• Course and Fine Grinding options
• Makes 4 cups of fresh coffee at a time
• The warming plate keeps your coffee at the
perfect temperature
• 600ml capacity tank
• Compact design
1. Specifications
Components and
structure
2. Technical Data
3. Important Safety
Information
4. Before First Use
5. Using your Appliance
6. Troubleshooting
7. Recycling
8. Cleaning & Care
9. Wiring Safety
10. Warranty Information
11. Your Receipt
See back page for Customer
Service Information.
4
This box contains:
Instruction Manual
Tower Coffee Maker Unit
Glass Coffee jug (Carafe)
Re-usable Filter
Spoon
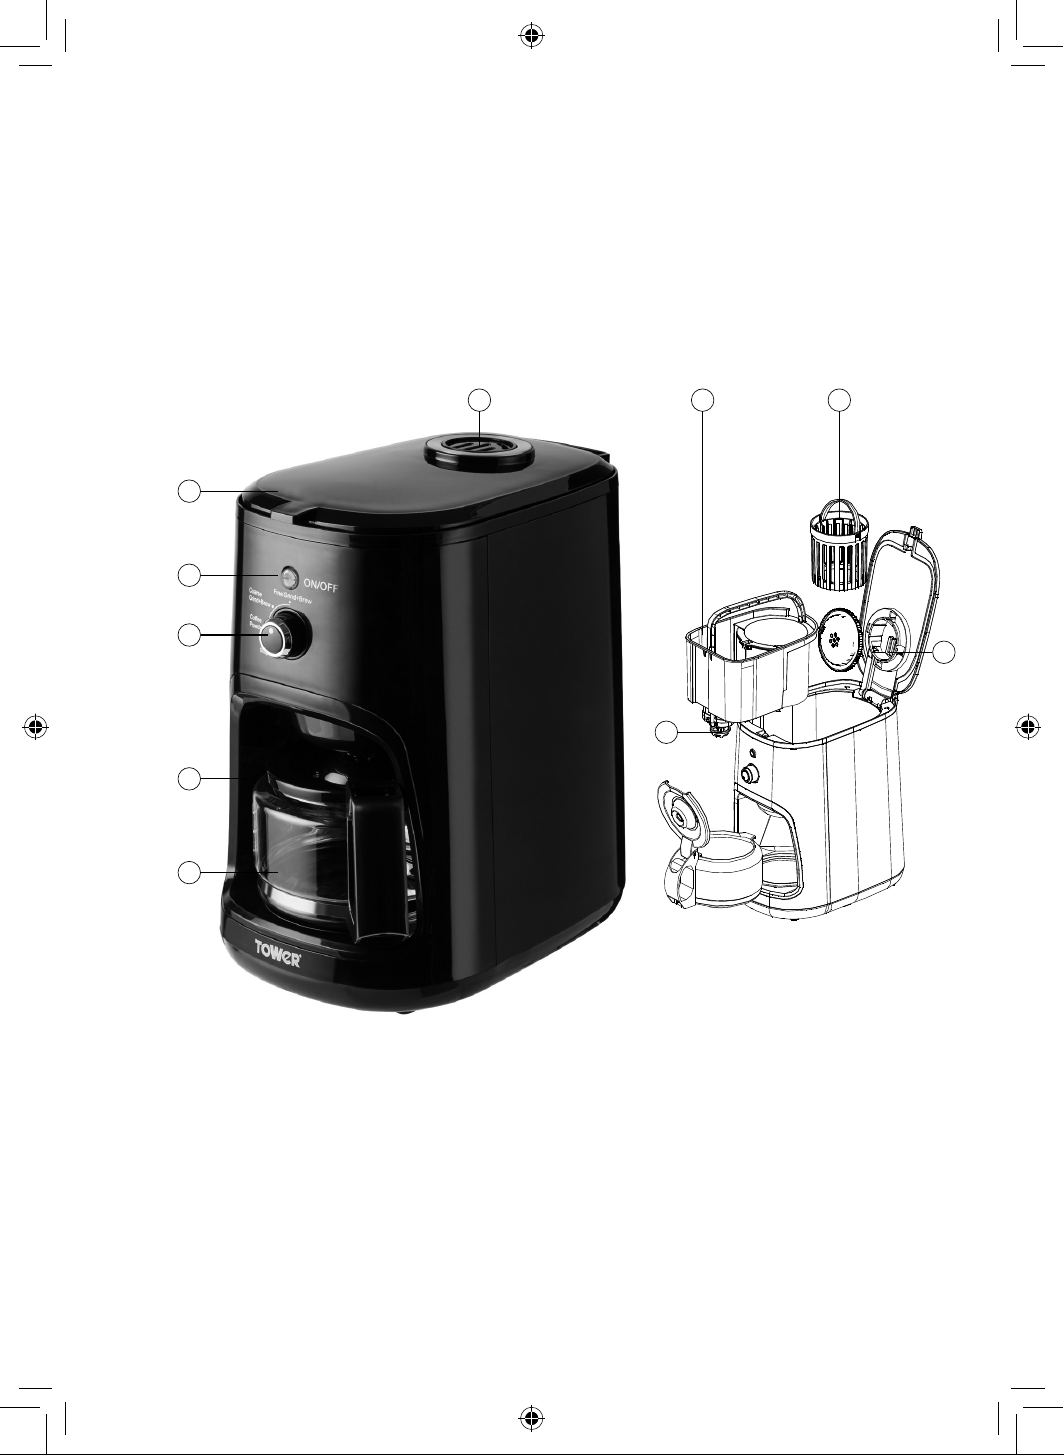
1. Glass Carafe
2. Carafe Lid
3. Control Dial
4. Power Button
5. Lid
6. Grinding Cavity
7. Water Tank
8. Brewing Basket
9. Anti-drip Valve
10. Bean Grinder
1 - Specifications:
Structure of your appliance:
2
1
3
4
5
6 8 7
9
10
5
Description: Bean to Cup Coffee Maker
Model: T13005
Rated Voltage: 220-240v
Frequency: 50/60Hz
Power Consumption: 900W
Documentation
We declare that this product conforms to the following product legislation in
accordance with the following directive(s):
2014/30/EU Electromagnetic Compatibility Directive.
2014/35/EU Low Voltage Directive.
2011/65/EU Restriction of Hazardous Substances Directive.
1935/2004/EC Materials & Articles in Contact With Food
(LFGB section 30 & 31).
RK Wholesale LTD Quality Assurance, United Kingdom.
2 - Technical Data:
Should you encounter problems or require a replacement part, contact the Tower
Customer Support Team: +44 (0) 333 220 6066.
Some spare parts may be ordered from the Tower website.
Your warranty becomes void should you decide to use non Tower spare parts.
Spare parts can be purchased from www.towerhousewares.co.uk
Guarantee for spare parts:
The spares and accessories are guaranteed for 1 year from date of purchase.
The main body and housing are guaranteed for the extended free warranty subject
to registration.
If any defect arises due to faulty materials of workmanship, the faulty products must
be returned to the place of purchase within 12 months from the date of purchase.
Refund or replacement is at the discretion of the retailer.

6
• To protect against fire,
electric shock and
injury to persons DO
NOT the immerse cord
or plug in water or any
other liquid.
• Close supervision is
necessary when any
appliance is used by or
near children.
• Unplug from outlet
when not in use and
before cleaning. Allow
to cool before putting
on or removing parts,
and before cleaning the
appliance.
• DO NOT operate any
appliance with a
damaged cord or plug
or after the appliance
malfunctions or has
been damaged in
any manner. Return
appliance to an
authorised service
facility for examination,
repair or adjustment.
• The use of an accessory
not recommended
by the appliance
manufacturer may
result in fire, electric
shock or injury to
persons.
• DO NOT use outdoors.
• DO NOT let the cord
hang over edge of table
or counter, or touch a
hot surface.
• DO NOT place on
or near a hot gas or
electric burner, or in a
heated oven.
• DO NOT use appliance
for other than intended
use.
• The container is
designed for use with
this appliance. It must
never be used on a
range top.
• DO NOT clean container
with cleansers, steel
wool pads, or other
abrasive material.
• To disconnect, turn any
control to “Off”, remove
plug from wall outlet.
Always hold the
• plug. But never pull the
cord.
Please read these notes carefully BEFORE using your
Tower appliance
3 - Important Safety Information:
7
• Scalding may occur if
the top lid is opened
during the brewing
cycles. Be careful not
to get burned by the
steam.
• Some parts of
appliance are hot when
operated, so DO NOT
touch with your hand
or make contact with
bare skin. Use handles
or knobs only.
• Never use the appliance
if the jug shows any
signs of cracks or has
a loose or weakened
handle. Only use the
jug with this appliance.
Use carefully as the jug
is fragile.
• This appliance is not
intended for use by
persons (including
children) with reduced
physical, sensory or
mental capabilities,
or lack of experience
and knowledge,
unless they have been
given supervision or
instruction concerning
use of the appliances by
a person responsible for
their safety.
• Children should be
supervised to ensure
that they DO NOT play
with the appliance.
• DO NOT set a hot
container on a hot or
cold surface.
• DO NOT let the coffee
maker operate without
water.
• This appliance is
intended to be used in
household and similar
applications such as:
• Staff kitchen areas in
shops, oces and
other working
environments;
• farm houses;
• By clients in hotels,
motels and other
residential type
environments;
• Bed and breakfast
type environments.
• This appliance has
been incorporated
with a grounded plug.
Please ensure the wall
outlet in your house is
properly earthed.
• In the unlikely event
the appliance develops
a fault, stop using
it immediately and
seek advice from the
Customer Support
Team:
+44 (0) 333 220 6066

8
1. Remove the parts from the packaging.
2. Prior to initial use run the Coffee Maker for the first time without coffee, filling
with water to the maximum mark.
3. Your appliance is now ready for normal use.
4. Dispose of the packaging in a responsible manner.
Brewing Your Coffee:
1. Open the top lid and fill the water tank with drinking water.
NOTE: Do not exceed the MAX LEVEL as indicated on the water tank. The
appliance can brew max 4 cups of coffee every brewing cycle.
2. Place the brewing basket into the grinding cavity and make sure the brewing
basket is correctly fitted into place.
3. Add coffee powder or beans to the brewing basket. Usually a cup, or two cups
of coffee, uses three spoons of coffee beans or powder, three cups of needs five
spoons, and four cups needs six spoons of coffee beans or coffee powder, but
you may adjust according to personal taste.
NOTE: The appliance will not work unless the top lid is closed and in its correct
position.
4. Insert the glass carafe onto the warming plate horizontally; ensure centre line
of the carafe aligns with anti-drip valve.
5. Plug the coffee machine into mains. The “Start” button illuminates in green
when the unit is powered.
WARNING: The control knob must point to “Stop” position before plug in.
For Coffee Powder:
• Turn the control knob to the “Coffee Powder” position, then press down the
“Start” button.
For Coffee Beans:
• Add your preferred coffee beans into brewing basket, and then replace the top
lid.
• Turn the control knob to “Coarse grind” or “Fine Grind” position based on your
preference, and then press down the “Start” button.
WARNING: Do not open the top lid during brewing process to avoid being
scalded.
• The appliance will begin to operate and brew coffee with the powder or beans.
At that time the “Start” button indicator light turns into red.
4 - Before First Use
5 - Using Your Appliance

9
• After it has finished grinding the appliance starts to brew coffee. After a while,
coffee flows into the glass carafe from the coffee outlet. The appliance will
automatically stop operating and switch to ‘keep-warm’ condition after it has
finished brewing. After keeping warm for 30 minutes, the appliance will cut off
automatically and the indicator light of the “Start” button will extinguish.
NOTE: During the brewing process, you can press the “Start” button again if you
want to make the appliance stop working. However, it is better not to avoid
stopping the unit during brewing process.
To continue brewing, you must firstly open the top lid and then close it again to
make the appliance continue operating.
NOTE: The appliance is designed with a pause-and-serve feature, if you wish, at
any time during the brewing cycle, you can temporarily remove the glass carafe
to pour and serve a cup of hot coffee.
The brewing cycle will not be interrupted and no coffee will drip from the
appliance. Simply replace glass carafe onto warming plate to restart the
brewing cycle, but do not remove the carafe for longer than 30s. Never return
the empty glass carafe onto warming plate when it is still warm.
Remove glass carafe to serve when the unit has finished brewing. For an
optimum coffee taste, serve it just after brewing.
NOTE: The volume of coffee brewed will be less than the amount of water first
added as some water will be absorbed during the brewing process.
CAUTION: Be careful when pouring from the Carafe that you do not angle it
beyond a safe angle. We recommend no more than 45 degrees from the vertical
position. Pour the coffee slowly until the glass carafe is empty, otherwise the
coffee may will rush into the lid, and flow out from two edges of lid. This will
result in a mess and could, if the liquid is still hot, cause scalding.
Always turn the coffee maker off and unplug the appliance when not in use.
Hints For Great Tasting Coffee:
1. A clean coffee maker is essential for making great-tasting coffee. Regularly
clean the coffee maker as specified in the “CLEANING AND MAINTENANCE”
section. Always use fresh, cold water in the coffee maker.
2. Store unused coffee powder in a cool, dry place. After opening a packet of
coffee powder reseal it tightly and store it in a refrigerator to maintain its
freshness.
3. For an optimum coffee taste, buy whole coffee beans and finely grind them
just before brewing.
4. Do not reuse coffee powder since this will greatly reduce the coffee flavour.
Reheating coffee is not recommended as coffee is at its peak flavour
immediately after brewing.
5. Clean the coffee maker when over-extraction causes oiliness. Small oil droplets
on the surface of brewed, black coffee are due to the extraction of oil from the
coffee powder.
6. Oiliness may occur more frequently if heavily roasted coffees are used.
10
Questions Answers
What kind of coffee
shall I use?
Any ground coffee! You can buy pre-ground coffee for filter ma-
chines from supermarkets in a variety of different flavours and
blends to suit your taste, you can grind your own coffee beans, or
you can buy beans from your favourite coffee shop and ask for them
to be ground to filter consistency.
How do you clean
the filter?
The filter can be washed out in warm water, however it must be
fully 100% dry prior to re-insertion into the product.
Can I put the carafe
in the microwave?
No, never put the carafe in the microwave, dishwasher or on a
hotplate
6 - Troubleshooting
DISPOSAL OF THE UNIT
Appliances bearing the symbol shown here may not be disposed of in domestic
rubbish. You are required to dispose of old electrical and electronic appliances like
this separately.
Please visit www.recycle-more.co.uk or www.recyclenow.co.uk for access to
information about the recycling of electrical items.
Please visit www.weeeireland.ie for access to information about the recycling of
electrical items purchased in Ireland.
The WEEE directive, introduced in August 2006, states that all electrical items must
be recycled, rather than taken to landfill.
Please arrange to take this appliance to your local Civic Amenity site
for recycling, once it has reached the end of its life.
7 - Recycling

11
CAUTION: Be sure to unplug this appliance before cleaning and let it cool down
completely. To protect against electrical shock, do not immerse cord, plug or
unit in water or liquid.
1. Clean all detachable parts such as the inner cover, brewing basket, water tank
etc. with warm water. Clean the small brush at one end of spoon after each
use.
2. Push the anti-drip valve upwards 3-4 times to empty the residual water.
3. Wipe external surface of product with a soft, damp cloth to remove stains.
4. Water droplets may build up in the area above the brewing basket and drip
onto the product base during brewing. To control the dripping, wipe off the
area with a clean, dry cloth after each use of the product.
5. Replace all parts for your next use of the appliance.
Brew Coffee With Coffee Powder:
To keep your coffee maker operating eciently, you should periodically clean away
scale deposits left by the water according to the water quality in your area and the
use,
We recommend removing mineral deposits as follows:
1. Fill the tank with water and de-scaler to the max level as indicated on the
water tank (the scale of water to de-scaler is 4:1. Make sure you refer to the
instructions that come with your descaling product. Please use “household de-
scaler”), you may also use the citric acid instead of the de-scaler (one hundred
parts of water and three parts of citric acid).
2. Insert the glass carafe onto the warming plate.
3. Make sure the brewing basket is clear of coffee beans or powder and is in place
in the unit.
4. Switch on the appliance and allow it to “brew” the de-scaling solution.
5. After the “brew” one-cup solution has run, switch off the appliance.
6. Leave the solution for 15 minutes and repeat step 3-5.
7. Switch on the appliance and run off the solution until the water tank is
completely empty.
8. Rinse by operating the appliance with water only at least 3 times. This will
ensure that all de-scaler is flushed from the system.
8 - Cleaning & Care
12
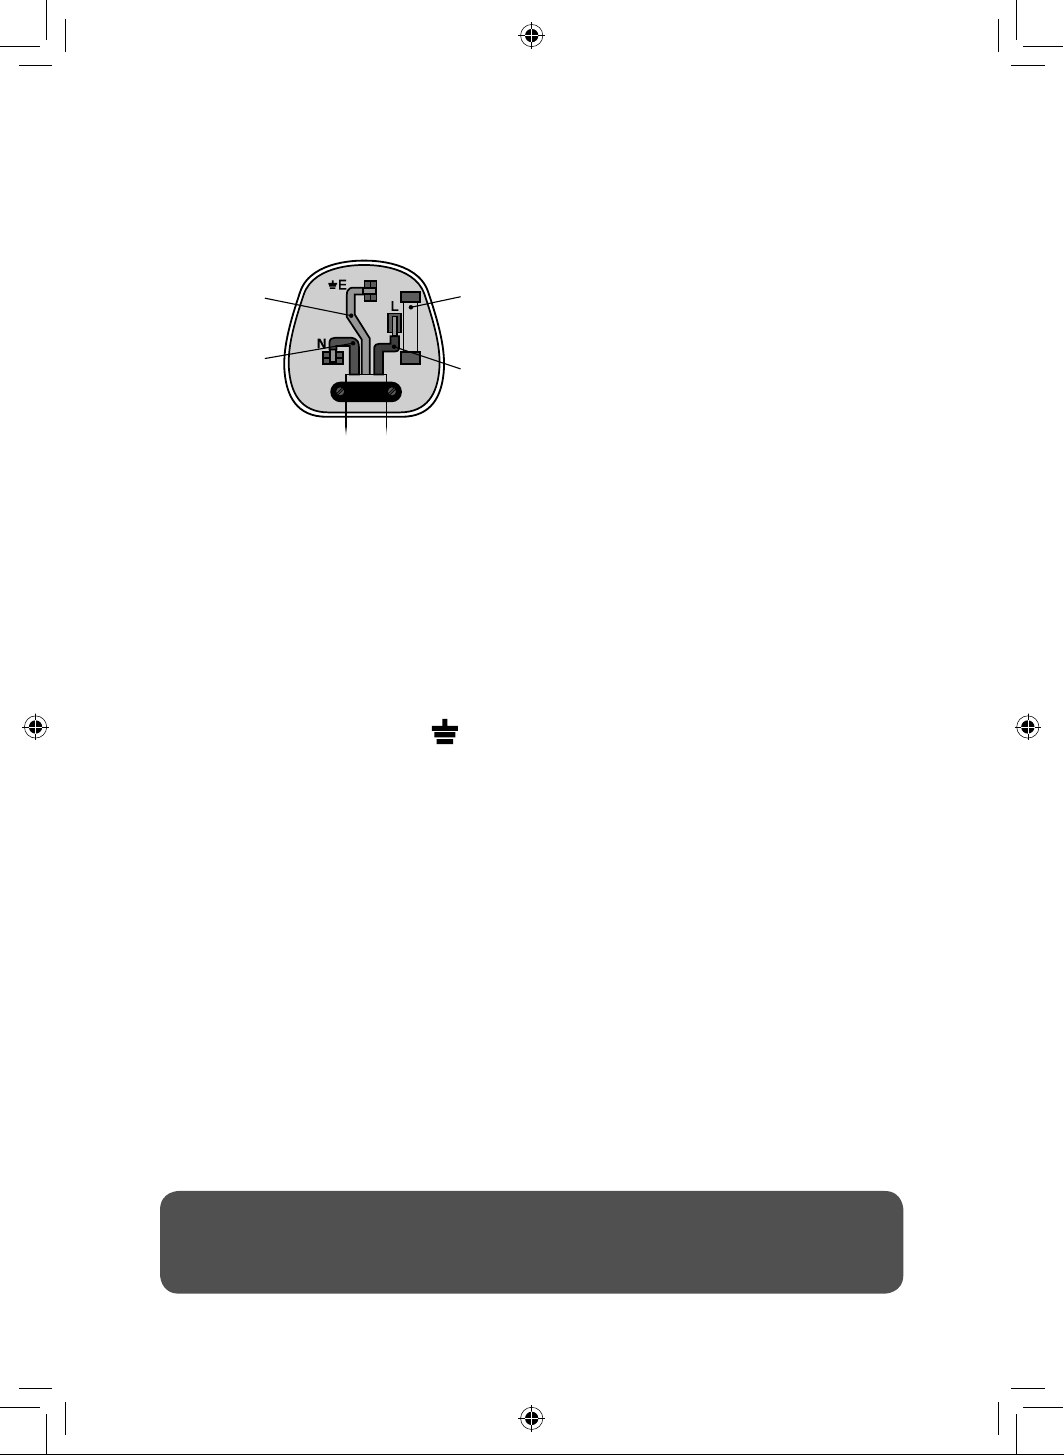
9 - Wiring Safety for UK Use Only
IMPORTANT
As the colours in the mains lead of this
appliance may not correspond with the
coloured markings identifying the terminals
in your plug, please proceed as follows:
The wires in the mains lead are labelled in
accordance with the following code:
Blue neutral [N] Brown live [L]
Green/Yellow [EARTH]
Plug Fitting Details (Where Applicable). The
wire labelled blue is the neutral and must be
connected to the terminal marked [N].
The wire labelled brown is the live wire and
must be connected to the terminal marked
[L].
The wire labelled green/yellow must be
connected to the terminal marked with the
letter [E].
On no account must either the brown or
the blue wire be connected to the [EARTH]
terminal.
Always ensure that the cord grip is fastened
correctly.
The plug must be tted with a fuse of the
same rating already tted and conforming to
BS 1362 and be ASTA approved.
If in doubt consult a qualied electrician who
will be pleased to do this for you.
Non-Rewireable Mains Plug
If your appliance is supplied with a non-
rewireable plug tted to the mains lead and
should the fuse need replacing, you must
use an ASTA approved one (conforming to
BS 1362 of the same rating).
If in doubt, consult a qualied electrician
who will be pleased to do this for you.
If you need to remove the plug - disconnect
it from the mains - then cut it off of the mains
lead and immediately dispose of it in a safe
manner. Never attempt to reuse the plug
or insert it into a socket outlet as there is a
danger of an electric shock.
FUSE
Earth
(Green/Yellow)
Fuse
Neutral
(Blue)
Live
(Brown)
WARNING:
This appliance MUST be earthed!
13
This product is guaranteed for 12 months
from the date of original purchase.
If any defect arises due to faulty materials
of workmanship, the faulty products must
be returned to the place of purchase.
Refund or replacement is at the discretion
of the retailer.
The Following Conditions Apply:
• The product must be returned to the
retailer with proof of purchase or a
receipt.
• The product must be installed and
used in accordance with the
instructions contained in this
instruction guide.
• It must be used only for domestic
purposes.
• It does not cover wear and tear,
damage, misuse or consumable parts.
• Tower has limited liability for incidental
or consequential loss or damage.
This guarantee is valid in the UK and Eire
only.
The standard one year guarantee is only
extended to the maximum available for
each particular product upon registration
of the product within 28 days of purchase.
If you do not register the product with us
within the 28 day period, your product is
guaranteed for 1 year only.
To validate your extended warranty, please
visit www.towerhousewares.co.uk and
register with us online.
Please note that length of extended
warranty offered is dependent on product
type and that each qualifying product
needs to be registered individually in order
to extend its warranty past the standard
1 year.
Extended warranty is only valid with proof
of purchase or receipt.
As a thank you for purchasing
one of our fantastic products,
we are offering you an extra
2 years peace of mind in
addition to your 1 year
guarantee.
To receive your extra 2 year
guarantee, register your
appliance online within 28
days of purchase by visiting
www.towerhousewares.co.uk
10 - Warranty

14
Ax your store receipt to this page for safe keeping.
11 - Your Receipt
15
NOTES

thank you!
We hope you enjoy your appliance for many years. As a thank you for
purchasing one of our fantastic products, we are offering you an extra
2 years peace of mind.
*To receive your extra 2 years guarantee, register your appliance online
within 28 days of purchase by visiting:
www.towerhousewares.co.uk
Should you have a problem with your appliance, or need any spare parts,
please call our Customer Support Team:
+44 (0) 333 220 6066
0819.V2
Your warranty becomes void should you
decide to use non Tower spare parts.
Spare parts can be purchased from
www.towerhousewares.co.uk