
Loading ...
Loading ...
Loading ...
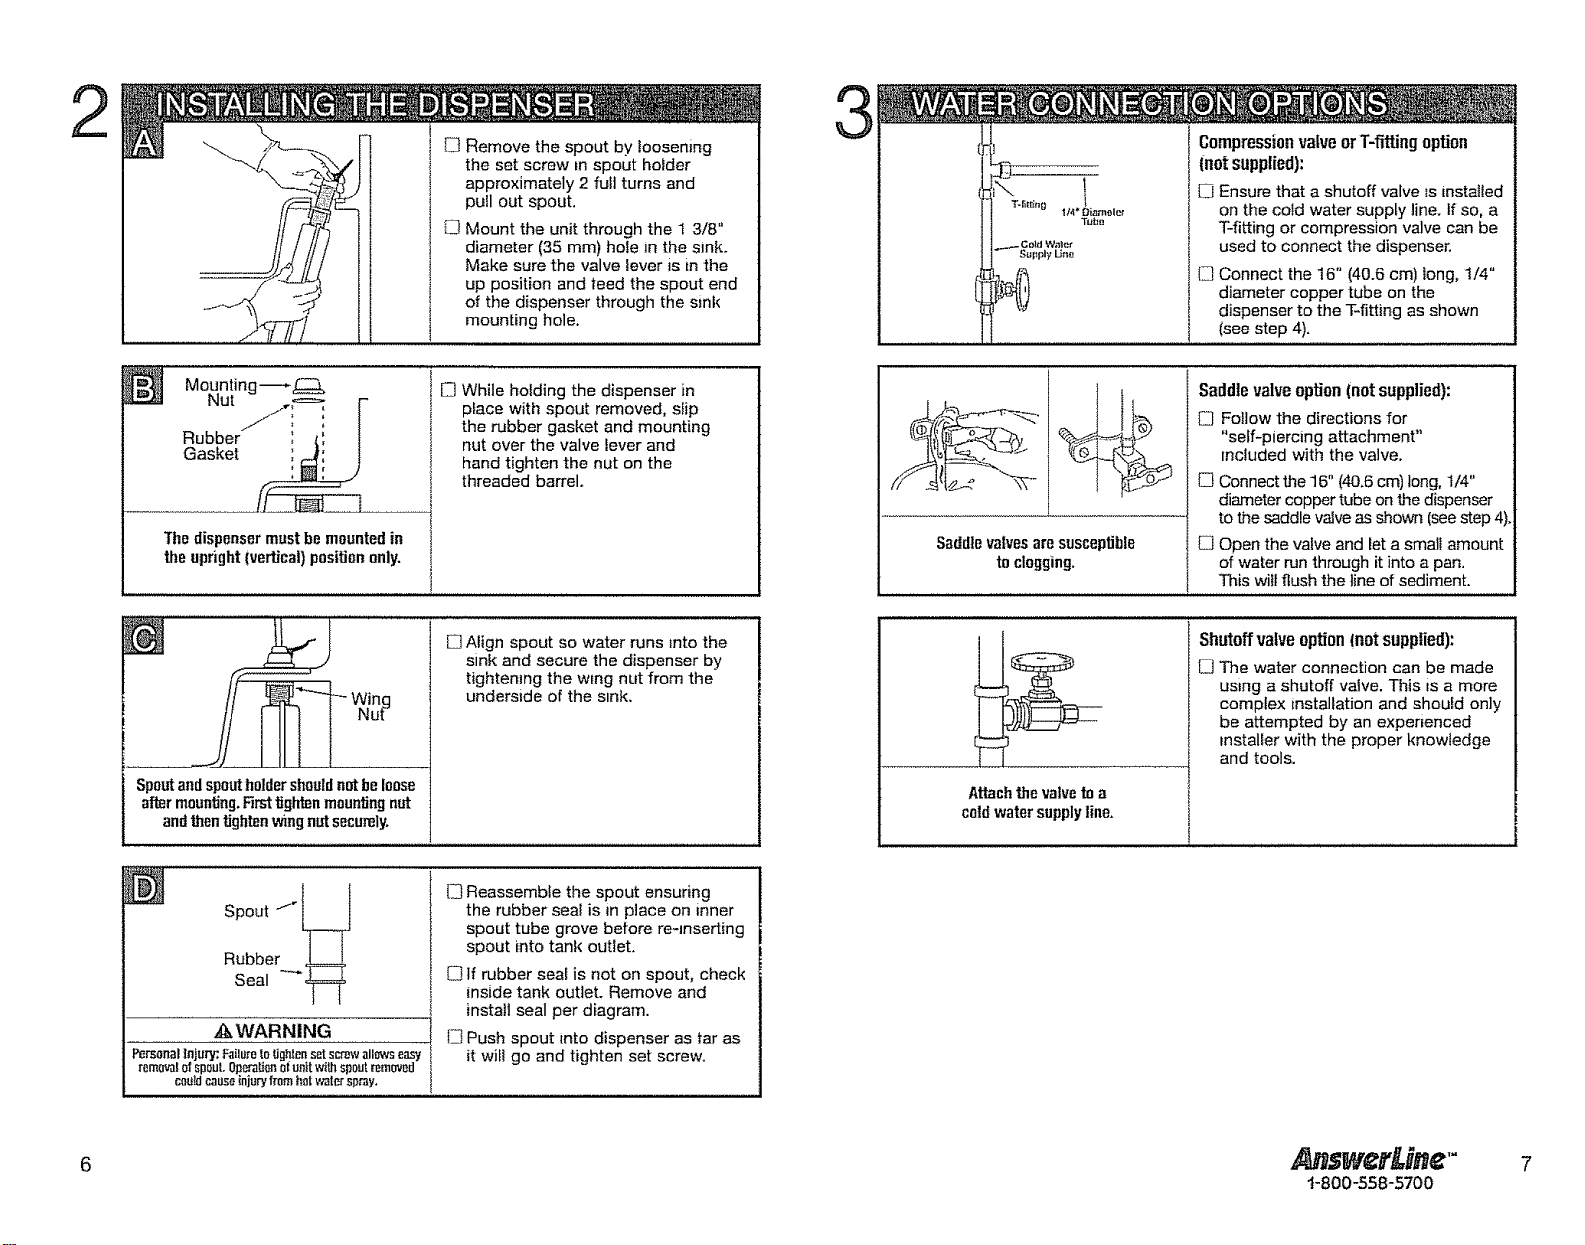
2
-"_\ _< _' H the set screw m spout holder
_w_ ) I approximately 2 furl turns and
_--qI pull out spout.
// _ _ I I _ Mount the unit through the 1 3/8"
// / /// I I diameter (35 mm) hole in the sink.
_-J_, // ' I t Make sure the valve lever is in the
--/- _ t I up position and teed the spout end
_ t t of the dispenser through the sink
/_/--_/ I1 mounting hole.
Mounting--_
F
Rubber !_! |
Gasket _ ',
Thedispensermust he mounted in
theuprightlvertJcat)positiononly.
Spoutand spout holder shouldnotbe loose
after mounting. [Firsttighten mounting nut
and then tighten w_ngnutsecurely.
[] While holding the dispenser in
place with spout removed, slip
the rubber gasket and mounting
nut over the valve lever and
hand tighten the nut on the
threaded barrel.
[] Align spout so water runs into the
sink and secure the dispenser by
tightening the wtng nut from the
underside of the sink.
D Reassemble the spout ensuring
the rubber seal is in place on inner
spout tube grove before re-inserting
spout into tank outlet.
[_ If rubber seal is not on spout, check
inside tank outlet. Remove and
install seal per diagram.
E] Push spout into dispenser as far as
it wilt go and tighten set screw.
Compressionvalve orT-fittingoption
Inot supplied):
CJEnsure that a shutoff valve Is installed
on the cold water supply line. If so, a
T-fitting or compression valve can be
used to connect the dispenser.
t_ Connect the 16" (40.6 cm) long, 1/4"
diameter copper tube on the
dispenser to the T-fitting as shown
(see step 4).
Saddle valves are susceptible
to clogging.
Saddlevalveoption (not supplied):
_-j Follow the directions for
"self-piercing attachment"
included with the vane.
{_qConnect the 16" (40.6 cm) long, t/4"
diameter copper tube on the dispenser
to the saddle valve as shown (see step 4).
C] Open the valve and let a small amount
of water run through it into a pan.
This wilt flush the line of sediment.
Attach the valve to a
cold water supply line,
Shutoff valve option(notsupplied):
El The water connection can be made
using a shutoff valve. This is a more
complex installation and should only
be attempted by an experienced
=nstalIer with the proper knowledge
I and tools.
. swerLia¢"
1-800-558-5700
6 7
Loading ...
Loading ...
Loading ...