
Loading ...
D ForyoursatistacUonandsafety,readat1ins_-ucUons,cauUons,warningsanddangersbeforeinstalling
orusingthisinstanthotwaterdispensec
D Thisparticularunitisnotintendedforcommercialuse.
[_ Makesurethatat!electricalwiringandconnectionsconformto localcodes.
D Astandard115wo}tgroundedeleclncalouUetisrequiredunderthesink1orthedispenserseiectric_power.
D Thewalloutletpoweringyourdispensermusthavepowersuppliedtoit continuously.
D Thisoutletmustbefusedandshoutdnotbecontrolledbythesamewallswitchthatoperatesthe
disposer,unIessyouhaveaSinkTopSwitch'"fromInSinkErator°
D Movingpartsinsidethetankcauengarattlingnoiseisnormal.
[_ Thisunitdoesnotcontainadrainpiugandshouldnotbeinstaliedwhereperiodicdraining_srequired,
suchassummerhomes.
Equipment You May Need:
D HoLe punch _ Drill
[] HoLe saw [] Level
[] Basin wrench
Ifyou_ntendtousethesprayerholemyoursinktotyourdispenser,youmayneeda basinwrenchand
a1/8" plugor a 1/4"cap(notsupplied)forthefaucetsprayhoseline.SeeStepI-B,
t1youneedtocutamountingholeinyourstainlesssteelsink,youmayneedat_" - 1#' holesaw
madetotcuttingstainlesssteeloraholepunch.Consultaprotesmonafifyouaredrillingroteasurface
otherthanstainlesssteel
Wing Nut Mounting Nut
BrassNut
RubberGasket Ferrule
These instructions are separated into main sections, indicated by numbers and subsections,
indicated by capital letters. The manual is setup this way to al!ow you to take a break at any
point after completing a section or subsection without affecting the installation process.
What you'll see in the
instruction manual:
._, Provides a step-by-step narrative describing the installation step, with check boxes that
can be marked as you progress through the insta!Iation.
_ Contains simple illustrations that prowde visual instruction to support the narrative.
,_ CAUTIONS, WARNINGS and DANGERS that will requ,re your attention dunng the step.
_An imminentlyhazardoussituation,which,it'notavoided,will resultin deathorseriousznju_, l
I '_WARNING !Apoten_a_yhaza_doussitu_"_n_w_Ich_Ifno_av_I_e_co_l_re_ul_in_ath_r_e_e_s`_j_/_I
I _ CAUTION IApotentiallyh_ardous s@a_on,v4_ich,if notavoided,mayresultin minoror moderateinjury..I
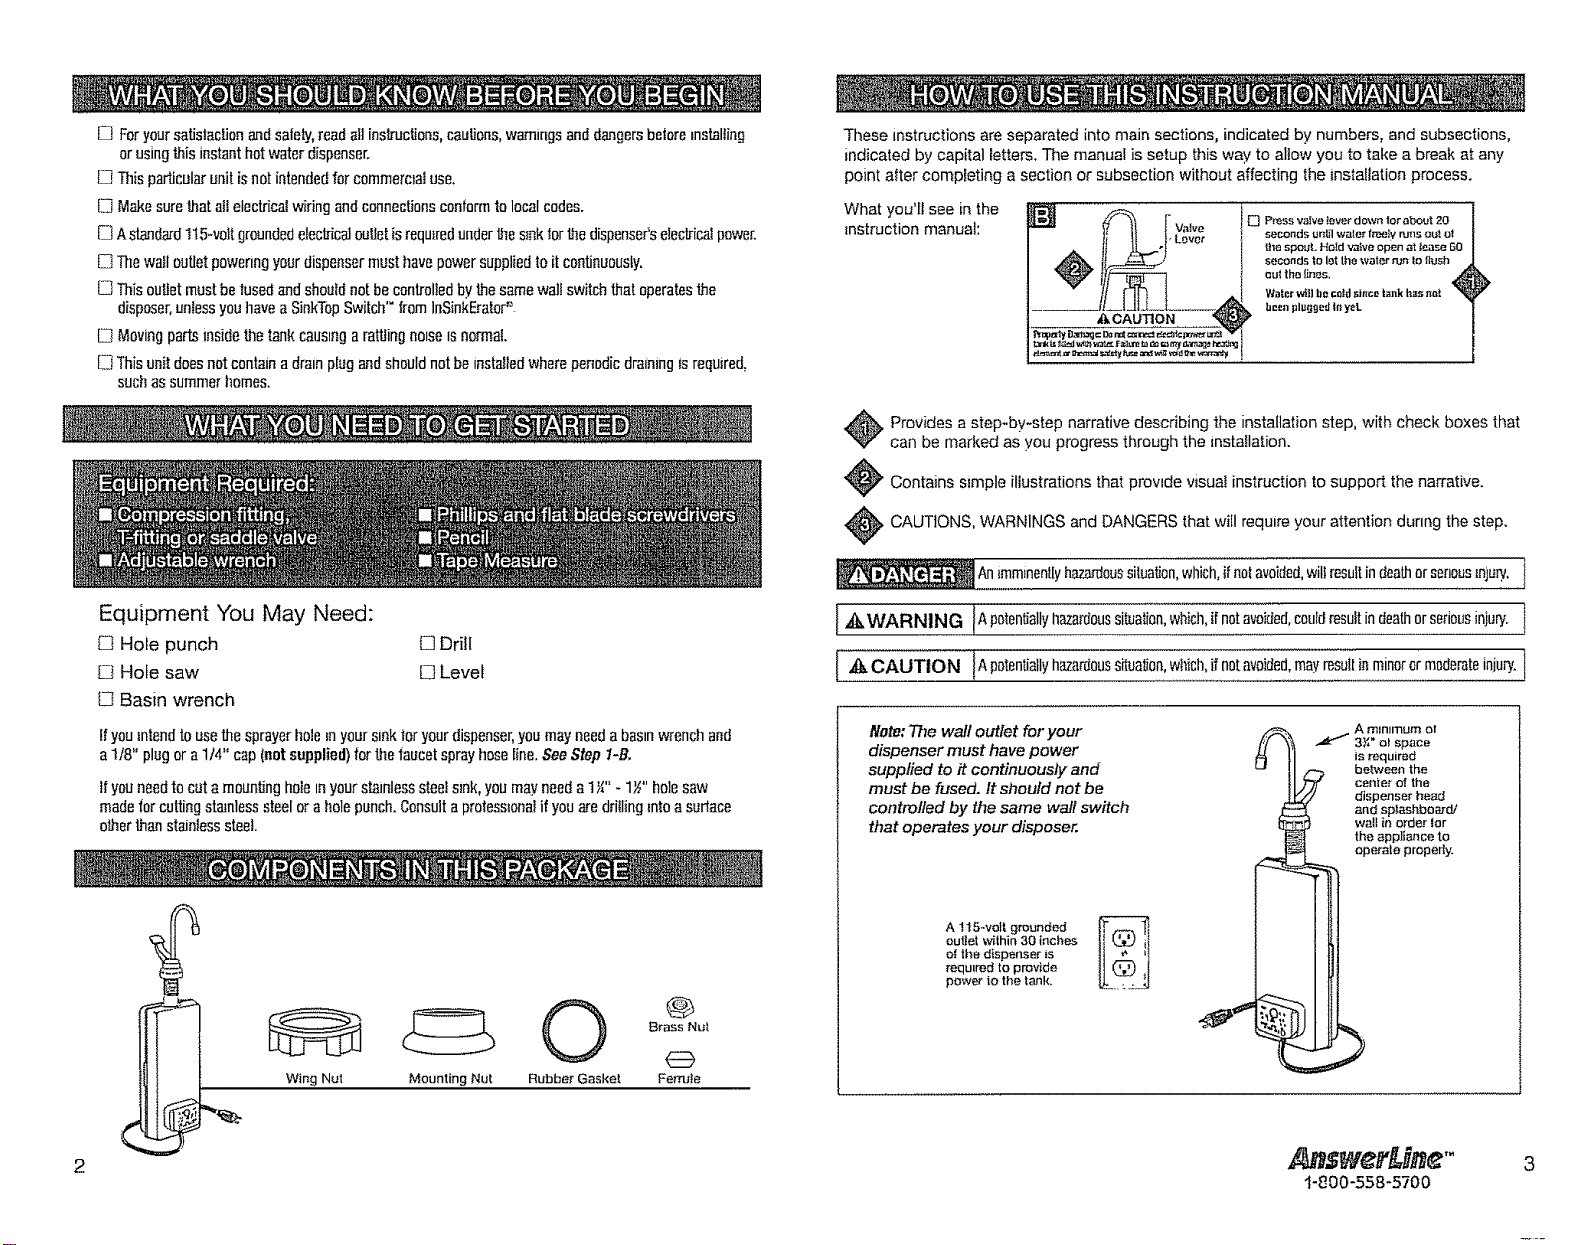
Note:The wall outlet for your
dispenser must have power
supplied to # continuously and
must be fused. It should not be
controlled by the same wall switch
that operates your disposer.
A mlnlmurn ol
.._ 3};" o| Space
is required
between the
center ot the
dispenser beau
and sp_ashbo_d/
wall in order for
the app]iance to
operate propeIIy.
A t15welt g_unded J_.._._ 11
outJetwithin30inches
o{thedispenser_s
required to provide
power iothetank.
1-800-558-5700
3
Loading ...
Loading ...
Loading ...