Loading ...
Loading ...
Loading ...
10
Getting Started
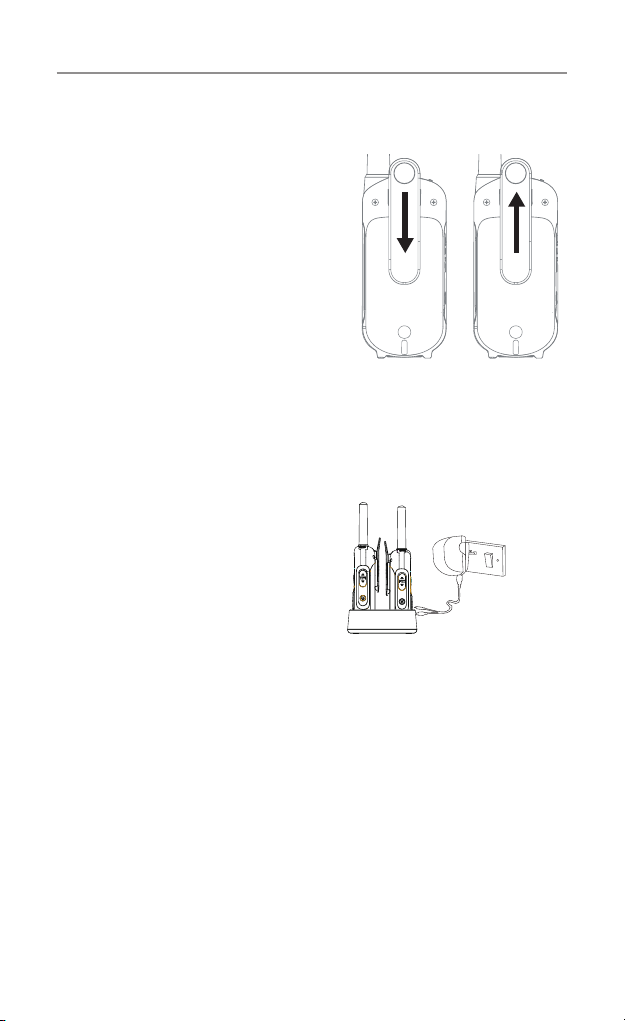
UHF2500 Battery Charging
a. Connect the supplied USB “Y”
cable to the AC power adaptor
then connect one of the mini
USB connectors to the charge
pod, place the radios in the
charge pod as indicated.
DO NOT use the second mini
USB connector for any other
application.
b.IfthechargePodisnot
available then the 2 mini USB
connectorscanbettedtothe
mini USB connectors found under the protective cover on the top
of the UHF2500 radios.
c.PlugACadaptorintoanACwallsocketandturnon,theLEDs
on the charge pod will turn on and the battery Icon on the radio
display will start ashing to indicate that the radios are charging.
The batteries can take more than 12 hours to fully charge.
Installing the Belt Clip
Slide the Belt clip into the slot as
shown in Figure 1.
A “click” indicates the Belt clip is
locked into position.
Removing the Belt Clip
PulltheBeltCliplatchforward
(away from the unit)
While pulling the Belt Clip latch,
push up the Belt Clip as shown in
Figure 2.
Figure 1
Figure 2
Belt Clip latch
Important: Always turn off
the units when charging.
This will shorten the
charging time.
Main socket
DO NOT USE THE SECOND MICRO USB
CABLEFORANYOTHERPURPOSE
WHEN THE OTHER ONE IS USED IN
THECHARGERPOD.
Loading ...
Loading ...
Loading ...