Loading ...
Loading ...
Loading ...
ChangingtheEngineOil
Change oil after the first 5 to 8 hours of use, and
every 50 hours thereafter. Change oil every 25 hours
when operating the engine under heavy load or in high
temperatures.
WARNING: If the engine has been recently
run, the engine, muffler and surrounding
metal surfaces will be hot and can cause
burns to the skin. Allow the tractor to cool and
use caution when removing
IMPORTANT:The oil filter should be changed at every
oil change interval.
To complete an oil change, proceed as follows:
Drainingthe 0il
Run the engine for a few minutes to allow the oil in the
crankcase to warm up. Warm oil will flow more freely
and carry away more of the engine sediment which may
have settled at the bottom of the crankcase. Use care to
avoid burns from hot oil.
,
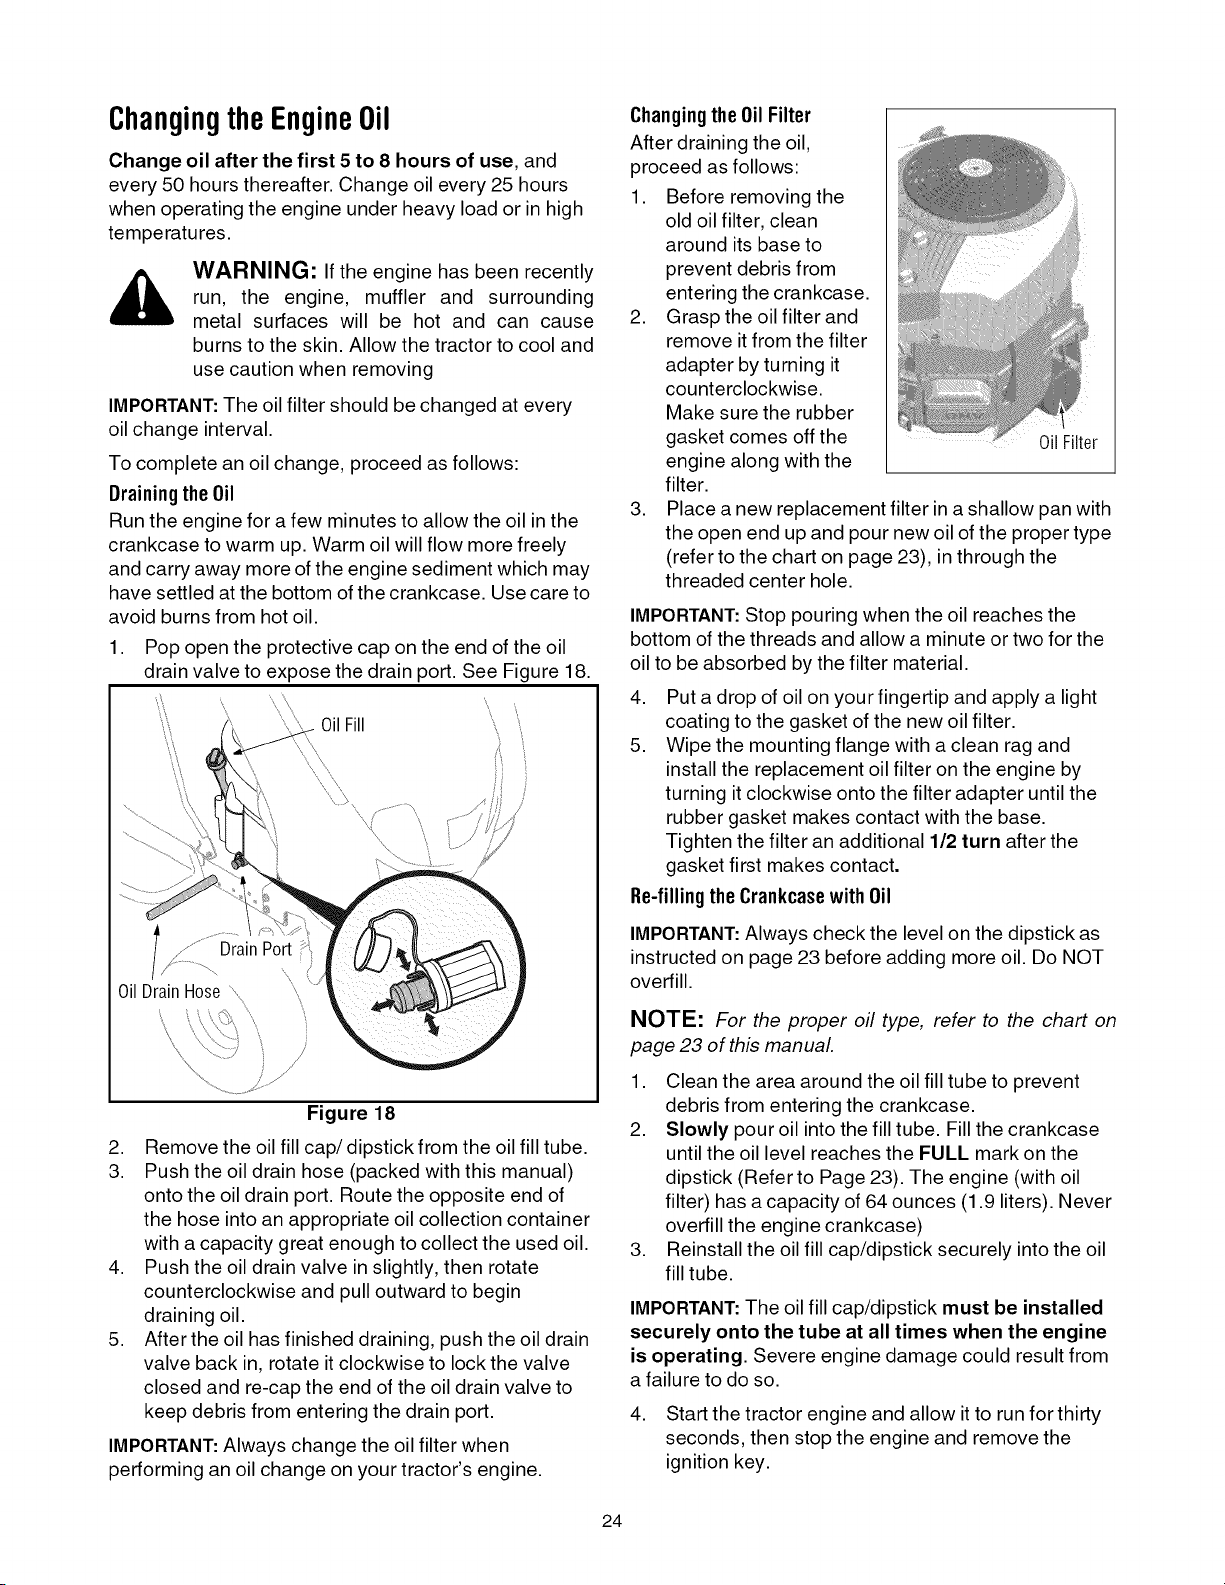
Pop open the protective cap on the end of the oil
drain valve to expose the drain port. See Figure 18.
0il Fill
Port ?_,
\
OilDrainHose\, '\
/
Figure 18
2. Remove the oil fill cap/dipstick from the oil fill tube.
3. Push the oil drain hose (packed with this manual)
onto the oil drain port. Route the opposite end of
the hose into an appropriate oil collection container
with a capacity great enough to collect the used oil.
4. Push the oil drain valve in slightly, then rotate
counterclockwise and pull outward to begin
draining oil.
5. After the oil has finished draining, push the oil drain
valve back in, rotate it clockwise to lock the valve
closed and re-cap the end of the oil drain valve to
keep debris from entering the drain port.
IMPORTANT: Always change the oil filter when
performing an oil change on your tractor's engine.
Changingthe 0il Filter
After draining the oil,
proceed as follows:
1.
,
,
Before removing the
old oil filter, clean
around its base to
prevent debris from
entering the crankcase.
Grasp the oil filter and
remove it from the filter
adapter by turning it
counterclockwise.
Make sure the rubber
gasket comes off the OilFilter
engine along with the
filter.
Place a new replacement filter in a shallow pan with
the open end up and pour new oil of the proper type
(refer to the chart on page 23), in through the
threaded center hole.
IMPORTANT:Stop pouring when the oil reaches the
bottom of the threads and allow a minute or two for the
oil to be absorbed by the filter material.
4. Put a drop of oil on your fingertip and apply a light
coating to the gasket of the new oil filter.
5. Wipe the mounting flange with a clean rag and
install the replacement oil filter on the engine by
turning it clockwise onto the filter adapter until the
rubber gasket makes contact with the base.
Tighten the filter an additional 1/2 turn after the
gasket first makes contact.
Re-fillingthe Crankcase with Oil
IMPORTANT: Always check the level on the dipstick as
instructed on page 23 before adding more oil. Do NOT
overfill.
NOTE: For the proper oil type, refer to the chart on
page 23 of this manual.
1. Clean the area around the oil fill tube to prevent
debris from entering the crankcase.
2. Slowly pour oil into the fill tube. Fill the crankcase
until the oil level reaches the FULL mark on the
dipstick (Refer to Page 23). The engine (with oil
filter) has a capacity of 64 ounces (1.9 liters). Never
overfill the engine crankcase)
3. Reinstall the oil fill cap/dipstick securely into the oil
fill tube.
IMPORTANT: The oil fill cap/dipstick must be installed
securely onto the tube at all times when the engine
is operating. Severe engine damage could result from
a failure to do so.
4. Start the tractor engine and allow it to run for thirty
seconds, then stop the engine and remove the
ignition key.
24
Loading ...
Loading ...
Loading ...