Loading ...
Loading ...
Loading ...
16
2. Drill screwholes in the flanges, being sure to pierce the
hood top.
3. With sheet-metal screws, fasten the AHT10 unit to the
hood.
4. With foil tape/duct tape, seal the AHT10 unit’s base.
12”-Tall Hood, Rear-Vent Configuration
This procedure instructs you how to install the AHT10 tran-
sistion kit for 12”-tall rear-vent configuration, comprising
Models 3012, 3612, and 4812.
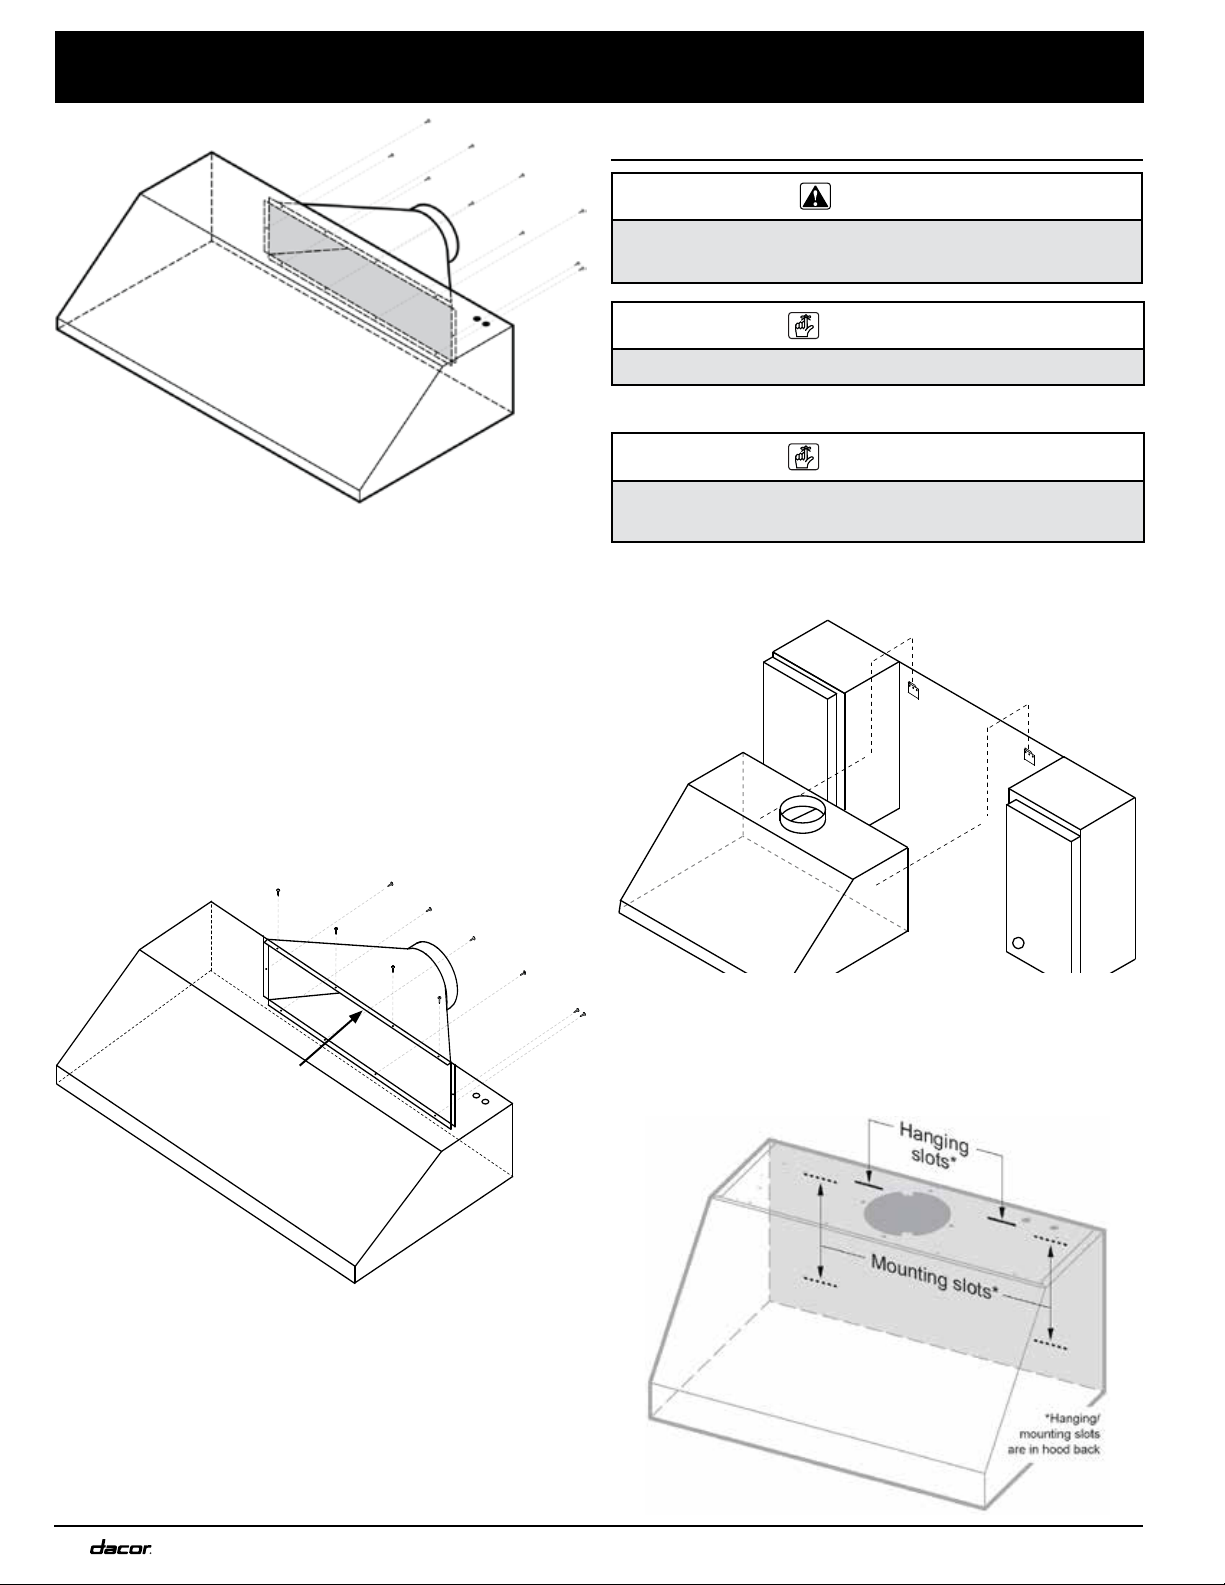
1. Center the transition kit over the duct collars, laying the
unbent flange on the hood’s top edge.
2. Drill screwholes in the flanges, being sure to pierce the
hood top/back.
3. With sheet-metal screws, fasten the AHT10 unit to the
hood.
4. With foil tape/duct tape, seal the AHT10 unit’s base.
Installation Instructions
Unbent flange
overlaps top
of hood
Rear-Vent
Configuration
Hanging the Range Hood
WARNING
Hanging the range hood requires two people. Do not lift
the hood unassisted.
IMPORTANT
Take care not to scratch/damage the hood.
1. Remove the plastic film from the hood.
IMPORTANT
Hanging slots in the hood back engage the holding brack-
ets to support the hood temporarily during installation.
2. Lift, and slip the hood onto the holding brackets through
the hanging slots in the hood back.
Holding brackets
3. Adjust the hood into its final position.
4. Mark the spot by drawing in a mounting hole in the back
of the hood. (This is where a screw will hold the hood to
the wall stud or concrete anchor.)
Loading ...
Loading ...
Loading ...