Loading ...
Loading ...
Loading ...
11
Installation Instructions
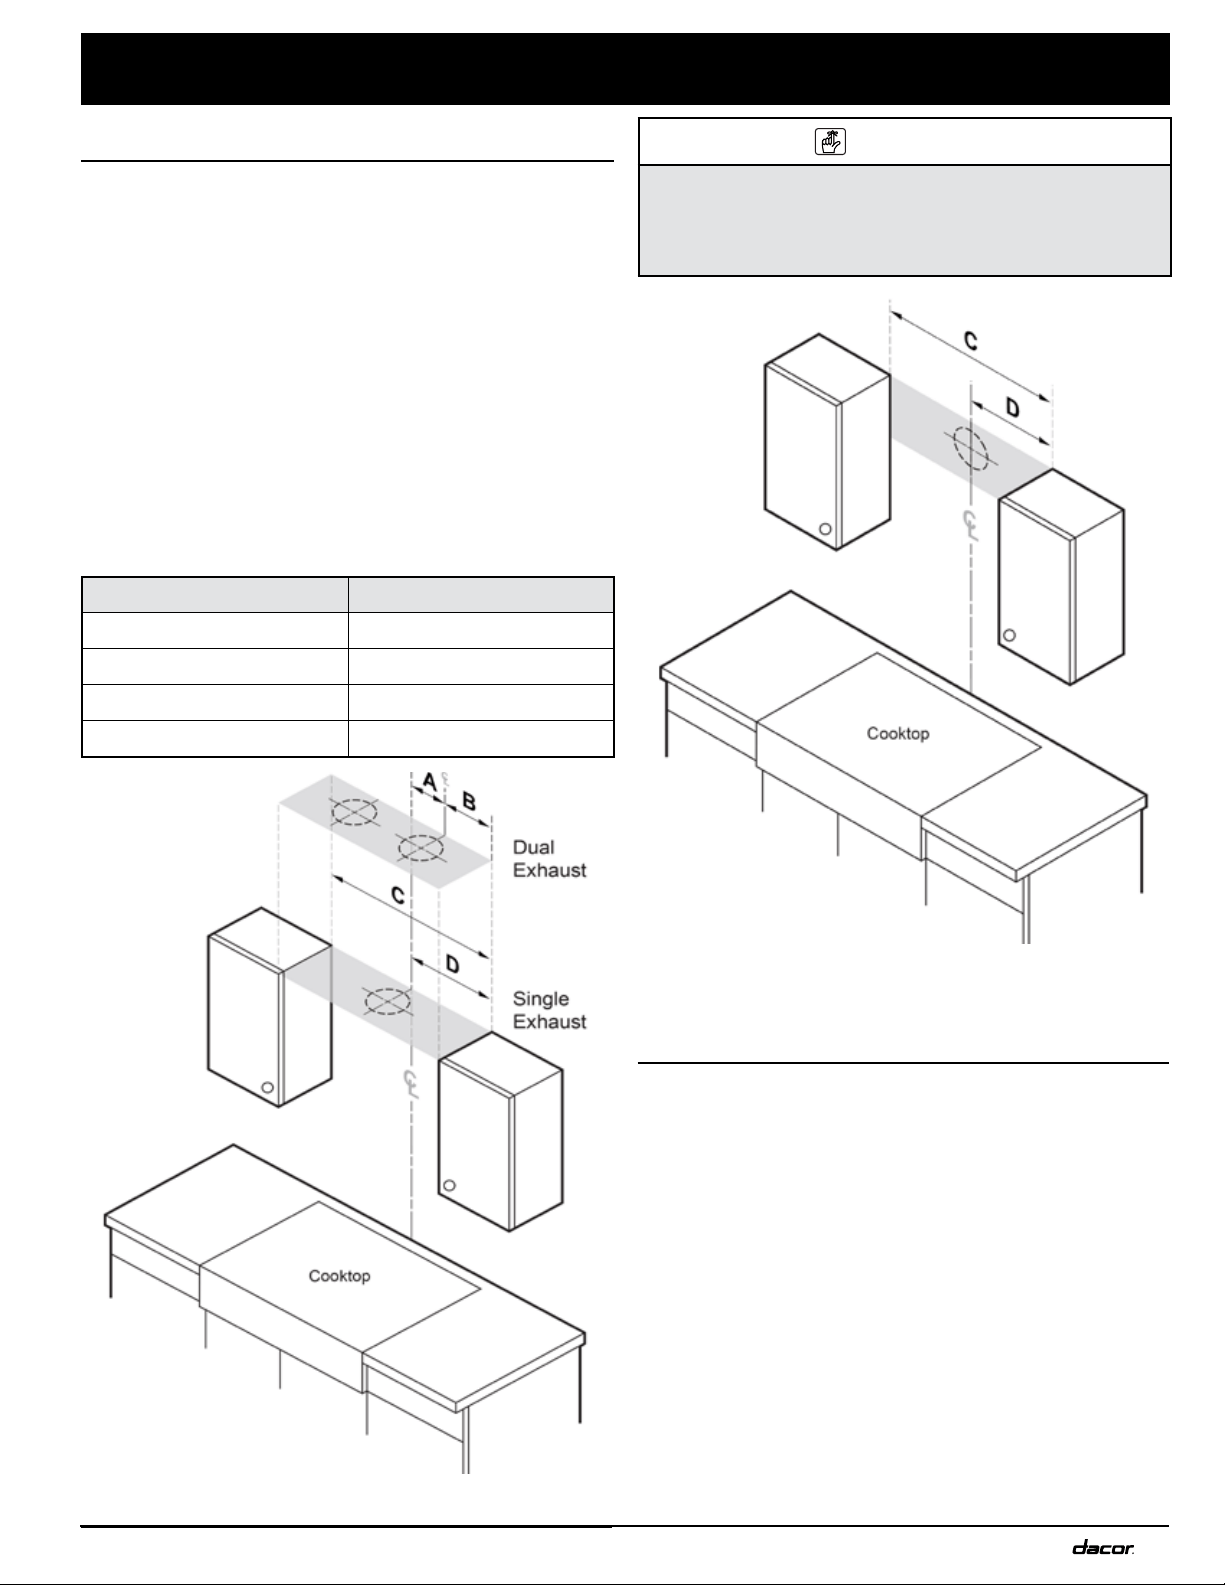
Marking the Centerlines
These measurements and marks are for centering and
leveling the hood, marking the duct cutouts, and installing
the holding brackets (which brackets temporarily support
the hood as you mount it permanently).
Have a marking tool, tape measure, and level ready.
1. Position the hood as it will be when installed (e.g., for a
top-vent installation, set the hood with the vents on top).
2. Measure the distance from the edge of the hood to the
center of the exhaust port.
3. Transfer that measurement to the wall (for a rear vent),
or overhead (for top vent). Measure the X and Y axes to
find the centerline.
4. Extend the line down 10 inches (25.4 cm).
5. Cut a hole 1 inch larger than the duct. (Dual-exhaust
models require two holes.)
Top-Exhaust Centerline (single-/dual-format)
Measurement Location Measurement: in. (cm)
A
9 7/8 in. (25.08 cm)
B
14 1/8 in. (35.88 cm)
C
48 in. (121.92 cm)
D
24 in. (60.96)
Rear-Exhaust Centerline
IMPORTANT
Users of the dual-exhaust format will need to install the
AHT10 Dual-to-Single Transition Kit. (See the section
Using the Dual-to-Single Transition Kit #AHT10 on Page
12 for installation instructions.)
Installing the Holding Brackets
IMPORTANT: To avoid alignment problems during final
installation, do not place the holding brackets above/below/
off the centerline.
1. Mark the holding bracket’s horizontal centerline 2 1/8
inches (54 cm) below the top of the hood.
2. Next, mark the holding bracket’s two vertical centerlines.
Refer to the table and image on right.
3. Measure and mark the “F” distance.
4. Lay the bracket against the wall, and align the
screwholes with the horizontal centerline.
Be sure to use anchors/screws that can support the
hood; be sure to properly reinforce drywall installations.
5. Mark the two holes in the bracket.
6. Drill those two holes for screws or anchors.
7. Attach the brackets securely to the wall.
Loading ...
Loading ...
Loading ...