Loading ...
Loading ...
Loading ...
9
Preparation and Setup
To determine your maximum length:
Start with the your duct run’s total max. length, then sub-
tract all of the ductwork equivalent lengths. (See the chart.)
Ductwork Equivalent Lengths
Piece Subtract
8” 90° Elbow 7 feet
8” 45° Elbow 3 feet
10” 90° Elbow 5 feet
10” 45° Elbow 2 feet
3” x 10” to Round 90° Transition 25 feet
3¼” x 10” to 8”/10” Round Transition 4 feet
Wall Cap w/Damper
*
Roof Cap
*Equivalent lengths of roof and wall caps vary with model and
configuration.
Ductwork Tips
• Try to minimize transitions, turns, and sharp angles (e.g.,
two staggered 45° angles are better than one sharp 90°
angle).
• Keep turns as far away from the hood exhaust as pos-
sible; keep as much space between bends as possible.
• For best performance, use round instead of rectangular
ducting, especially when elbows are needed.
• If multiple elbows are used, try to keep at least 24 inches
of straight duct between each elbow.
• Avoid using “S” or back-to-back adjacent elbows.
• In extremely cold-weather regions, use thermal breaks
(i.e., short sections of non-metallic duct) to avoid indoor
heat loss. Locate the break as close to the outside pass-
through point as possible.
• Do not use flexible metal ducting, or ductwork smaller
than what the tables advise.
• The hood exhaust connects to an 8” round duct. You can
increase the duct size over the duct run if desired.
• To prevent backdraft, never decrease the duct size over
the run. If existing ductwork is less than 8 inches in diam-
eter, replace it with 8” ductwork.
• Connect all ducting sections with sheet-metal screws,
then seal with certified duct/foil tape. Never connect joints
with tape only.
• Support the weight of the ducting with sheet-metal
screws as needed.
• To prevent backdraft, a damper at the duct outlet may be
required.
WARNING
• Electricity to the range hood should be installed only by
a licensed electrician.
• Observe all governing codes and ordinances during
site preparation and installation. Contact your local
building department for details.
• Improperly anchoring the hood to the wall may cause
personal injury if unit falls.
• To prevent personal injury and property damage from
electric shock, do not drill or cut in the vicinity of plumb-
ing and electrical wiring.
• Use the temporary holding brackets to support the
hood only until permanent anchoring is secured.
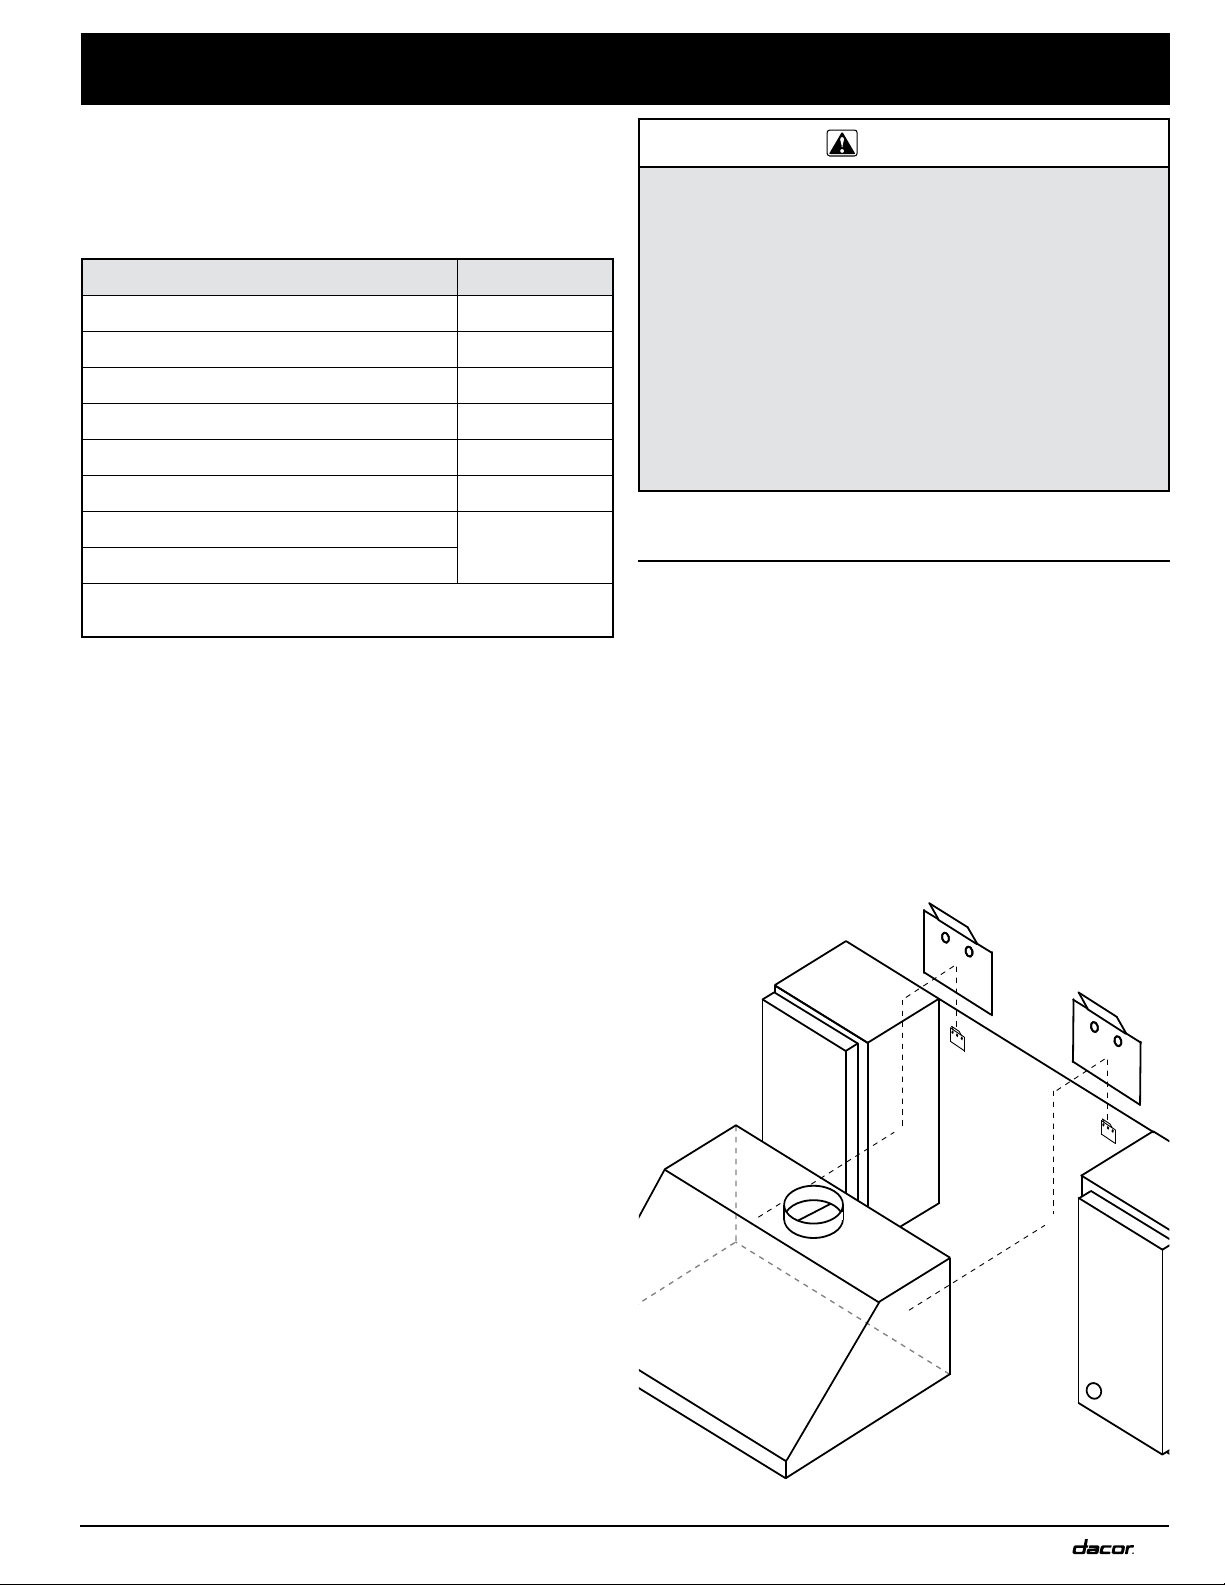
Holding Brackets
Brackets enlarged
for clarity
Preparing the Mounting Location
Holding brackets and hardware are provided to temporarily
support the hood as you permanently fasten it to the wall.
The illustrations below show the purpose of the holding
brackets and the support behind the wall.
• (If mounting the hood to brick or masonry) Select anchors
that can support the hood’s full weight.
• Ensure the mounting surface is properly reinforced to
support the hood’s full weight.
• If mounting the unit to drywall or a plastered surface,
install a reinforced mounting block between the studs.
• Attach screws directly to the studs and cabinets if they
align with the mounting holes in the hood back/top.
Loading ...
Loading ...
Loading ...