Loading ...
Loading ...
Loading ...
21
A note on pizza stones
When using a pizza stone, it is necessary to
preheat the stone, without a pizza, for optimum
results.
1. Insert the wire rack into rack position 7.
2. Place pizza stone on the center of the wire
rack so air will flow around all sides of
the stone.
3. Close the door.
4. Turn the SELECT/CONFIRM dial until
the indicator on the LCD screen reaches
the PIZZA function. The top figure on the
LCD screen indicates the preset PIZZA
temperature of ‘375°F’, while the bottom
figure indicates the preset time of
‘20:00 MIN/SEC’. The preset
CONVECTION and FROZEN settings will
also be displayed.
5. Turn the TIME dial to the set the time to
15:00 MIN/SEC.
6. Press the START/STOP button to activate
the PIZZA function. The button backlight
will illuminate red, the oven alert will sound
and the LCD screen will illuminate orange.
The LCD screen will indicate a blinking
‘PREHEATING’.
7. Once the oven has finished preheating,
an alert will sound.
8. After the PREHEATING alert has sounded,
the timer will automatically begin to
count down.
9. At the end of the cycle, the oven alert will
sound. The START/STOP button backlight
will go out and the LCD screen will
illuminate white.
10. Open the oven door and carefully place
pizza on the heated pizza stone.
11. Select desired PIZZA temperature, time,
convection, and fresh/frozen settings and
press the START/STOP button to restart
the PIZZA cycle.
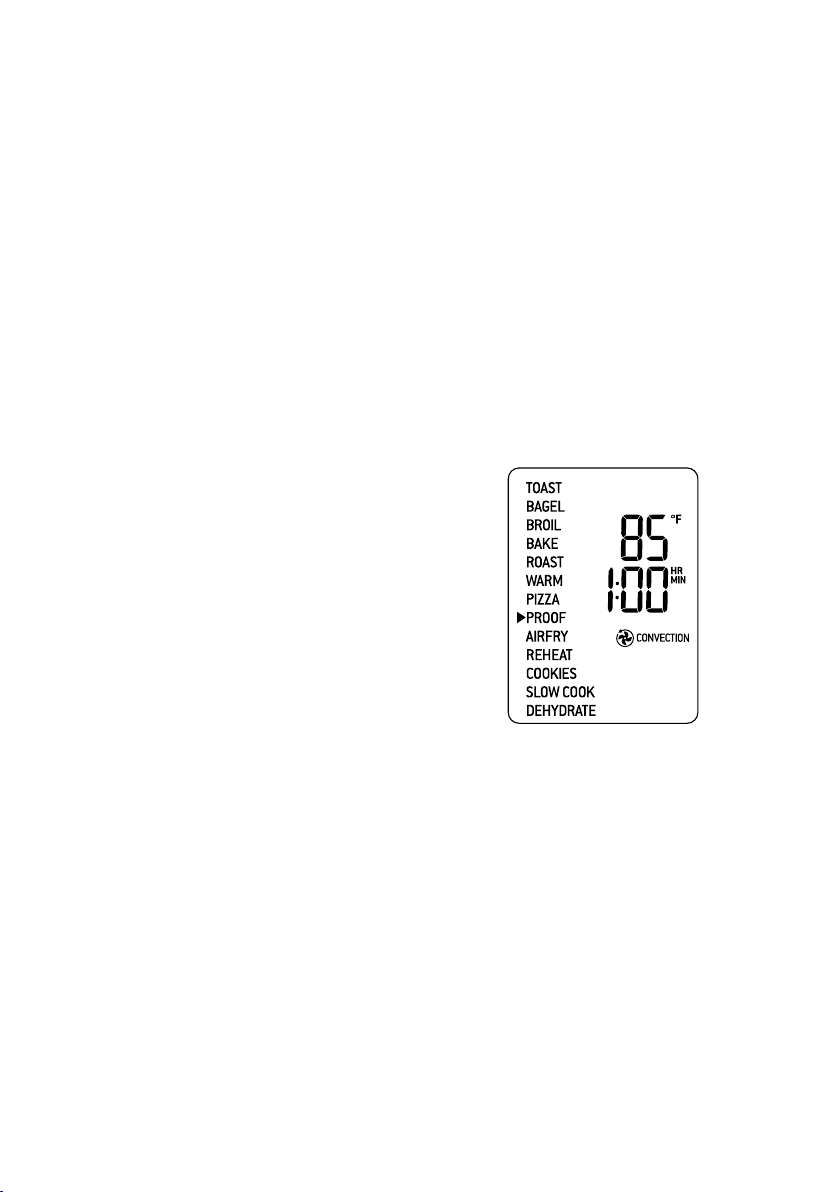
PROOF FUNCTION
The PROOF function is designed to precisely
hold low temperatures, providing an ideal
environment for proofing bread, rolls, pizza and
other doughs.
1. Insert the wire rack into rack position 8.
2. Place dough in an oven-proof vessel, cover
and place on center of wire rack.
3. Close the oven door.
4. Turn the SELECT/CONFIRM dial until
the indicator on the LCD screen reaches
the PROOF function. The top figure on the
LCD screen indicates the preset PROOF
setting of ‘85°F’,while the bottom figure
indicates the preset time of ‘1:00HR/MIN’.
The preset CONVECTION setting will
also be displayed.
5. The proofing temperature, time and
convection settingss can be adjusted before
or during the proof cycle.
a) The proofing temperature is displayed as
the top figure on the LCD screen. Turn the
TEMPERATURE dial to adjust the proofing
temperature from 80°F/27°C to a max of
100°F/38°C.
b) The proofing time is displayed as the
bottom figure on the LCD screen. Turn
the TIME dial to adjust the time up to
2:00 HR/MIN.
6. Press the START/STOP button to activate
the PROOF function. The button backlight
will illuminate red, the oven alert will sound
and the LCD screen will illuminate orange.
Loading ...
Loading ...
Loading ...