Loading ...
Loading ...
Loading ...
CUSTOMER RESPONSIBILITIES
Fill in dates as you complete
regular service
Before After Every Every Yearly Service
Use Use 15 min. 5 hrs. Dates
Check for dar_aged/wom parts p. ,
v., p-
Check for loose tasteners/parts p,-
y-
Check chain tension
v" /I
Check chain sharpness
p-
v"
Check guide bar _, p,, p,,
Clean unit& labels
p,,
GENERAL RECOMMENDATIONS
The warranty on this unit does not cov-
er items that have been subjected to
ope.rator abuse or negligence. To re-
cewe full value from the warranty, the
operator must maintain unit as instruct-
ed in this manual. Vadous adjustments
will need to be made periodically to
propedy maintain your unit.
• Once a year, check guide bar and
chain for wear.
WARNING: Disconnect the power
source before performing maintenance.
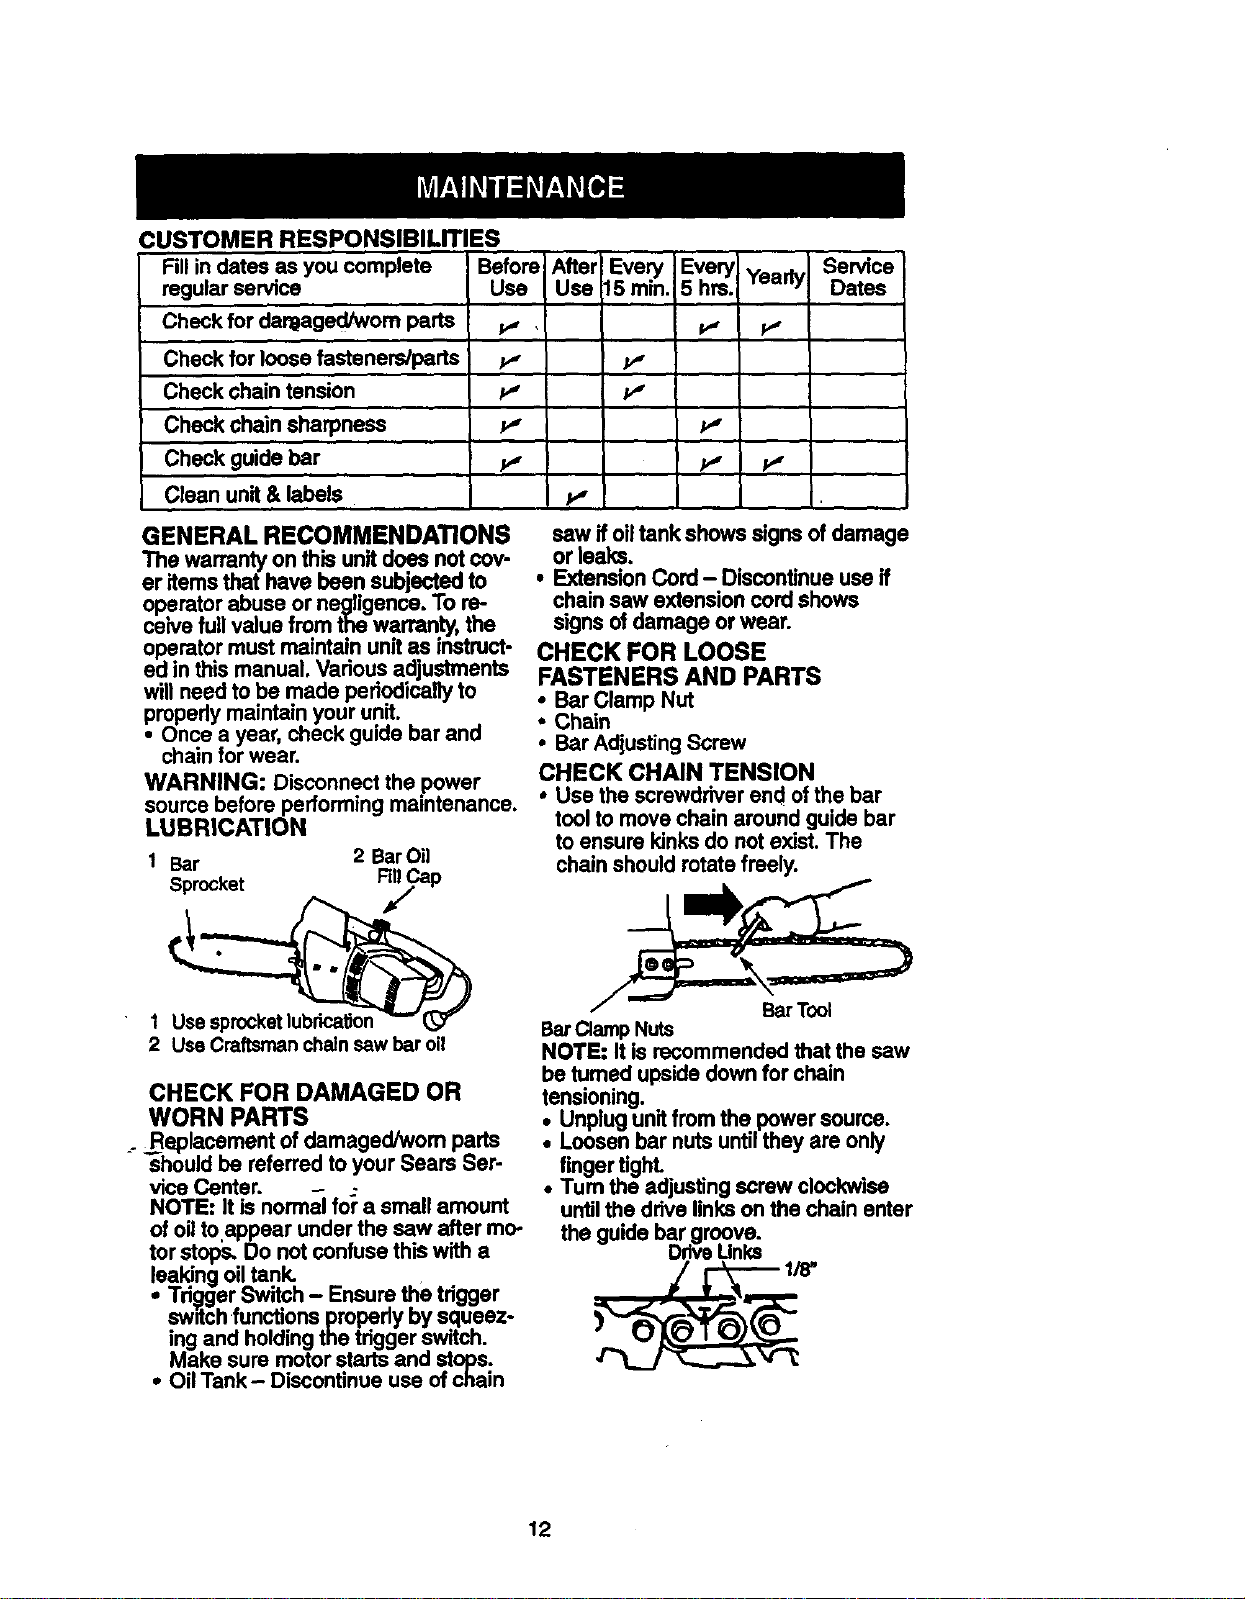
LUBRICATION
1 Bar 2 BarOil
Sprocket Fill Cap
I"
1 Usesprocketlubrication
2 Use Craftsmanchainsaw bar oil
CHECK FOR DAMAGED OR
WORN PARTS
. _Replacement of damaged/wom parts
should be referred to your Sears Ser-
vice Center.
NOTE: It is norm_ for a small amount
of oil toappear under the saw after mo-
tor stops. Do not confuse this with a
leaking oil tank.
• Td_ger Switch - Ensure the tdgger
switch functions propedy by s,queez-
ing and holding the tdgger switch.
Make sure motor starts and stops.
• Oil Tank- Discontinue use of chain
saw if oiltank showssignsof damage
or leaks.
• ExtensionCord - Discontinueuse if
chainsaw extension cordshows
signsof damage or wear.
CHECK FOR LOOSE
FASTENERS AND PARTS
• Bar Clamp Nut
• Chain
° Bar AdjustingScrew
CHECK CHAIN TENSION
• Use the screwdriverend ofthe bar
toolto move chainaround guide bar
to ensure kinksdo notexist. The
chainshouldrotate freely.
Bar Clamp Nuts
NOTE: It is recommended that the saw
be tumed upside down for chain
tensioning.
• Unplug unit from the power source.
• Loosen bar nuts until they are only
finger tight.
• Turn the adjusting screw clookwisa
until the drive links on the chain enter
the guide bar groove.
DriveUnks
12
Loading ...
Loading ...
Loading ...