Loading ...
Loading ...
Loading ...
Shooting
2
34
EN
Letting the camera choose the settings (AUTO mode)
The camera adjusts settings to suit the scene; all you have to do is press the shutter
button.
Use live guides to easily adjust such parameters as color, brightness, and background
blurring.
1
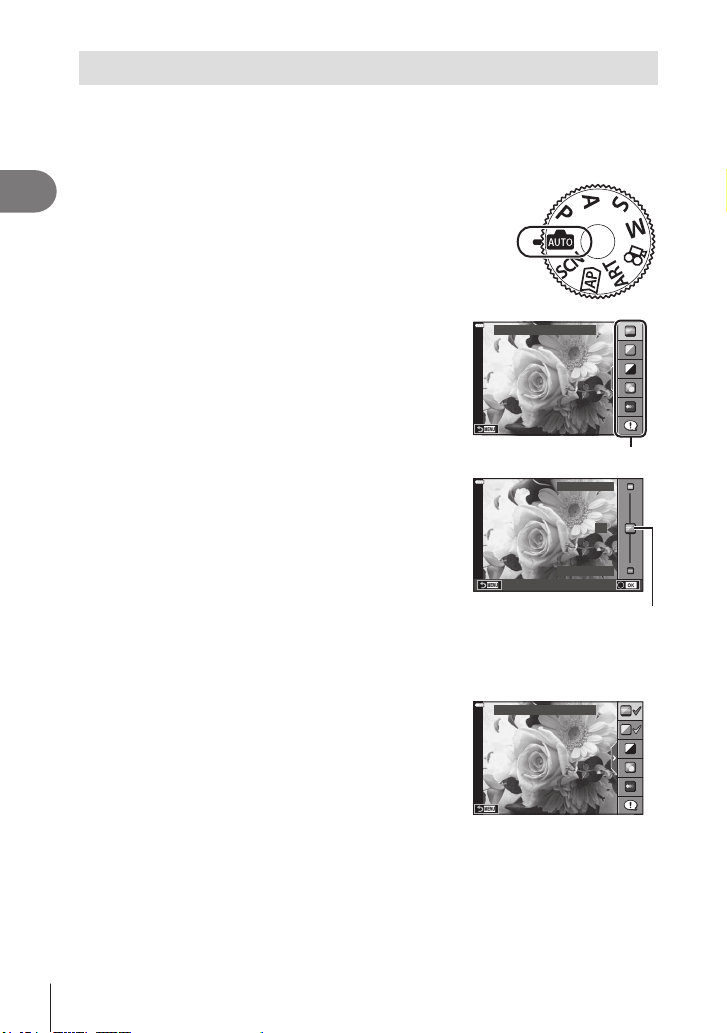
Set the mode dial to B.
• In auto mode, the camera automatically selects
the scene mode option appropriate to your subject
when you press the shutter button halfway. Once the
selection has been made, the B icon in the bottom
left corner of the display will be replaced by the icon
for the chosen scene.
2
To adjust shooting settings, display the live guide
by pressing the u button.
• Use FG to highlight an item in the live guide and
press Q to display a slider.
Change Color Saturation
Guide item
3
Use FG to position the slider and choose a
level.
• Press the Q button to save changes.
• To exit, press the MENU button.
• When [Shooting Tips] is selected, use FG to
highlight the item and press the Q button to display
the detail.
• The effect of the selected level is visible in the
display.
If [Blur Background] or [Express Motions] is selected,
the display will return to normal, but the selected
effect will be visible in the nal photograph.
0
Clear & Vivid
Flat & Muted
Slider
4
To set multiple live guides, repeat Steps 2 and 3.
• A check is displayed on the guide item for live guides
that are already set.
• [Blur Background] and [Express Motions] cannot be
set at the same time.
Change Color Saturation
5
Shoot.
• To clear the live guides from the display, press the MENU button.
• If [RAW] is currently selected for image quality, image quality will automatically be set to
RAW+JPEG.
• Certain live guide settings are not applied to the RAW copy.
• Pictures may appear grainy at some live guide setting levels.
Loading ...
Loading ...
Loading ...