Loading ...
Loading ...
Loading ...

5
OPERATIONS MANUAL
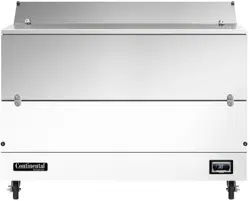
MILK COOLERS FORCED AIR & COLD WALL
IMPORTANT NOTE: It is very important that your milk
cooler is properly level during operation. If it is not level,
doors won’t close properly and gaskets won’t provide a
good seal, which will cause your unit to run excessively.
Excess ice will accumulate inside the cabinet, around the
door openings and on the forced air evaporator coil. If
allowed to continue, ice will eventually block the coil and
the refrigeration system won’t be able to maintain proper
temperature, resulting in loss of product stored inside. In
addition, a cabinet that is not level will allow condensa-
tion water to overflow the pan and spill into the storage
compartment.
CONDENSATE PAN (Forced Air Models)
All forced air models have a built-in condensate vaporizer on
the underside of the cabinet (see Figure 2A) and are com-
pletely self-defrosting. The activator switch is protected by a
packing nut during shipment. The nut must be removed for
proper operation. Disconnect power by unplugging the cabinet
power cord from the supply. Remove the front grill by taking
out the 2 screws at each end. Gently pull the grill forward,
away from the cabinet, being careful not to damage the tubing
from the thermometer to the sensing bulb. Loosen the screws
securing the hold down bracket and lift the condensate pan
out of the mounting bracket. Remove the packing nut from the
switch and discard the nut. Place the condensate pan back in
the mounting bracket. Plug the power cord into the receptacle
labeled “VAPORIZER” on the control box. Check that the switch
is operating correctly by lightly pressing down on the top of
the pan, at the end where the cord is attached. You will hear a
“click” as pressure is applied and another “click” when pressure
is removed. If you do not hear the switch “click”, ensure the pan
is seated in the bracket correctly and the cord is properly routed
and secured in the clamp. Reinstall the grill and reconnect
power. To clean the vaporizer, follow the steps above.
IMPORTANT NOTE: It is extremely important to ensure
the condensate pan is plugged into the receptacle labeled
“vaporizer” and that the condensing unit is plugged into
the receptacle labeled “condensing unit.” DO NOT con-
nect the floor drain to the condensate pan. The electric
vaporizer is provided to eliminate condensation moisture
only. Placing the floor drain hose in the electric vaporizer
will create unsanitary and unpleasant odors. Water from
the floor drain will also overflow the condensate pan and
spill onto the floor, creating unsafe conditions.
TOP ASSEMBLY
(REMOVED)
EVAPORATOR COIL
(FORCED-AIR ONLY)
JOINING STRIP
FANS
(FORCED AIR)
FRONT GRILL
ELECTRONIC
CONTROL
FRONT DOOR
LATCH KEEPER
LATCH
HINGED LID
TEMP CONTROL
(FORCED AIR
W/MECHANICAL
CONTROL)
LOCK
FLOOR RACK
POWER SUPPLY
(WHEN EQUIPPED)
ELECTRIC VAPORIZER
CONDENSING UNIT
DC POWER SUPPLY
(WHEN EQUIPPED)
FIGURE 2A: Milk Cooler Components (Forced Air Models)
FIGURE 2: Electric Condensate Pan (Forced Air Models)
Loading ...
Loading ...
Loading ...