Loading ...
Loading ...
Loading ...
En
19
Basic Operation
Turning the power on
1 Make all the connections, then plug the power cord
into a power outlet.
= Connections (p. 9 )
2 Press the [u] switch.
This unit’s indicators light and the power turns on.
Turning the power off
Press the [u] switch.
This unit’s power turns off.
! Do not pull out the SD memory card or turn off this unit’s power
while the SD memory card indicator is flashing. Doing so could
delete this unit’s management data and damage the SD memory
card, making it impossible to read.
!
Do not remove the USB device or turn Off the power of the unit while
the USB indicator is flashing. The management data in the unit may
get deleted. Also, the USB device may become unreadable.
Loading and ejecting discs
! This unit is a one-disc player. Do not insert multiple disc.
! Do not force discs into the disc insertion slot when this unit’s power
is off. Doing so could damage the disc and lead to malfunction of
this unit.
! When the disc is being drawn in or ejected, do not apply any force
to the disc in the direction opposite its movement. Doing so could
damage the disc or this unit.
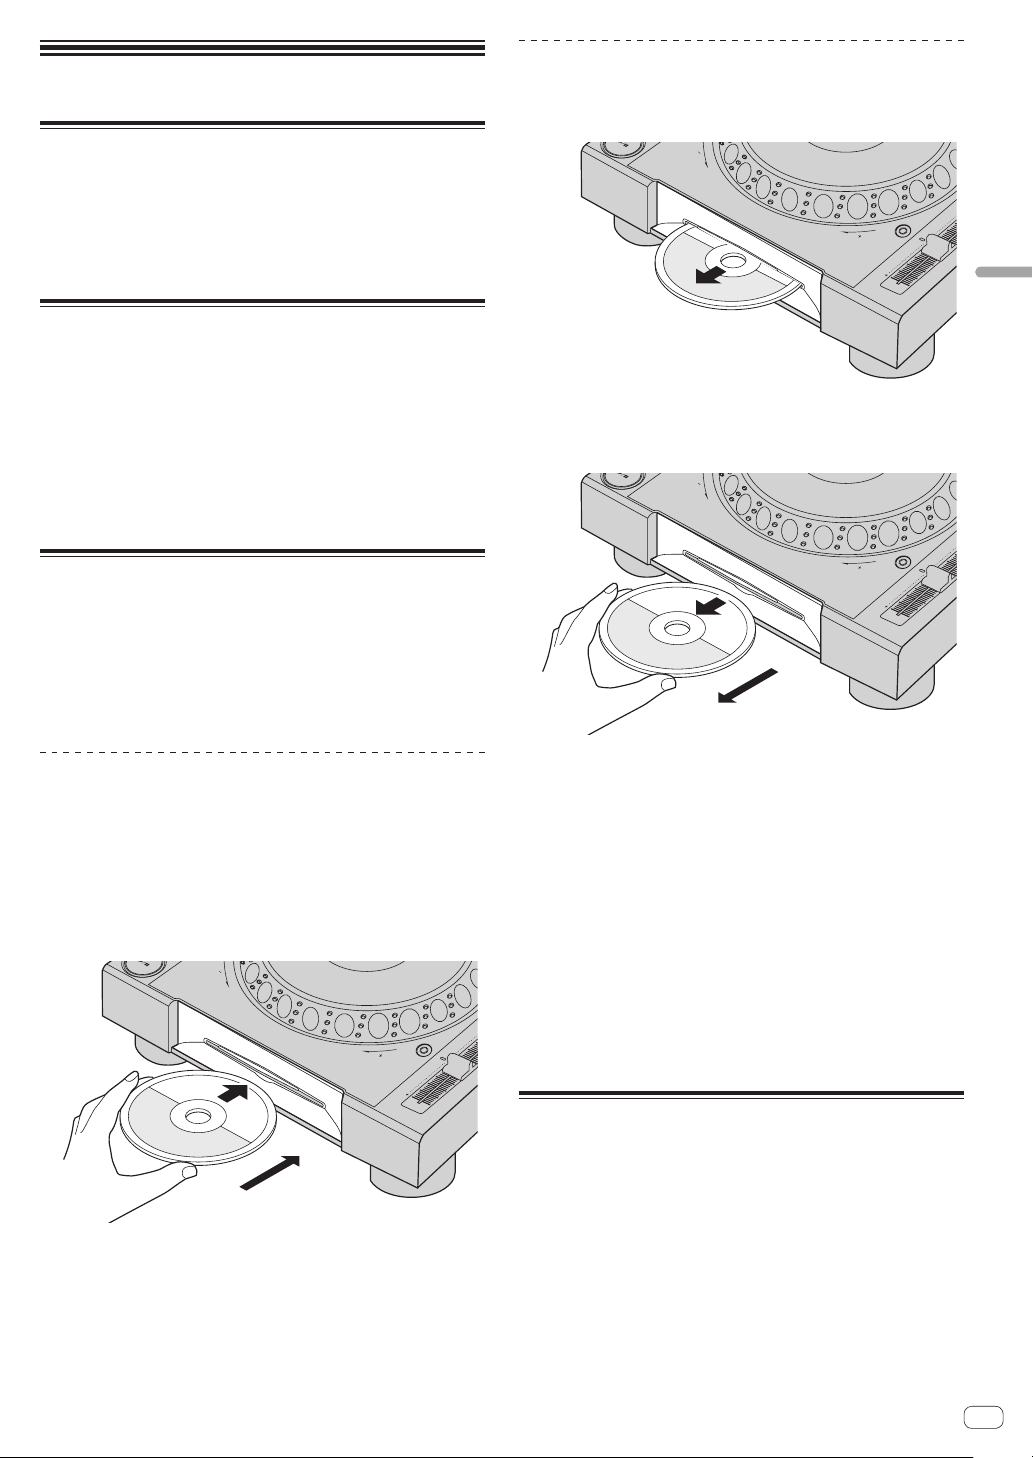
Inserting discs
1 Press the [u] switch to turn this unit’s power on.
2 Insert the disc horizontally into the disc insertion slot,
with the printed surface facing up.
Playback starts after the medium’s information has been read.
! When a disc containing music files recorded with a hierarchical
structure is loaded, playback starts from the tracks in the uppermost
layer.
TEMPO
0
REV
FWD
TEMPO
RESET
! When auto cue is turned on, the disc pauses at the audio start posi-
tion. In this case, press the [PLAY/PAUSEf] to start playback.
= For details on auto cue, see Setting auto cue on page 23 .
! If a disc is inserted when a storage device (SD, USB) that has previ-
ously been connected to this unit or another Pioneer DJ’s DJ player
is connected, the number of discs including the disc information is
displayed on the main unit display for a few seconds.
= For details on storing disc information, see Procedure for calling
out hot cues (for discs) on page 25 .
Ejecting discs
1 Press the [DISC EJECTh] button to eject the disc.
The disc is ejected from the disc insertion slot.
TEMPO
0
REV
FWD
TEMPO
RESET
2 Pull the disc out, being careful not scratch its signal
surface.
TEMPO
0
REV
FWD
TEMPO
RESET
! If the [DISC EJECTh] button is pressed accidentally, press the
[PLAY/PAUSEf] button immediately. Disc ejection is canceled
and the unit is reset to as it was directly before the [DISC EJECTh]
button was pressed. (No sound is output during the resetting
process.)
! When [EJECT/LOAD LOCK] on the [UTILITY] menu is set to [LOCK],
discs cannot be ejected during playback. Either set [EJECT/LOAD
LOCK] to [UNLOCK] or press the [PLAY/PAUSEf] button to
pause playback, then press the [DISC EJECTh] button.
About the resume function
If a disc is ejected during playback, when that same disc is reloaded,
playback resumes from the point playing when the disc was ejected. If
a disc is ejected while pausing, when that disc is reloaded, it pauses at
the same point as when it was ejected. These points are stored in the
memory until this unit’s power is turned off or a different disc is loaded.
! This function does not work with storage devices (SD, USB).
Inserting and ejecting SD memory
cards
! Do not insert any objects other than SD memory cards into the SD
memory card insertion slot. Inserting coins or other metal objects
could damage the internal circuitry, resulting in malfunction.
! Do not forcibly insert or remove SD memory cards. Doing so could
damage the SD memory card or this unit.
Basic Operation
Loading ...
Loading ...
Loading ...