Loading ...
Loading ...
Loading ...
Keep fingers close together.
Feed the board at a continuous even rate of speed.
Any hesitation or stopping could cause a "step" to be
cut on the edge of the board.
Figure 16 - FeedingWorkpiece
• As the trailing hand passes over the cutterhead,
remove the leading hand.
• Continue feeding while placing the leading hand
behind the trailing hand until the entire length of the
board is cut.
Figure 17 - Guiding Workpiece
• Feed with the grain whenever possible.
Rotation
_j_ Against the Grain
Rotation
Figure 18 - Direction of Feed
• If the nature of the workpiece is such that it must be
fed against the grain, take very light cuts and feed
slowly.
• When using long workpieces, to avoid injury from slips
or kickbacks and to exert even pressure on the cutter-
head, use extra supports (see Recommended
Accessories, page 17) at both infeed and outfeed ends.
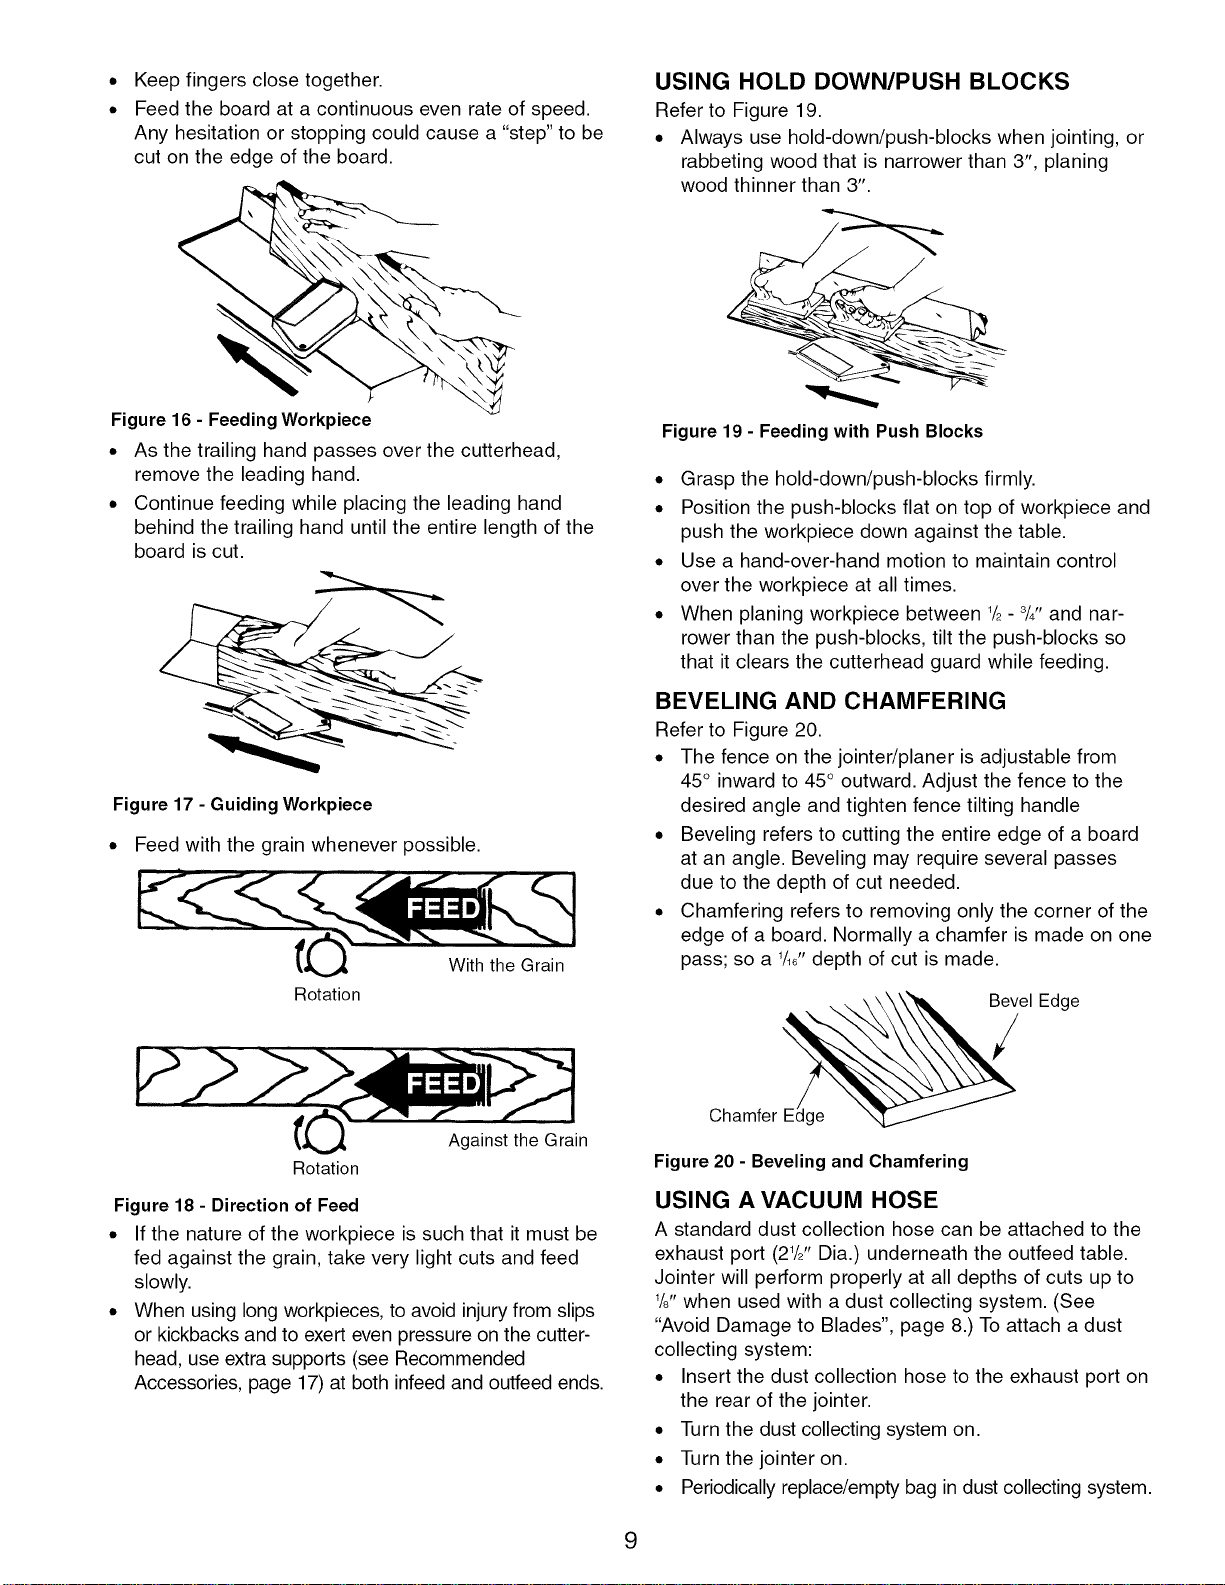
USING HOLD DOWN/PUSH BLOCKS
Refer to Figure 19.
• Always use hold-down/push-blocks when jointing, or
rabbeting wood that is narrower than 3", planing
wood thinner than 3".
Figure 19 - Feeding with Push Blocks
• Grasp the hold-down/push-blocks firmly.
• Position the push-blocks flat on top of workpiece and
push the workpiece down against the table.
• Use a hand-over-hand motion to maintain control
over the workpiece at all times.
• When planing workpiece between 1__3/4,and nar-
rower than the push-blocks, tilt the push-blocks so
that it clears the cutterhead guard while feeding.
BEVELING AND CHAMFERING
Refer to Figure 20.
• The fence on the jointer/planer is adjustable from
45° inward to 45° outward. Adjust the fence to the
desired angle and tighten fence tilting handle
• Beveling refers to cutting the entire edge of a board
at an angle. Beveling may require several passes
due to the depth of cut needed.
• Chamfering refers to removing only the corner of the
edge of a board. Normally a chamfer is made on one
pass; so a _/_6"depth of cut is made.
Bevel Edge
Chamfer id_g_e_
Figure 20 - Beveling and Chamfering
USING A VACUUM HOSE
A standard dust collection hose can be attached to the
exhaust port (2_/_'' Dia.) underneath the outfeed table.
Jointer will perform properly at all depths of cuts up to
_/6"when used with a dust collecting system. (See
"Avoid Damage to Blades", page 8.) To attach a dust
collecting system:
• Insert the dust collection hose to the exhaust port on
the rear of the jointer.
• Turn the dust collecting system on.
• Turn the jointer on.
• Periodically replace/empty bag in dust collecting system.
9
Loading ...
Loading ...
Loading ...