Loading ...
Loading ...
Loading ...
ELECTRICAL CONNECTIONS
WARNING: Make sure unit is turned off and discon-
nected from power source before inspecting any wiring.
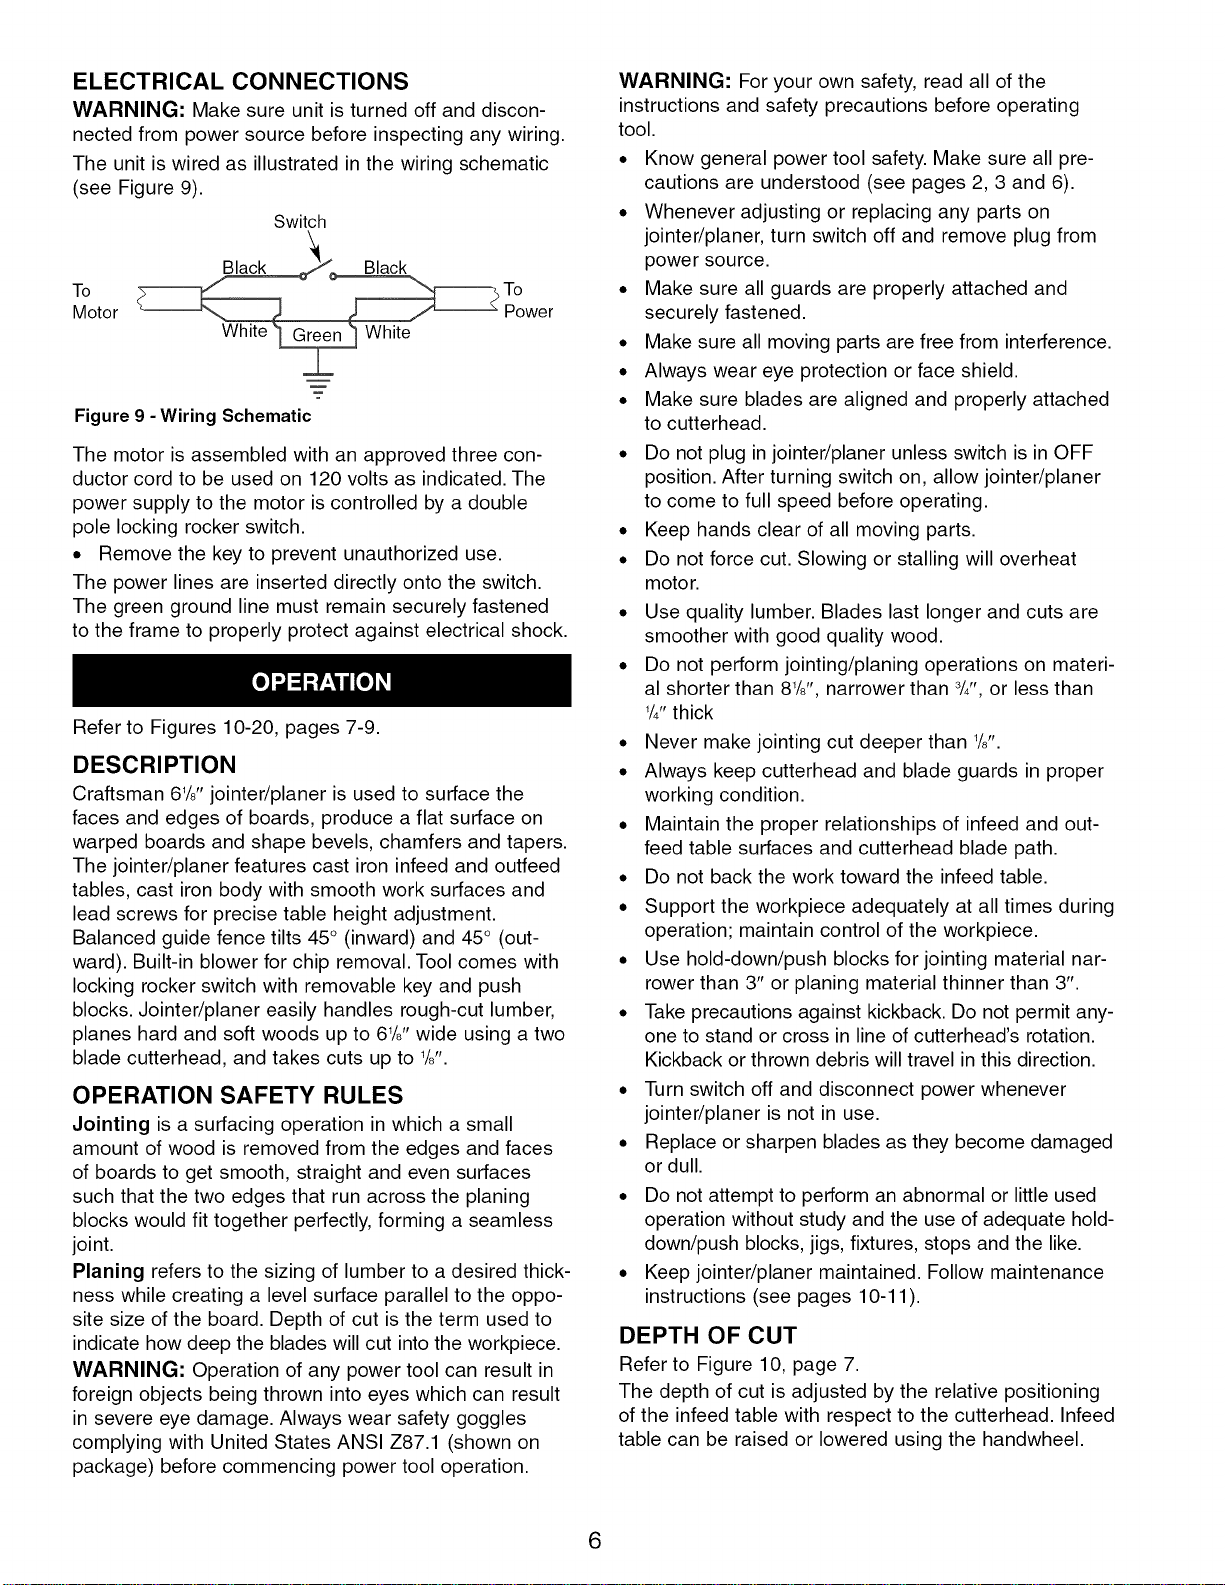
The unit is wired as illustrated in the wiring schematic
(see Figure 9).
Switch
To
Motor
White _ White
Figure 9 - Wiring Schematic
To
Power
The motor is assembled with an approved three con-
ductor cord to be used on 120 volts as indicated. The
power supply to the motor is controlled by a double
pole locking rocker switch.
. Remove the key to prevent unauthorized use.
The power lines are inserted directly onto the switch.
The green ground line must remain securely fastened
to the frame to properly protect against electrical shock.
Refer to Figures 10-20, pages 7-9.
DESCRIPTION
Craftsman 61/8'' jointer/planer is used to surface the
faces and edges of boards, produce a flat surface on
warped boards and shape bevels, chamfers and tapers.
The jointer/planer features cast iron infeed and outfeed
tables, cast iron body with smooth work surfaces and
lead screws for precise table height adjustment.
Balanced guide fence tilts 45 ° (inward) and 45° (out-
ward). Built-in blower for chip removal. Tool comes with
locking rocker switch with removable key and push
blocks. Jointer/planer easily handles rough-cut lumber,
planes hard and soft woods up to 6W' wide using a two
blade cutterhead, and takes cuts up to W'.
OPERATION SAFETY RULES
Jointing is a surfacing operation in which a small
amount of wood is removed from the edges and faces
of boards to get smooth, straight and even surfaces
such that the two edges that run across the planing
blocks would fit together perfectly, forming a seamless
joint.
Planing refers to the sizing of lumber to a desired thick-
ness while creating a level surface parallel to the oppo-
site size of the board. Depth of cut is the term used to
indicate how deep the blades will cut into the workpiece.
WARNING: Operation of any power tool can result in
foreign objects being thrown into eyes which can result
in severe eye damage. Always wear safety goggles
complying with United States ANSI Z87.1 (shown on
package) before commencing power tool operation.
WARNING: For your own safety, read all of the
instructions and safety precautions before operating
tool.
• Know general power tool safety. Make sure all pre-
cautions are understood (see pages 2, 3 and 6).
• Whenever adjusting or replacing any parts on
jointer/planer, turn switch off and remove plug from
power source.
• Make sure all guards are properly attached and
securely fastened.
• Make sure all moving parts are free from interference.
• Always wear eye protection or face shield.
• Make sure blades are aligned and properly attached
to cutterhead.
° Do not plug in jointer/planer unless switch is in OFF
position. After turning switch on, allow jointer/planer
to come to full speed before operating.
• Keep hands clear of all moving parts.
• Do not force cut. Slowing or stalling will overheat
motor.
• Use quality lumber. Blades last longer and cuts are
smoother with good quality wood.
• Do not perform jointing/planing operations on materi-
al shorter than 81M, narrower than 3/4",or less than
1/4"thick
° Never make jointing cut deeper than W'.
• Always keep cutterhead and blade guards in proper
working condition.
• Maintain the proper relationships of infeed and out-
feed table surfaces and cutterhead blade path.
• Do not back the work toward the infeed table.
• Support the workpiece adequately at all times during
operation; maintain control of the workpiece.
° Use hold-down/push blocks for jointing material nar-
rower than 3" or planing material thinner than 3".
• Take precautions against kickback. Do not permit any-
one to stand or cross in line of cutterhead's rotation.
Kickback or thrown debris will travel in this direction.
• Turn switch off and disconnect power whenever
jointer/planer is not in use.
• Replace or sharpen blades as they become damaged
or dull.
• Do not attempt to perform an abnormal or little used
operation without study and the use of adequate hold-
down/push blocks, jigs, fixtures, stops and the like.
° Keep jointer/planer maintained. Follow maintenance
instructions (see pages 10-11 ).
DEPTH OF CUT
Refer to Figure 10, page 7.
The depth of cut is adjusted by the relative positioning
of the infeed table with respect to the cutterhead. Infeed
table can be raised or lowered using the handwheel.
6
Loading ...
Loading ...
Loading ...