Loading ...
Loading ...
Loading ...
WARNING: Turn the switch to OFF position and
unplug jointer/planer from power source before pro-
ceeding to do maintenance work
CHECKING FOR WORN BLADES
Condition of blades will affect precision of cut If blade
wear is not observed when checking the blade height,
the quality of cut will indicate the blade condition Dull
blades will tear rather than sever wood fiber A raised
grain will occur when dull blades pound on wood where
there is difference in density A raised ridge will be pro-
duced where the blades have been nicked
SHARPENING BLADES
Refer to Figure 21.
The blades can be honed individually by whetting them
with a fine sharpening stone Make sure oilstone is flat
and is not worn To sharpen blades:
• Partially cover the stone with paper to protect the
table top
• Position infeed table so stone will contact blade
along its beveled surface
• Stroke the stone across blade from one side to other
while stone is also moved slightly in the direction of
feed
• Make sure to do the same number of strokes on
each place
If the blades are nicked they must be replaced or
reground They can be reground several times until they
become 13/16"wide
NOTE: Many shops do not have capabilities to resur-
face blades Yellow pages should list "Sharpening
Services" or "Tool Grinding"
Figure 21 - Sharpening Blades
Never install unbalanced blades or reground blades
less than 13/1_"wide
REPLACING BLADES
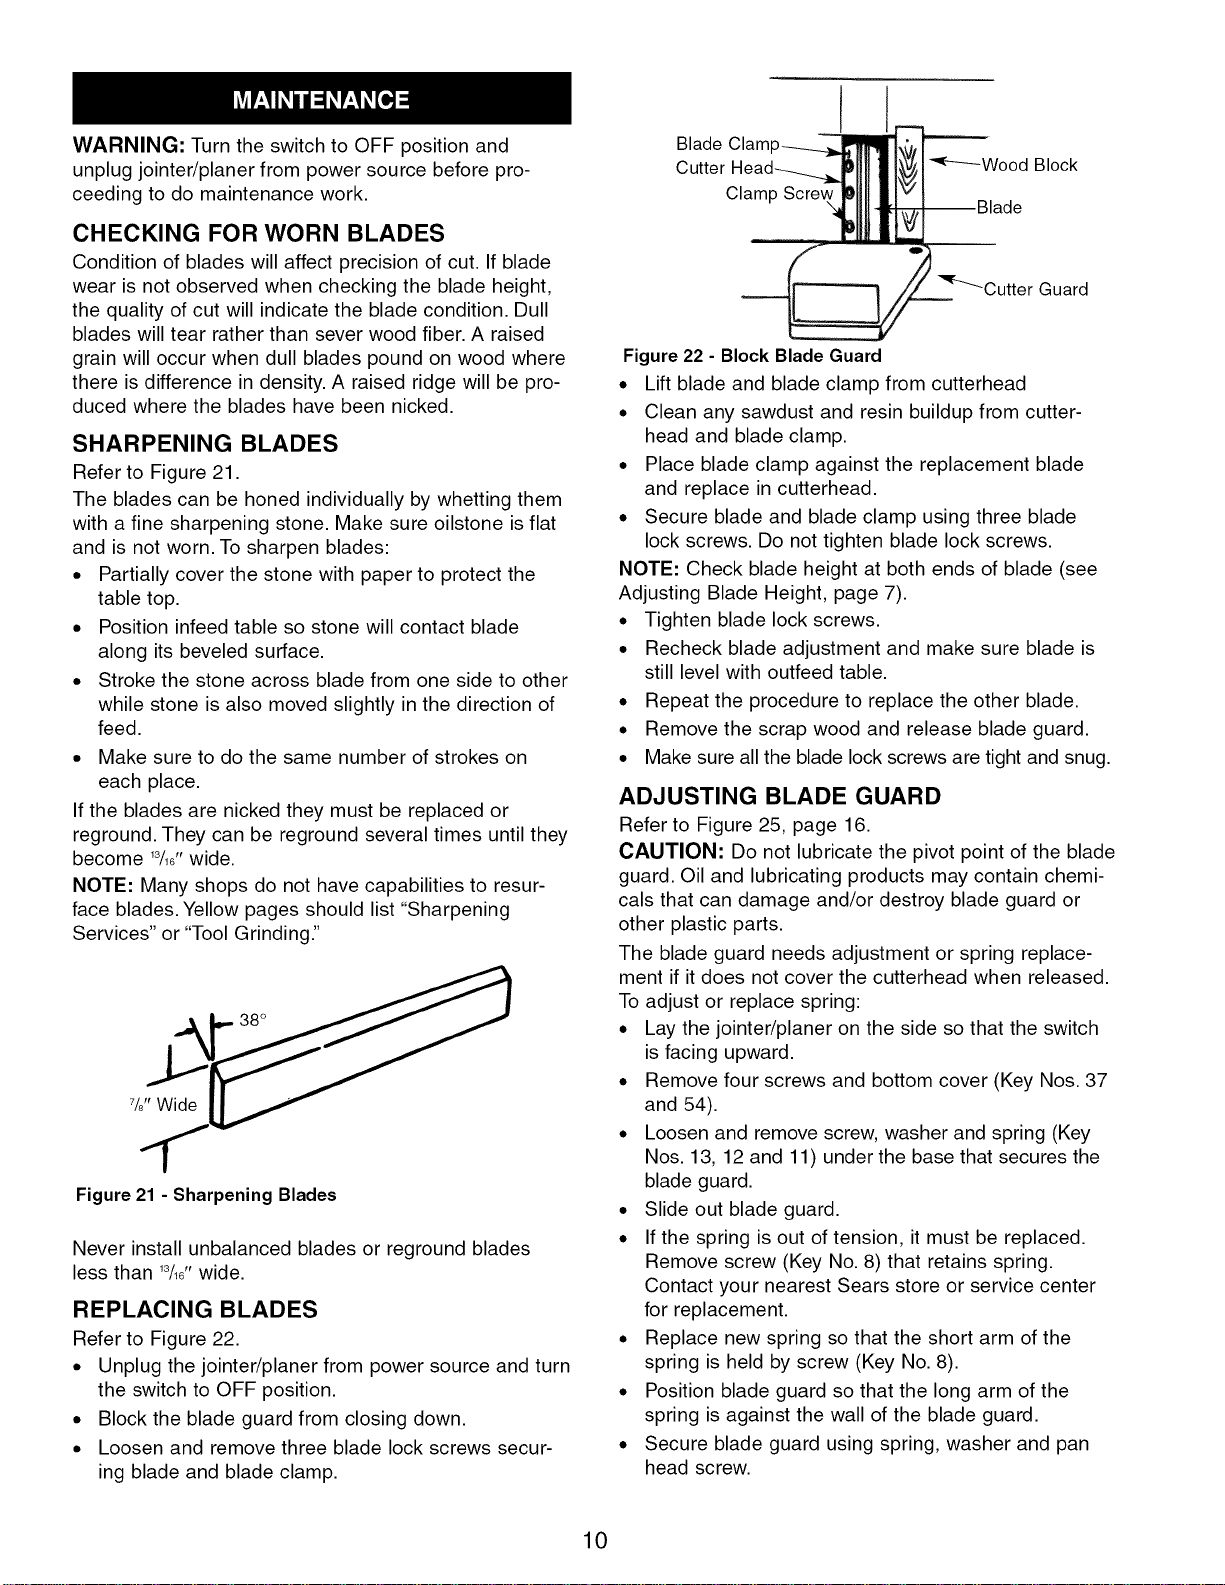
Refer to Figure 22
• Unplug the jointer/planer from power source and turn
the switch to OFF position
• Block the blade guard from closing down
• Loosen and remove three blade lock screws secur-
ing blade and blade clamp
Blade Clam
Cutter
Clamp Screv
Figure 22 - Block Blade Guard
• Lift blade and blade clamp from cutterhead
• Clean any sawdust and resin buildup from cutter-
head and blade clamp
• Place blade clamp against the replacement blade
and replace in cutterhead
• Secure blade and blade clamp using three blade
lock screws Do not tighten blade lock screws
NOTE: Check blade height at both ends of blade (see
Adjusting Blade Height, page 7)
• Tighten blade lock screws
• Recheck blade adjustment and make sure blade is
still level with outfeed table
• Repeat the procedure to replace the other blade
• Remove the scrap wood and release blade guard
• Make sure all the blade lock screws are tight and snug
ADJUSTING BLADE GUARD
Refer to Figure 25, page 16
CAUTION: Do not lubricate the pivot point of the blade
guard Oil and lubricating products may contain chemi-
cals that can damage and/or destroy blade guard or
other plastic parts
The blade guard needs adjustment or spring replace-
ment if it does not cover the cutterhead when released
To adjust or replace spring:
• Lay the jointer/planer on the side so that the switch
is facing upward
• Remove four screws and bottom cover (Key Nos 37
and 54)
• Loosen and remove screw, washer and spring (Key
Nos 13, 12 and 11) under the base that secures the
blade guard
• Slide out blade guard
• If the spring is out of tension, it must be replaced
Remove screw (Key No 8) that retains spring
Contact your nearest Sears store or service center
for replacement
• Replace new spring so that the short arm of the
spring is held by screw (Key No 8)
• Position blade guard so that the long arm of the
spring is against the wall of the blade guard
• Secure blade guard using spring, washer and pan
head screw
10
Loading ...
Loading ...
Loading ...