Loading ...
Loading ...
Loading ...
10. Light Kit Assembly.
page 9
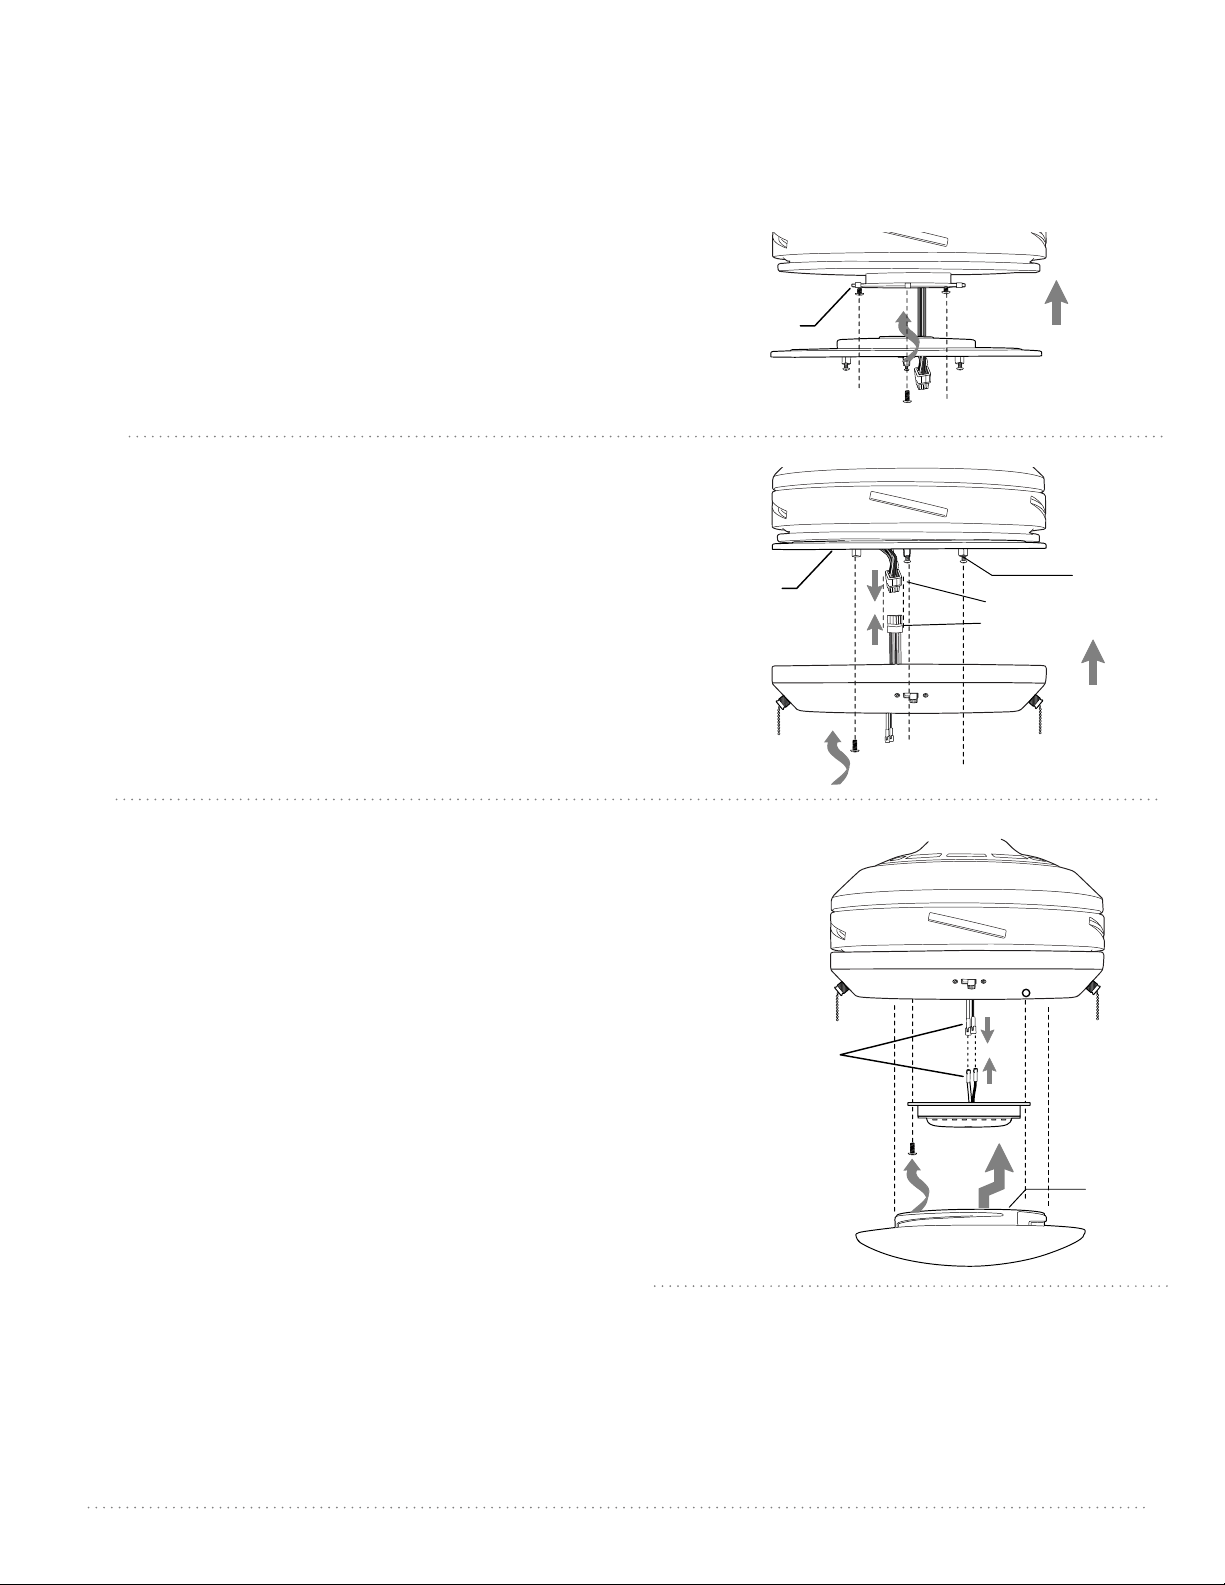
Remove 1 screw from motor plate on underside of
motor housing and partially loosen the other 2
screws. Align slotted holes in fitter plate with
loosened screws in motor plate, allowing male
plug from motor housing to come through hole in
middle of fitter plate. Twist fitter plate to lock.
Re-insert screw that was previously removed and
securely tighten all 3 screws with a Phillips
screwdriver.
Remove 1 screw from post located on underside of
fitter plate and partially loosen the other 2 screws
on the other 2 posts. Connect male plug from
motor housing to female plug from the light kit
fitter. Make sure plugs connect tightly.
Align slotted holes in light kit fitter with loosened
screws in fitter plate. Twist light kit fitter to lock.
Re-insert screw that was previously removed and
tighten all 3 screws securely.
Remove 1 screw from light kit fitter and partially
loosen the other 2 screws. Connect WHITE wire
from LED light kit to WHITE wire from light kit
fitter. Connect BLACK wire from LED light kit to
BLUE (or BLACK) wire from light kit fitter. Be sure
that molex connections snap together completely.
Align slotted holes in outer edge of LED light kit
with loosened screws in light kit fitter. Twist LED
light kit to lock. Re-insert screw that was removed
and secure all screws.
Align slots on glass shade with the three plates on
the inside of the light kit fitter. Gently push up on
glass shade and turn to the RIGHT (clockwise) until
it slides completely into place.
NOTE: Pull down VERY GENTLY on glass shade to
make sure that glass shade is secure.
male plug
female plug
light kit fitter
fitter plate
glass shade
motor housing
light kit fitter
molex
connections
LED light kit
slot
motor housing
fitter plate
motor plate
post
*NOTE: This equipment has been tested and found to comply with the limits for a Class B
digital device, pursuant to Part 15 of the FCC Rules. These limits are designed to provide
reasonable protection against harmful interference in a residential installation. This
equipment generates, uses and can radiate radio frequency energy and, if not installed and
used in accordance with the instructions, may cause harmful interference to radio
communications. However, there is no guarantee that interference will not occur in a
particular installation. If this equipment does cause harmful interference to radio or television
reception, which can be determined by turning the equipment off and on, the user is
encouraged to try to correct the interference by one or more of the following measures:
* Reorient or relocate the receiving antenna.
* Increase the separation between the equipment and receiver.
* Connect the equipment into an outlet on a circuit different from that to which the
receiver is connected..
Consult the dealer or an experienced radio/TV technician for help.
motor housing
Loading ...
Loading ...
Loading ...