Loading ...
Loading ...
Loading ...
SiUS091133 Indoor Unit: FTXS30/36LVJU
Removal Procedure 254
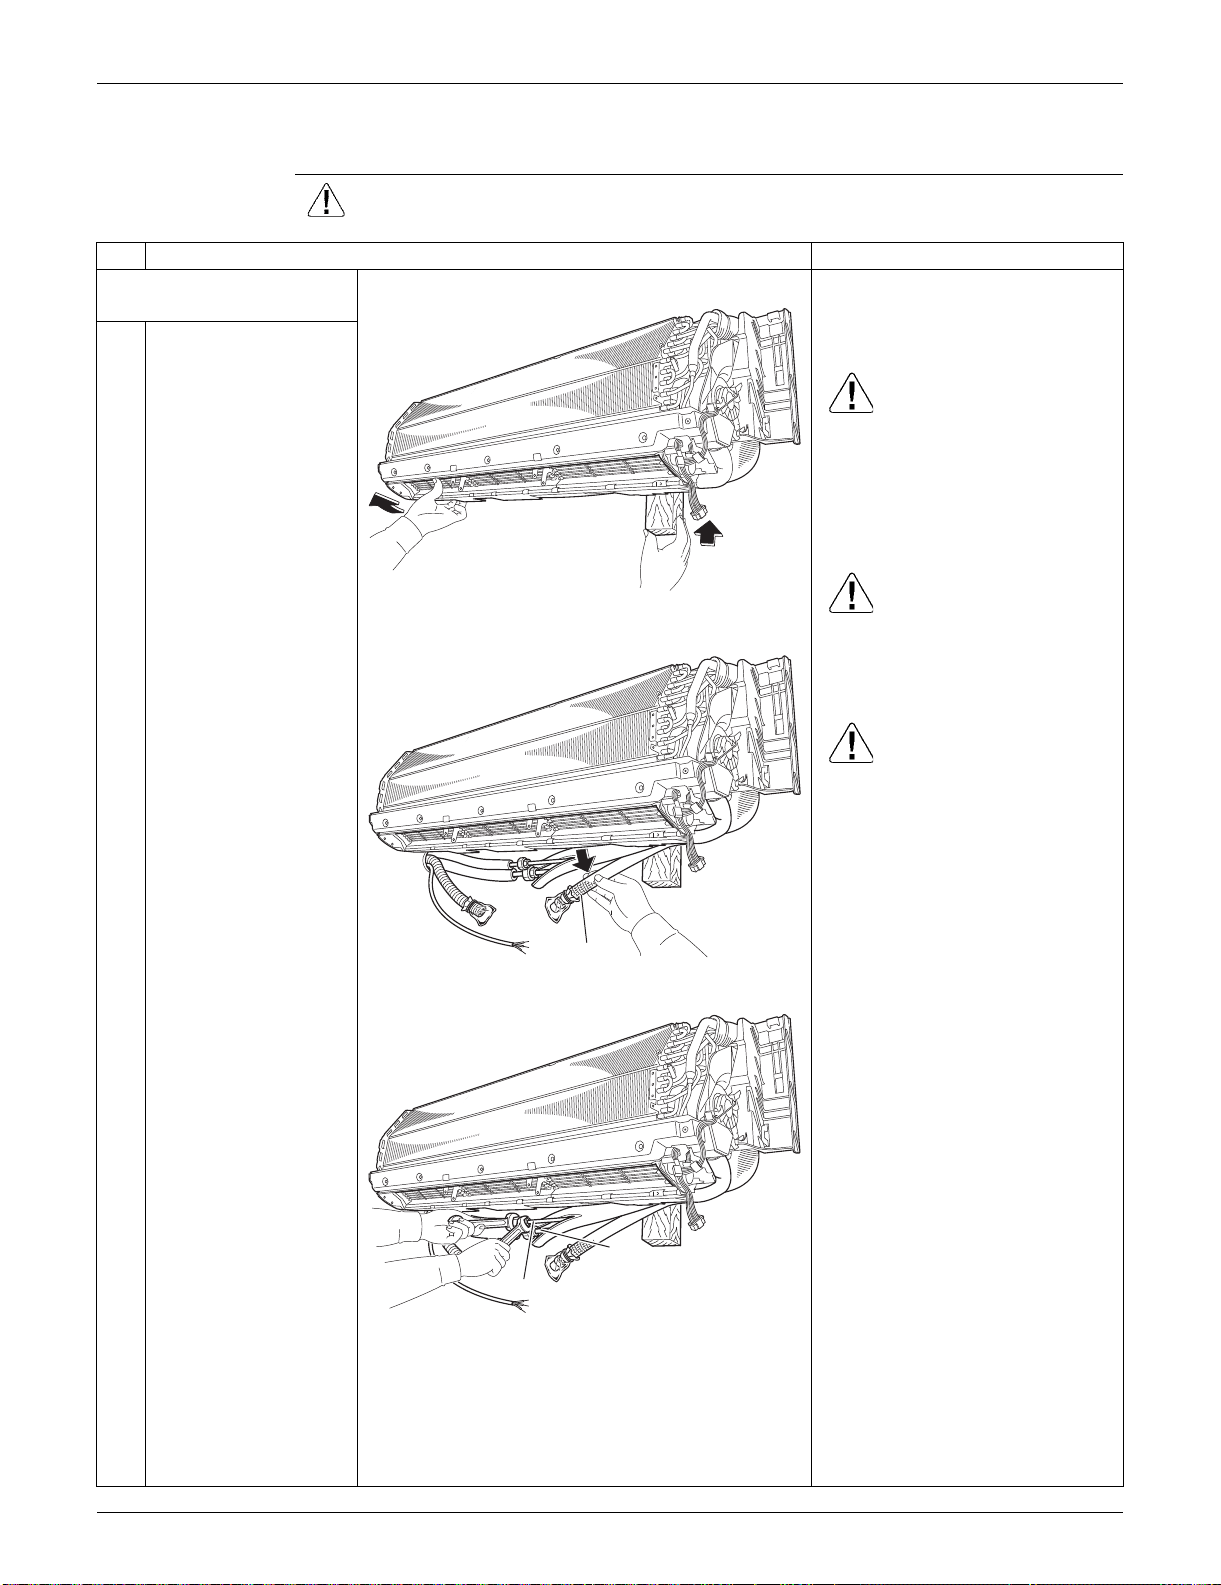
3.7 Removal of Indoor Heat Exchanger
Procedure Warning Be sure to wait for 10 minutes or more after turning off all power supplies
before disassembling work.
Step
Procedure Points
1. Disconnect the refrigerant
piping.
Preparation
Remove the electrical box
according to the “Removal of
Electrical Box”.
Caution
If the refrigerant leaks, repair the
leakage, then collect all
refrigerant from the unit. After
conducting vacuum drying,
recharge a proper amount of
refrigerant.
Caution
From the viewpoint of global
environment protection, be sure
to use a vacuum pump for air
purging.
Caution
In pump-down work, be sure to
stop the compressor before
disconnecting the refrigerant
piping. If the refrigerant piping is
disconnected with the
compressor operating and the
stop valve open, air may be
sucked in to generate an over-
pressure in refrigeration cycle,
thus resulting in pipe rupture or
accidental injury.
Place a plastic sheet under the
drain pan to prevent from
wetting the floor with remaining
drain.
If the drain hose is embedded in
the wall, disconnect the drain
hose beforehand.
Carry out the removal work with
2 wrenches.
When the pipings are
disconnected, protect both the
openings of pipe and unit from
entering moisture.
1
Hold the indoor unit up
with a piece of wood
etc.
2
Pull out the drain hose.
3
Unscrew the flare nuts
for gas piping and liquid
piping.
(R11406)
(R9569)
Drain hose
(R9570)
Liquid piping
Gas piping
Loading ...
Loading ...
Loading ...