Loading ...
Loading ...
Loading ...
54
E
F
H
J
M
A
B
C
D
4. Realice el mismo procedimiento en el otro
lado del tractor.
5. FIJE LAS PIEZAS DE PROPULSIÓN POS-
TERIORES (C) – Levante la parte posterior
de la cortadora, ubique la ranura de la pieza
de unión (D) por encima de la clavija que hay
en la barra posterior de la cortadora y fíjela
con una arandela y un resorte de contención.
6. FIJE LA PIEZA DE UNIÓN ANTERIOR (E)
– Trabaje por el lado izquierdo del tractor.
Introduzca el extremo de la barra de la pieza
de unión por el orificio anterior de la barra de
suspensión anterior del tractor (F).
7. Introduzca el otro extremo de la pieza de
unión (E) en el orificio que se encuentra en
la barra anterior de la cortadora (H), y fíjelo
por medio de una arandela y un resorte de
contención (J).
8. Retire el resorte del cable del embrague (Q)
del brazo del engranaje (R).
9. Retire el resorte de sujeción (K), deslice la
abrazadera (L) hasta quitarla, y saque a
presión la guía de la caja (P) hasta que se
salga del soporte.
10. Instale la correa pasándola por encima de la
polea del motor (M) y fijadors de la correa (G).
IMPORTANTE: Verifique que la correa encaje
bien en todas las ranuras de las poleas de la
cortadora.
11. Suba la palanca elevadora a la posición de
más arriba.
12. Si es necesario, ajuste las rueditas del calibre
antes de poner en funcionamiento la corta-
dora, como se ilustra en el capítulo de Manejo
de este manual.
E
F
C
G
Q
R
D
K
G
P
B
L
M
A
15
PURGE TRANSMISSION
CAUTION: Never engage or dis en gage
freewheel lever while the engine is run ning.
To ensure proper operation and per for mance,
it is rec om mend ed that the trans mis sion be
purged before operating trac tor for the first
time. This procedure will remove any trapped
air inside the trans mis sion which may have
de vel oped dur ing shipping of your tractor.
IMPORTANT: Should your transmission
require removal for service or re place ment,
it should be purged after re in stal la tion before
operating the tractor.
1. Place tractor safely on a level surface
-
that is clear of objects and open - with
engine off and parking brake set.
2. Disengage transmission by placing
freewheel control in disengaged position
(See “TO TRANS PORT” in this section
of manual).
3. Sitting in the tractor seat, start en gine.
After the engine is running, move throttle
control to slow position. With motion
control lever in neutral po si tion, slowly
disengage clutch/brake pedal.
CAUTION: At any time, during step 4,
there may be movement of the drive wheels.
4. Move motion control lever to full for ward
position and hold for five (5) seconds.
Move lever to full reverse position and
hold for five (5) seconds. Repeat this
procedure three (3) times.
5. Move motion control lever to neutral posi-
tion. Shutoff engine and set parking brake.
6. Engage transmission by placing free-
wheel control in engaged position (See
“TO TRANSPORT” in this sec tion of
manual).
7. Sitting in the tractor seat, start en gine.
After the engine is running, move throttle
control to half (1/2) speed. With motion
control lever in neutral position, slowly
dis en gage clutch/brake pedal.
8. Slowly move motion control lever forward,
after the tractor moves ap prox i mate ly
five (5) feet (1,5 m), slowly move motion
control lever to reverse po si tion. After
the tractor moves ap prox i mate ly five
(5) feet (1,5 m) return the motion control
lever to the neutral position. Repeat this
pro ce dure with the motion control lever
three (3) times.
Your transmission is now purged and now
ready for normal operation.
MOWING TIPS
• DO NOT use tire chains when the mower
hous ing is attached to tractor.
• Mower should be properly leveled for best
mowing performance. See “TO LEVEL
MOWER HOUSING” in the Service and
Adjustments section of this manual.
• The left hand side of mower should be
used for trim ming.
• Drive so that clippings are dis charged onto
the area that has already been cut. Have
the cut area to the right of the tractor. This
will result in a more even dis tri bu tion of
clippings and more uniform cutting.
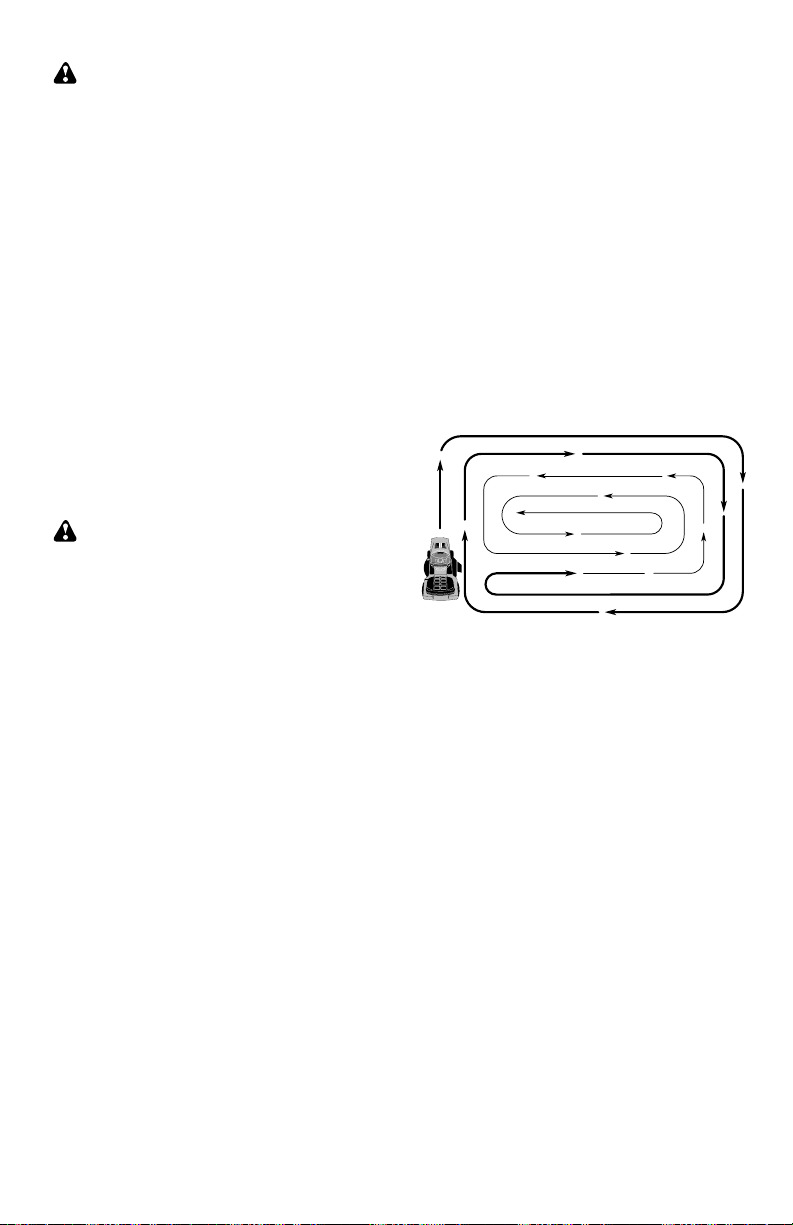
• When mowing large areas, start by turning
to the right so that clippings will discharge
away from shrubs, fences, driveways,
etc. After one or two rounds, mow in the
opposite direction making left hand turns
until finished .
• If grass is extremely tall, it should be
mowed twice to reduce load and possible
fire hazard from dried clip pings. Make
first cut relatively high; the second to the
desired height.
• Do not mow grass when it is wet. Wet
grass will plug mower and leave undesir-
able clumps. Allow grass to dry before
mowing.
• Always operate engine at full throt tle
when mowing to assure better mow-
ing performance and prop er dis charge
of material. Reg u late ground speed by
se lect ing a low enough gear to give the
mower cut ting per for mance as well as the
quality of cut desired.
• When operating attachments, se lect a
ground speed that will suit the terrain and
give best performance of the at tach ment
being used.
Loading ...
Loading ...
Loading ...