Loading ...
Loading ...
Loading ...
12
Combustion Air
COMBUSTION AIR
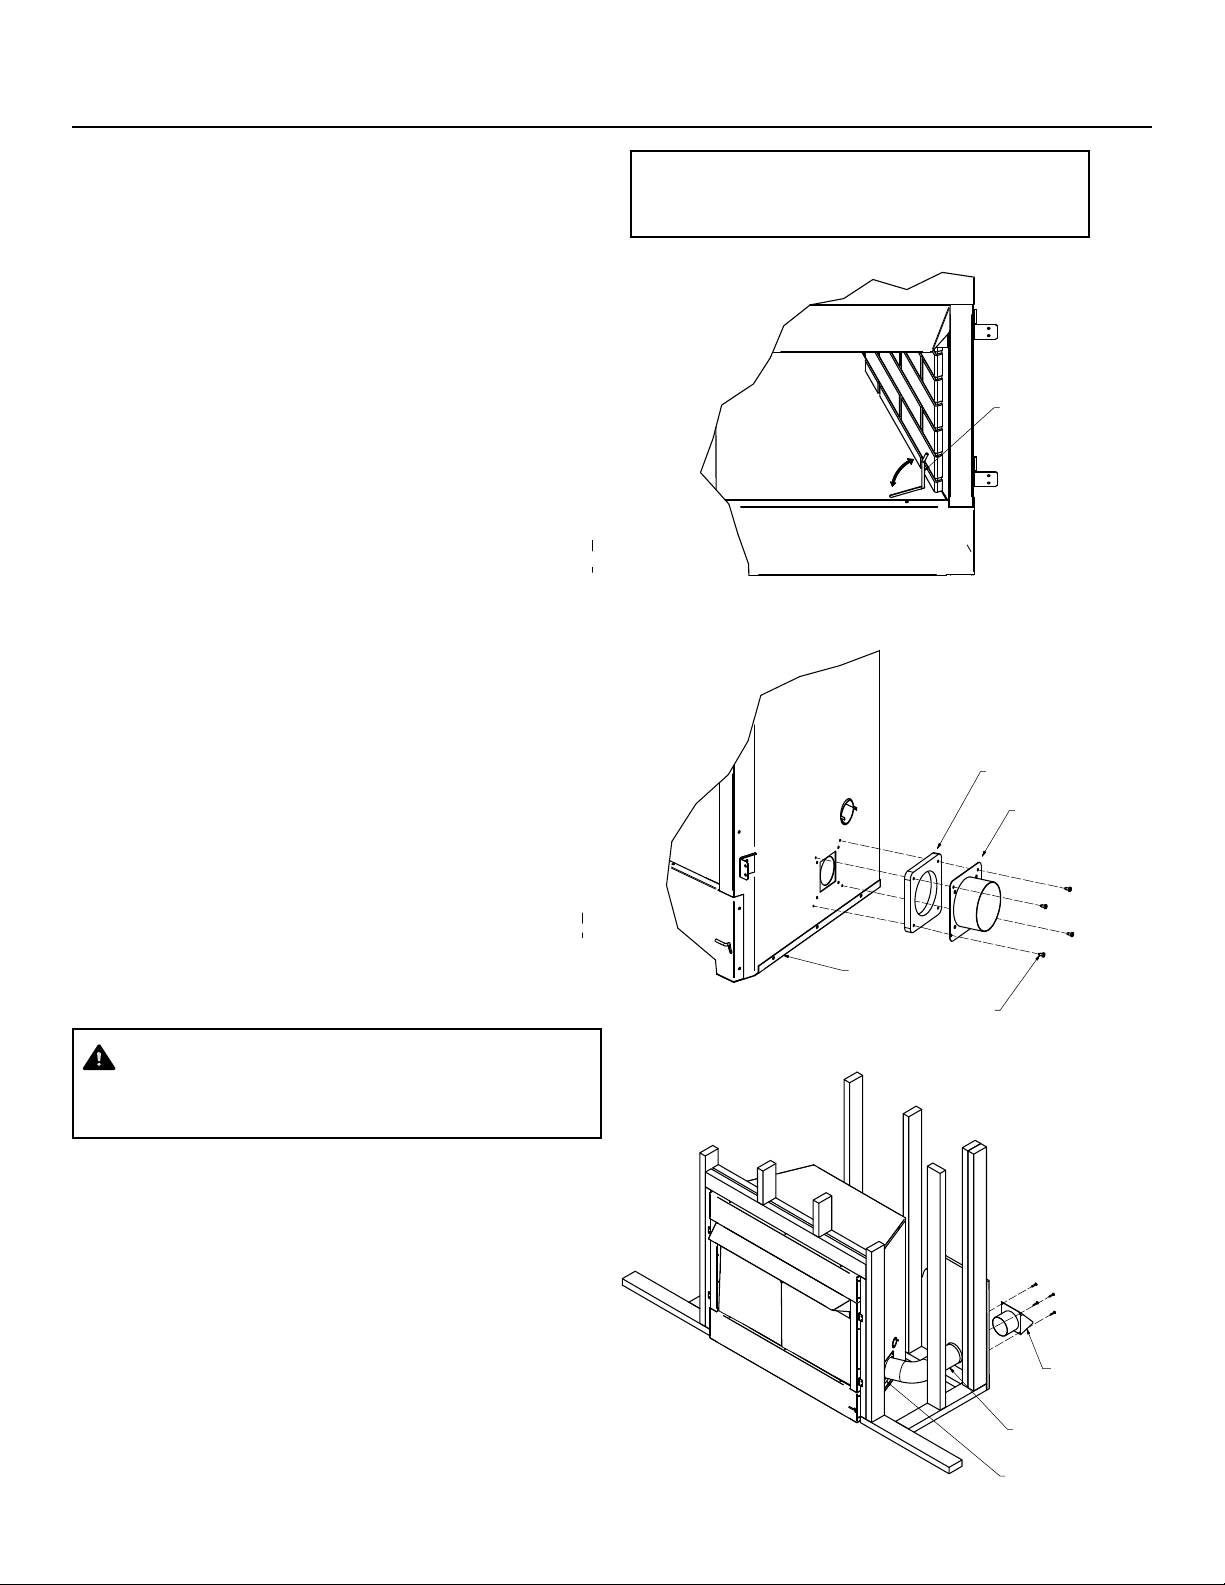
1. Locate combustion air assembly at an exterior location which is
not likely to be accidentally blocked in any manner. Locate assem-
bly a min. of 12” above the snow line to prevent blockage by snow
accumulation.
2. Never mount the combustion air inlet assembly in a garage or
storage area where combustible fumes such as gasoline might be
drawn into the replace.
3. Combustion air can be drawn from the crawl space under a house
when an adequate supply of air is provided by open ventilation.
4. CAUTION: Do not take combustion air from attic space or garage
space.
5. Locate air supply inlet at least 3’ away from any appliance vent
terminal.
6. Avoid extremely long runs and numerous turns in the duct leading
from the replace to the combustion air assembly. These conditions
increase the resistance to the free ow of air through the duct.
The use of outside air for combustion is optional unless required by
building codes. It is only necessary to supply outside combustion air
to one side of the replace. Use the open air kit.
OUTSIDE AIR KIT ASSEMBLY (OAK100)
1. Place the insulation gasket between the open air kit starting collar
and replace wall.
2. Place the starting collar (4”) on the side of replace. Fasten it in
place with the four sheet metal screws provided.
NOTE: When the air starting collar is securely attached, it will form
a seal against the fireplace wall.
WARNING!
Do not use a combustible duct. Always use UL Listed Class 0 or 1
duct material.
3. Attach outside duct to starting collar with duct clamp or screws.
4. Cut a 6-inch diameter opening for the open air kit in the
outside wall covering where the outside vent is to be located.
5. Select and cut a piece of duct long enough to attach to the
replace and stick out at least 3” beyond the face of the wall to
which the open air kit inlet air vent will be attached. Cut duct with
a standard pocket knife.
6. If the duct is the insulated type, push the insulation back from one
end of the duct approximately 2”.
7. Slip the exposed end of the duct over the starting collar on the
replace.
8. Using the sheet metal screws provided, secure the duct end to the
collar attached to the replace.
9. Nail or screw the combustion air assembly to the surface of the
wall.
A
Insulation Gasket
PHOAK Starting Collar
(4) Sheet Metal Screws
ZC Firebox
RH Side
Fig. - Outside Air Inlet Collar Attachment
PHOAK Inlet Air Vent
PHOAK Starting Collar
4" Semi-Rigid Metal
Vent Tube
Fig. - Simple Outside Air Kit Installation
Notice: If you do not install an outside air kit be sure to
keep the lever in the “closed” position to avoid cold air
drafts.
Figure 13 - Outside Air Inlet Collar Attachment
Figure 14 - Simple Outside Air Kit Installation
Figure 12 - Outside Air Operation
A
OUTSIDE AIR LEVER
OPEN
CLOSED
Loading ...
Loading ...
Loading ...