Loading ...
Loading ...
Loading ...
10
Fireplace and Canopy/Hood Installation
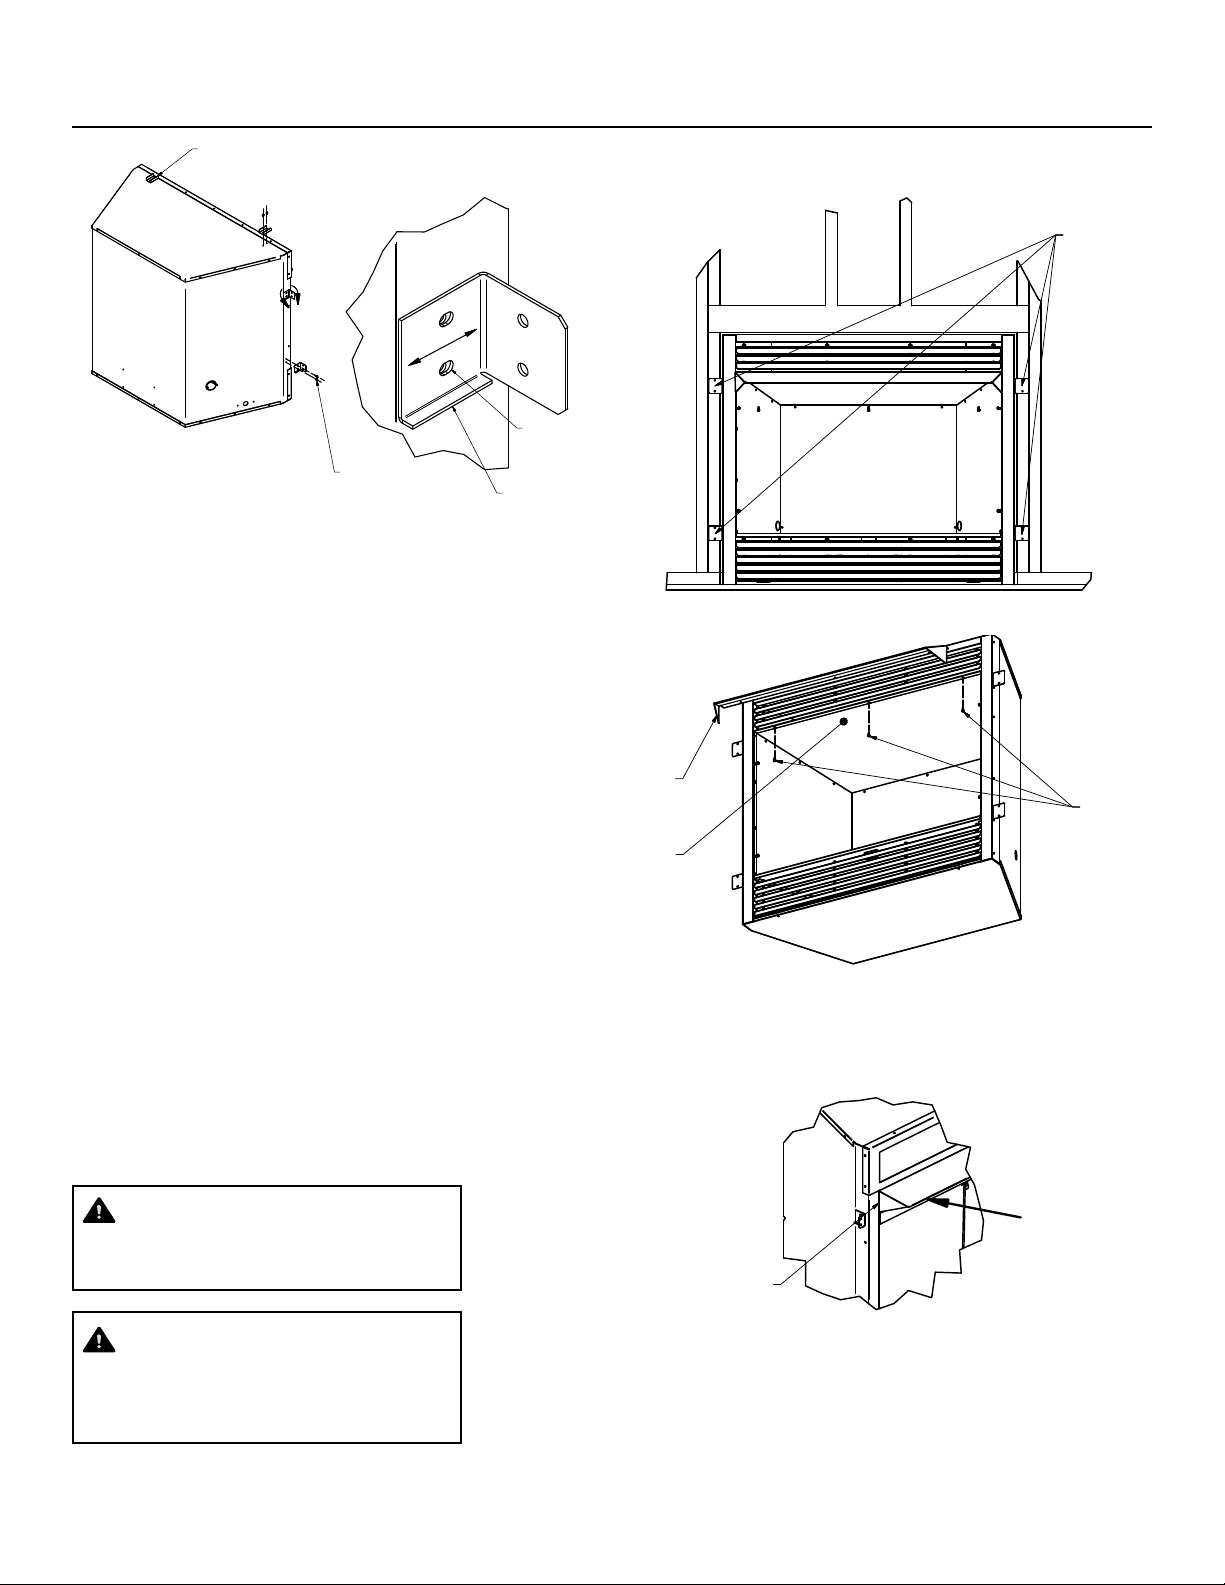
Standoff Installation Instructions:
1. Position the Standoff Bracket as shown and start both mounting
screws.
Push the Standoff Bracket forward and tighten both mounting
screws to position the Firebox for 1/2” Drywall.
Pull the Standoff Bracket backward and tighten both mounting
screws to position the Firebox for 9/16” Drywall.
Repeat process for all four Standoff Brackets.
2. Slide the rebox into prepared framing or position rebox in its
nal position and frame later.
3. Level the rebox by checking the top edge of the rebox. Shim if
necessary.
4. Anchor rebox to the side framing members using 8d nails or
other suitable fasteners. Figure 9.
5. The canopy/hood must be installed for safe operation of the
heater.
INSTALLING CANOPY/HOOD
A canopy/hood is furnished with each rebox and MUST be installed
for safe operation. Figure 11
1. Align the canopy/hood with the holes in the top frame.
2. Insert all 3 screws slightly but do not tighten.
3. Push the canopy/hood toward Firebox to insure there is no gap
between the canopy/hood and Firebox as shown in Figure 11a.
4. Then tighten all screws securely.
WARNING!
Close replace screen panel before operating a
decorative type unvented room heater.
WARNING!
The rebox canopy must not be modied or
replaced with a canopy that may be provided
with the unvented decorative room heater.
#8 x 3/8 Sheet
Metal Screw
Combustion
Casing Top
Nailing Flanges
FIG. - Hood Installation
Fig. - Nailing Flange Location
Canopy/Hood
Figure 10 - Nailing Flange Location
Figure 11 - Canopy/Hood Installation
Figure 9 - Mounting Standoff Brackets
B
NO GAP
(ON BOTH SIDES)
P
U
S
H
G
E
N
T
L
Y
FIG. 11a - Hood Assembly
Figure 11a - Canopy/Hood Assembly
9
/
1
6
"
D
R
YW
A
L
L
T
H
I
C
K
N
E
S
S
(
B
A
C
KW
A
R
D
)
1
/
2
"
D
R
YW
A
L
L
TH
I
C
KN
E
S
S
(
F
O
R
W
A
R
D
)
Standoff Installation Instructions:
1. Position the "Side" Standoff Bracket as shown and start both mounting screws.
Push the Standoff Bracket forward and tighten both mounting screws to position the Firebox for 9/16" Drywall.
Pull the Standoff Bracket backward and tighten both mounting screws to position the Firebox for 1/2" Drywall.
Repeat process for all four "Side"
Standoff Brackets.
2. Attach the "Top" Standoff Brackets by positioning them inline with the mounting holes and inserting the screws.
SIDE Standoff (Nailing Flange)
TOP Standoff
Slotted Mounting
Hole
#8 x 3/8" Mounting Screws
Loading ...
Loading ...
Loading ...