Loading ...
Loading ...
Loading ...
6
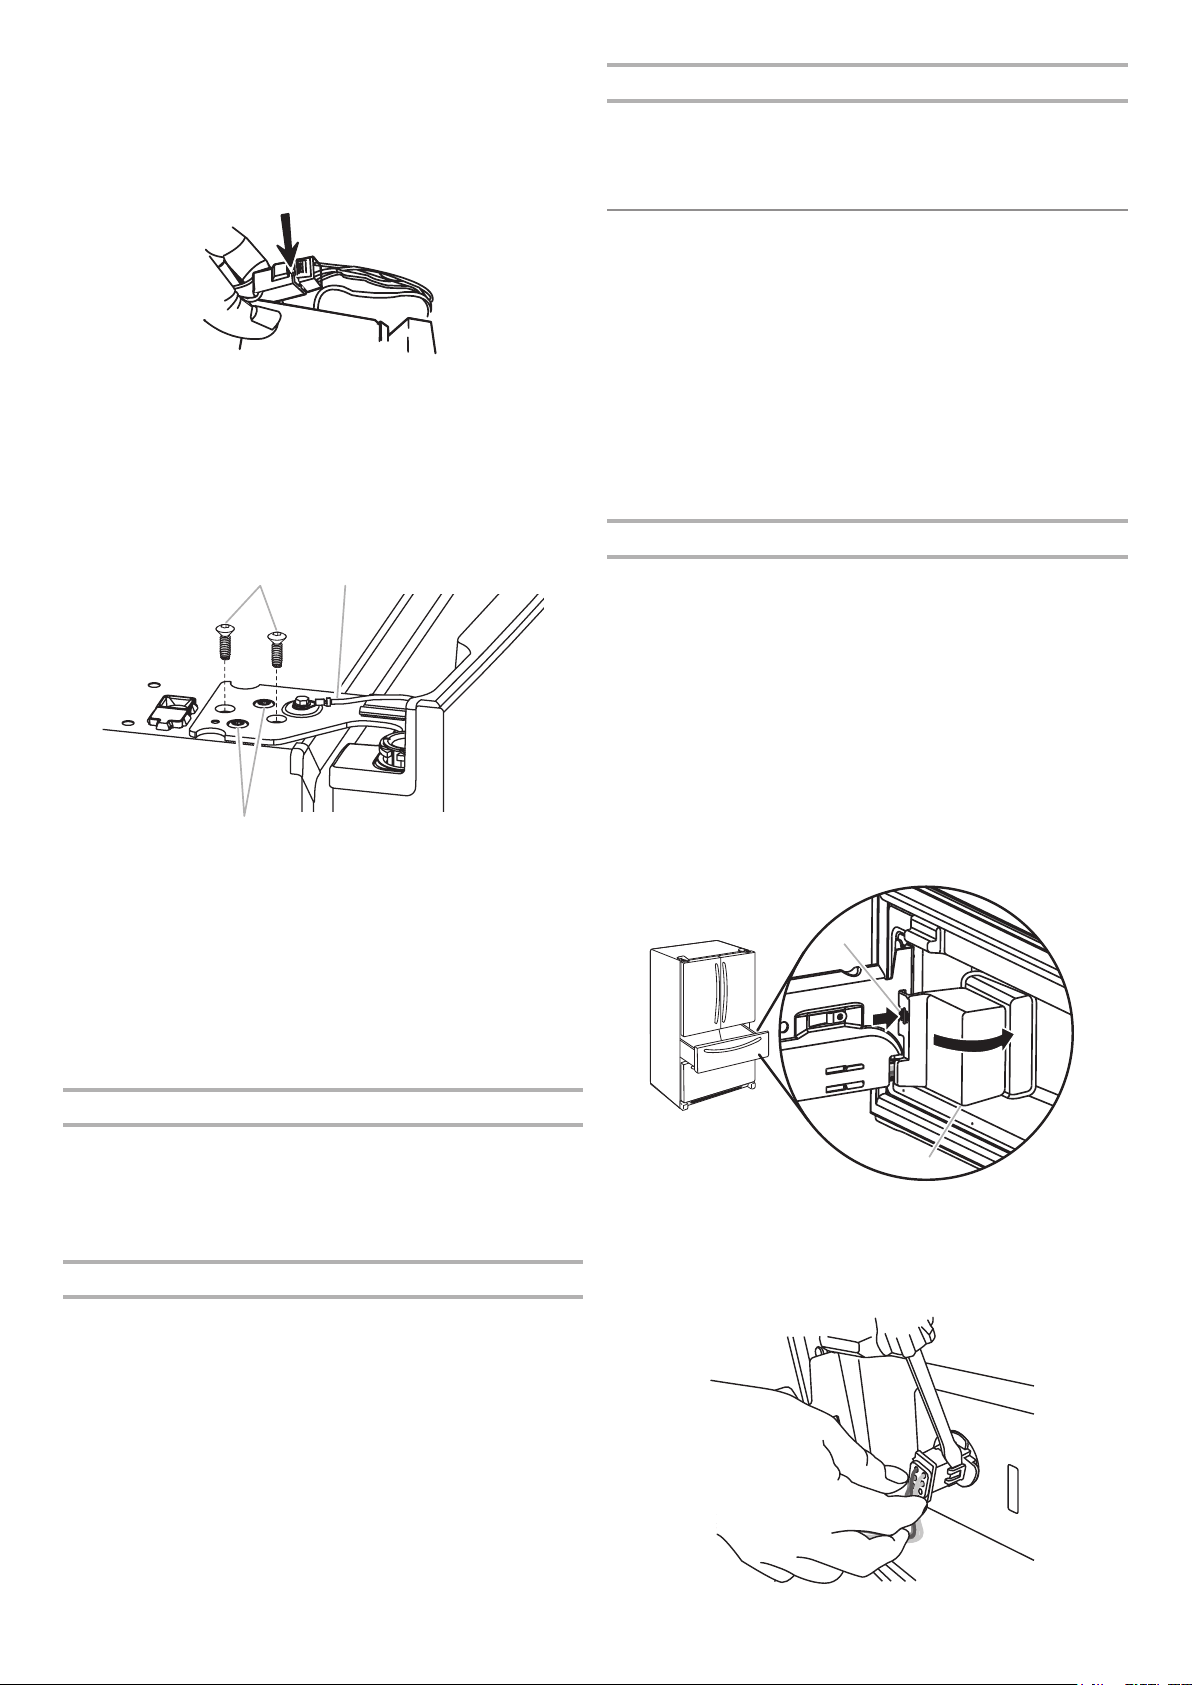
3. Disconnect the wiring plug located on top of the door hinge.
■ Grasp each side of the wiring plug. With your left thumb,
press down to release the catch and pull the sections of
the plug apart.
NOTE: Do not remove the green, ground wire. It should
remain attached to the door hinge.
4. Using the 3/16" hex key wrench, remove the two internal hex
head screws from the top hinge, and set aside.
NOTES:
■ Provide additional support for the refrigerator door while
the hinges are being removed. Do not depend on the door
gasket magnets to hold the door in place while you are
working.
■ Do not remove the two locator screws. These screws will
help you align the hinge when you replace the door.
5. Lift the refrigerator door from the bottom hinge pin. The top
hinge will come away with the door.
NOTE: It may not be necessary to remove the bottom hinges
and brake feet assemblies to move the refrigerator through a
doorway.
■ Only if necessary, use a driver with a #2 square bit tip to
remove the bottom hinges and a 3/8" nut driver to remove
the brake feet screws.
Replace Right-Hand Refrigerator Door
1. Set the right-hand door onto the bottom hinge pin.
2. Insert the top hinge pin into the open hole in the top of the
refrigerator door.
3. Using the two 3/16" internal hex head screws, fasten the
hinge to the cabinet. Do not tighten the screws completely.
Replace Left-Hand Refrigerator Door
IMPORTANT: Do not intertwine the water tubing and wiring
bundles when reconnecting them.
1. Set the left-hand door onto the bottom hinge pin.
2. Using the two 3/16" internal hex head screws, fasten the
hinge to the cabinet. Do not tighten the screws completely.
3. Reconnect the water dispenser tubing.
Style 1 - Insert the tubing into the tting until it stops and the
outer ring is touching the face of tting.
Style 2 - Insert the tubing rmly into the tting until it stops.
Close the clasp around the tubing. The clasp snaps into
place between the tting and the collar.
4. Reconnect the electrical wiring.
■ Push together the two sections of the wiring plug.
Final Steps
1. Completely tighten the four internal hex head screws (two
on the right-hand door hinge and two on the left-hand door
hinge).
2. Replace both top hinge covers.
Remove and Replace Drawer Fronts
Depending on the width of your door opening, it may be
necessary to remove the drawer fronts to move the refrigerator
into your home.
IMPORTANT:
■ If the refrigerator was previously installed and you are moving
it out of the home, before you begin, turn the refrigerator
control OFF, and unplug the refrigerator or disconnect power.
Remove food from the drawers.
■ Two people may be required to remove and replace the
drawer fronts.
TOOLS NEEDED: 1/4" Hex head nut driver, Flat-blade
screwdriver
Refrigerated Drawer
Disconnect Wiring
NOTES:
■ The exterior refrigerator drawer front is connected to the
temperature control. Before removing the drawer front, the
wires must be disconnected from the temperature control.
■ The cable visible behind and under the pantry drawer at the
right side contains wiring for the pantry control and moves
with the drawer as it is pulled out. There is no need to
disconnect this cable.
1. Open the drawer to its full extension, and remove the large
interior bin.
2. Locate the wiring cover on the backside of the drawer front.
Press tab on the cover to release the snaps, and pull off
cover to reveal the wiring connection.
3. On one side of the wiring connector, insert the screwdriver
blade between the connector tab and the connector to
release. Repeat for the opposite side. Pull the wiring
connector apart.
A B
C
B
A
A. 3/16" Internal hex head screws
B. Ground wire (do not remove)
C. Locator screws (do not remove)
A. Press tab B. Wiring connection cover
Loading ...
Loading ...
Loading ...