Loading ...
Loading ...
Loading ...
12
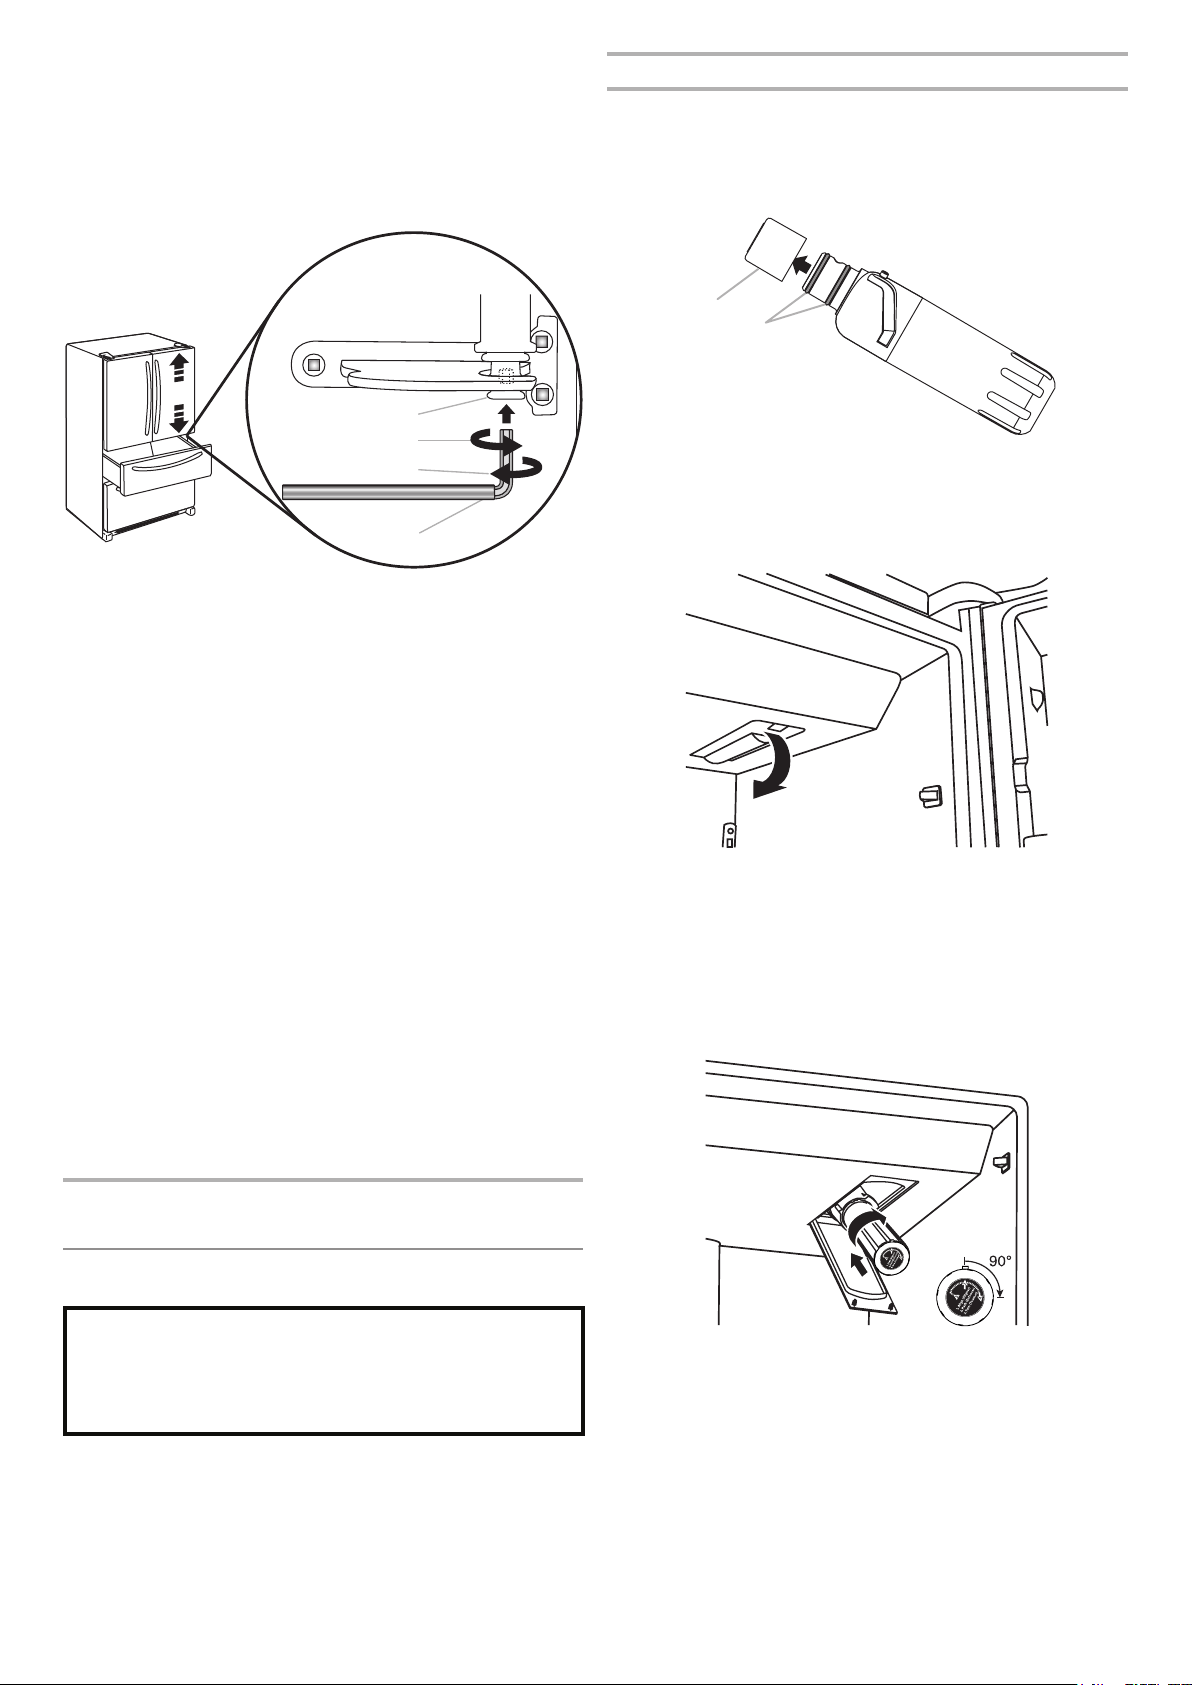
5. Make sure the doors are even at the top and that the space
between the bottom of the refrigerator doors and the top of
the freezer drawer is even. If necessary, align the doors.
To Align the Doors:
■ Keeping both refrigerator doors closed, pull out the
refrigerated drawer. Locate the bottom hinge pin of the
right-hand refrigerator door. The alignment screw is inside
the bottom hinge pin.
■ Insert the short end of the 1/8" hex key wrench (packed
with the Door Handle Installation Instructions) into the
bottom hinge pin until it is fully engaged in the alignment
screw.
To raise the door, turn the hex key to the right.
To lower the door, turn the hex key to the left.
■ Continue to turn the alignment screw until the doors are
aligned.
6. Make sure the refrigerator is steady. If the refrigerator seems
unsteady or rolls forward when a door or drawer is pulled
open, adjust the brake feet.
To Steady the Refrigerator:
■ Open the freezer drawer. Using a 1/4" hex driver, turn both
brake feet clockwise the same amount until the brake feet
are snug against the oor. Check again. If not satised,
continue to adjust the brake feet by half turns of the screw
until the refrigerator does not roll forward when the drawer
is opened.
NOTE: Having someone push against the top of the
refrigerator takes some weight off the brake feet. This
makes it easier to turn the screws.
7. Replace the base grille by aligning the ends of the grille with
the leveling assemblies on each side and snapping the grille
into place.
FILTERS AND ACCESSORIES
Water Filtration System
Install the Water Filter
1. Locate the accessory packet in the refrigerator and remove
the water lter.
2. Take the water lter out of its packaging and remove the
cover from the O-rings. Be sure the O-rings are still in place
after the cover is removed.
3. The water lter compartment is located in the right-hand side
of the refrigerator ceiling. Push up on the compartment door
to release the catch, then lower the door.
4. Align the arrow on the water lter label with the cutout notch
in the lter housing and insert the lter into the housing.
5. Turn the lter clockwise 90 degrees (1/4 turn), until it locks
into the housing.
NOTE: If the lter is not correctly locked into the housing,
the water dispenser will not operate. Water will not ow from
the dispenser.
6. While the compartment door is still open, lift the lter up into
the compartment. Then, close the lter compartment door
completely.
7. Flush the water system. See “Flushing the Water Filter” in the
“Water and Ice Dispensers” section.
IMPORTANT: If you do not ush the water system, you may
experience dripping and/or decreased ow from the water
dispenser.
A
B
C
D
Do not use with water that is microbiologically unsafe or
of unknown quality without adequate disinfection before
or after the system. Systems certified for cyst reduction
may be used on disinfected waters that may contain
filterable cysts.
B
A
A. O-ring cover
B. O-rings
A. Bottom hinge pin
B. Turn to the right to raise
C. Turn to the left to lower
D. 1/8" Hex key wrench
Loading ...
Loading ...
Loading ...