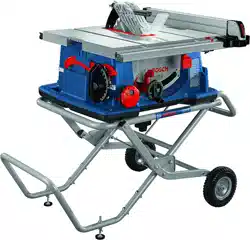
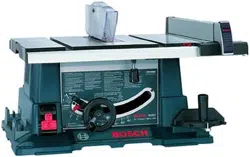
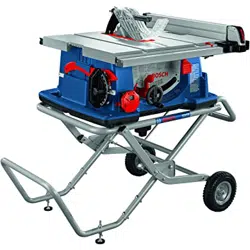
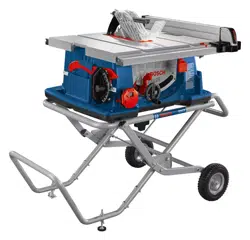
Operating / Safety Instructions Table Saws for Bosch 4100XC-10
Table of Contents
Safety Symbols
General Power Tool Safety Warnings
Work area safety
Electrical safety
Personal safety
Power tool use and care
Service
Safety Instructions for Table Saws
Guarding related warnings
Cutting procedures warnings
Kickback causes and related warnings
Table saw operating procedure warnings .
Additional Safety Rules
Intended Use
Specifications
Double Insulated Tools
Extension Cords
Symbols
Getting To Know Your Table Saw
Glossary of Terms
Unpacking And Checking Contents
Tools Needed For Assembly
Assembly
Storage, Transportation, and Mounting
Adjustments
Basic Table Saw Operation
Maintaining Your Table Saw
General Maintenance
Lubrication
Attachments
Troubleshooting
Storage, Transportation, and Mounting
MITER GAUGE AND PUSH STICK STORAGE
When not in use, store miter gauge 10 in miter gauge storage slot 13 on the left side panel of the saw. When not in use, slide push stick 22 into push stick storage slot 23. Make sure to insert push stick handle first as shown:
RIP FENCE AND THIN WORKPIECE FENCE STORAGE
When not in use, store rip fence 18 in rip fence storage 11 on the right side panel of the saw
Store the blade wrench 14 in its dedicated area, secured with a wing nut 14a
Wrap the power cord 28 around the cord wrap 16
Mount the 5mm hex wrench 15 in its dedicated storage location on the right side of the base
To store the thin workpiece fence 25, lift the clip 26 and place the fence on the “shoulders” of the red cord wraps 16 as shown. Release the clip 26 to secure the fence 25 in place.
SMART GUARD SYSTEM STORAGE - When not in use, the main barrier guard and anti-kickback device can be stored under the right side table extension.
Slide the main barrier guard assembly 19a (upside down) up and back into the strap support 20b at the rear right side of the saw (Fig. 17).
Pivot the rear of the guard up and into the front mounting bracket 20a (Fig. 17).
ock the main barrier guard assembly 19a into place in the same manner as you would attach it to the riving knife (Fig. 18).
Attach the anti-kickback device 19b to the front mounting bracket in the same manner that it attaches to the riving knife
MOUNTING THE TABLE SAW - If table saw is to be used in a permanent location, it should be fastened securely to a firm supporting surface such as a stand or workbench, using the four mounting holes 24 (Fig. 19).
If mounting to a workbench, the base should be bolted securely using 5/16" (M8) hex bolts (not included) through mounting holes. Hint: If workbench is 3/4" (19mm) thick, bolts will have to be at least 3-1/2" (90mm) long - if workbench is 1-1/2" (38mm) thick, bolts should be at least 4-1/2" (114mm) long.
Locate and mark where the saw is to be mounted, relative to holes in the base of the tool.
Drill four (4) 3/8" (9.5mm) diameter holes through workbench.
Place table saw on workbench aligning holes in base with holes drilled in workbench.
Insert four (4) 5/16" dia. bolts through holes in base and supporting surface; then secure with (4) 5/16” flat washers and (4) 5/16" hex nuts (hardware not included).
Maintaining Your Table Saw
GENERAL MAINTENANCE - Do not allow sawdust to accumulate inside the saw. Frequently use a brush to remove any dust that may accumulate inside the saw cabinet and the motor. Clean your cutting tools (i.e. blades) with a Gum and Pitch Remover. Periodically clean the guard with a rag or a brush. The cord and the tool should be wiped with a dry clean cloth to prevent deterioration from oil and grease. A coat of automobile-type wax applied to the table will help to keep the surface clean and allow workpieces to slide more freely. If the power cord is worn or cut, or damaged in any way, have it replaced immediately. Make sure the teeth of the anti-kickback device are always sharp. To sharpen:
Remove anti-kickback device from riving knife.
Rotate one pawl away from the other.
Hold pawl over corner of workbench (Fig. 67).
Using a small round file (Smooth Cut) sharpen the teeth.
LUBRICATION
The gear case has been completely lubricated at the factory. However, after six months to one year, depending upon use, it’s wise to return your tool to the nearest Service Center for the following:
Brushes replaced.
Parts cleaned and inspected.
Relubricated with fresh lubricant.
Electrical system tested.
All repairs.
The following parts should be oiled occasionally with SAE No. 20 or No. 30 oil, or WD-40 (Fig. 68):
#2 The legs and rest-on-wheels do not look real sturdy. Does this table saw shake/vibrate when starting or cutting?
- The stand is a lot sturdier than the other saws I have with stationary metal stands. There is a leveling adjustment as well. - There is no shakiness I have experienced. The saw has a "soft start" feature so it behaves much like a drive-controlled motor.