
Loading ...
Loading ...
Loading ...
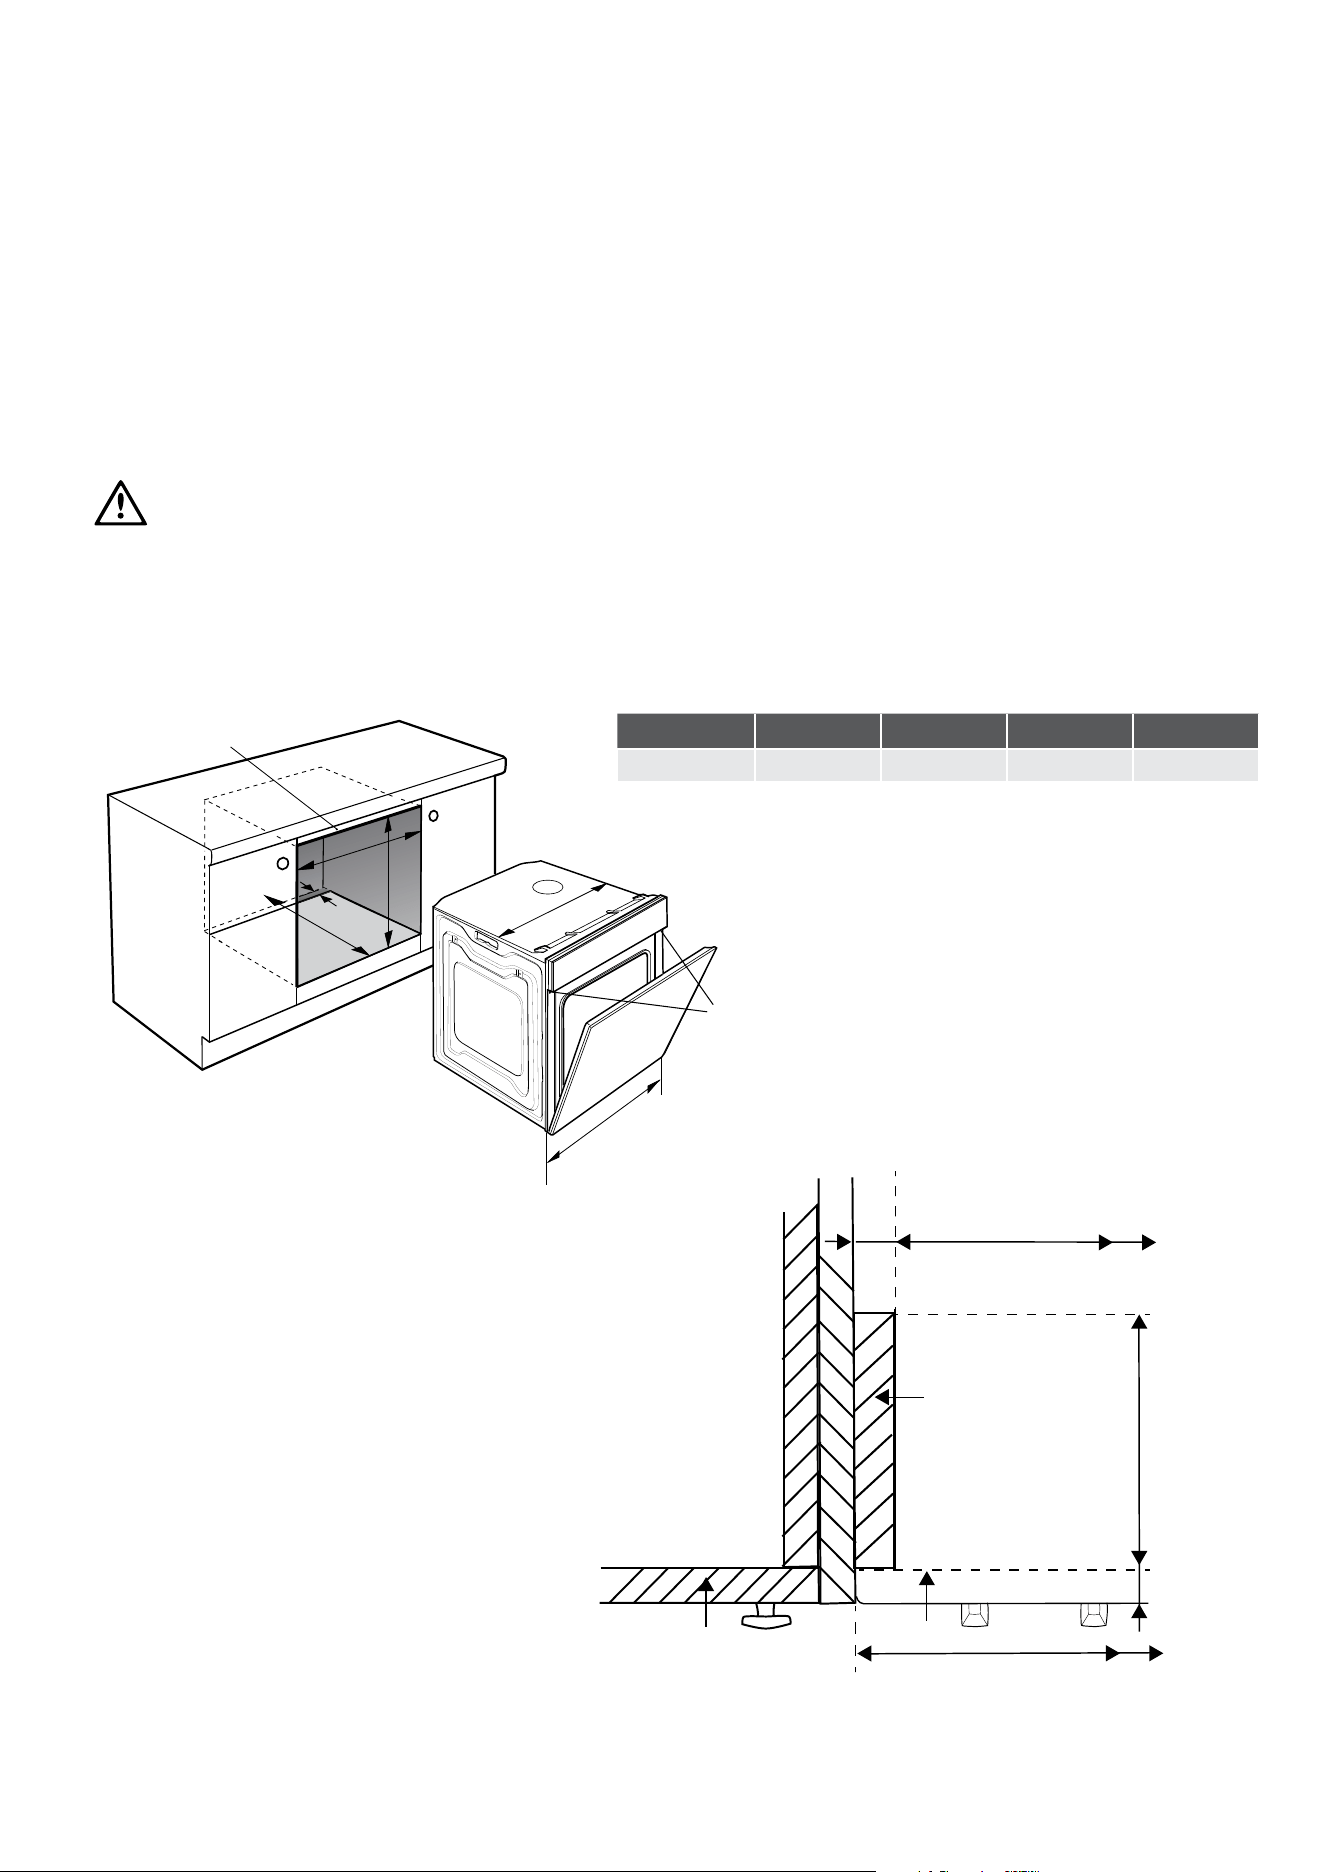
Pyrolytic underbench oven-flush fit only
Your underbench oven looks best when the control panel is directly under the benchtop. An upper infill panel may have
to be added if the cooktop placed over the oven is too deep. Refer to cooktop installation instructions for required
clearance between cooktop and oven.
caution
NOTE: Dimension “D”.
A requirement for all pyrolytic clean ovens – for proper ventilation there must be a gap at the bottom rear of the
cabinet. This can be a full width opening 20mm deep.
installation
C
B
A
561
Mounting holes
596
upper infill
(if required)
Use black installation
screws supplied
D
Flush Fit
(Pyro only)
Cupboard
door
Oven
Infill
panel
100mm max
for pyro oven
20mm
600mm
568mm
16mm
A B C D
Flush fit (mm) 600 600 581(min)
20
Built-in Cooking BEFORE OPERATING YOUR APPLIANCE 9
before operating your
appliance for the first time
tips & information
Setting the time
3 button programmable clock (where applicable)
After electrically connecting the appliance, you must set the
time of the day before you can operate your oven.
• After the appliance has been electrically connected
‘12:00’ will be displayed and the clock ‘indicator’
will flash.
• To set the time of day in hours and minutes press the
or buttons.
5 seconds after the last change, clock
‘indicator’ will
disappear, confirming the time has been set. Once the time
has been entered, the clock advances minute by minute.
NOTE: The clock has a 24-hour display.
Operating your 120 minute timer (where applicable)
To set the timer, simply turn the knob clockwise to the required
number of minutes.
NOTE: For any time below fifteen minutes turn the knob
past the forty minute mark then turn back to the required
number of minutes. When the timer returns to zero/off
position, the timer gives a short ring/ding.
• For appliances with a separate grill compartment, run grill
on maximum for 15 minutes with grill door open.
5 button programmable clock (where applicable)
• After the appliance has been electrically connected,
“12” and the “Set Clock” symbol “
“ will flash.
• To set the time of day “Hours” press the
or buttons.
• Press the “Clock” button and the time of day “Minutes”
will flash and can be set in the same manner.
• After 5 seconds from the last change, the clock display
will stop flashing, confirming the time is set.
NOTE: The clock has a 24-hour display.
Preparing your appliance for the first time
• Please remove all boxes and bags from inside the oven
before operation.
• Please wipe out the oven interior prior to operation with
warm soapy water and polish dry with a soft clean cloth.
Do not close the oven door until the oven is completely dry.
• New appliances can have an odour during first
operation. It is recommended to ‘run in’ your oven before
you cook for the first time. Run the oven at 180°C for
30 minutes and ensure that the room is well ventilated.
8 INSTALLATION Built-in Cooking
Loading ...
Loading ...
Loading ...