Loading ...
Loading ...
Loading ...
20 21
OPERATIONOPERATION
•Selectthecorrectshelflocationforfoodbeingcooked.
•makesuredisheswillfitintotheovenbeforeyou
switch it on.
•Keepedgesofbakingdishesatleast40mmfromthe
side of the oven. This allows free circulation of heat
and ensures even cooking.
•Donotopentheovendoormorethannecessary.
•Donotplacefoodswithalotofliquidintotheovenwith
other foods. This will cause food to steam and not brown.
•Aftertheovenisturnedoffitretainstheheatforsome
time.Usethisheattofinishcustardsortodrybread.
•Donotusealotofcookingoilwhenroasting.Thiswill
prevent splattering oil on the sides of the oven and
the oven door. Polyunsaturated fats can leave residue
which is very difficult to remove.
•Whencookingthingswhichrequireahighheatfrom
below (e.g. tarts), place the cooking dish on a scone
tray in the desired shelf position.
•forspongesandcakesusealuminium,brightfinished
ornon-stickutensils.
•Removeunnecessarytraysordisheswhenroasting
or baking.
Oven shelf location (exluding POR881)
Your oven has seven positions for shelves.
These are numbered from 1 (the lowest shelf position)
to 7 (the highest shelf position). See diagram.
To give maximum space above and below the shelves,
load them in this way:
•Whencookingwith1shelf,useposition3or4.
•Whencookingwith2shelves,useposition3and5.
Refer to cooking guide.
Usetheovenefficiently,bycookingmanytraysoffoodat
the same time. For example:
•Cook2traysofscones,smallcakesorsausagerolls.
•Cookaroastdinneratthesametimeasyoucook
chips or vegetables.
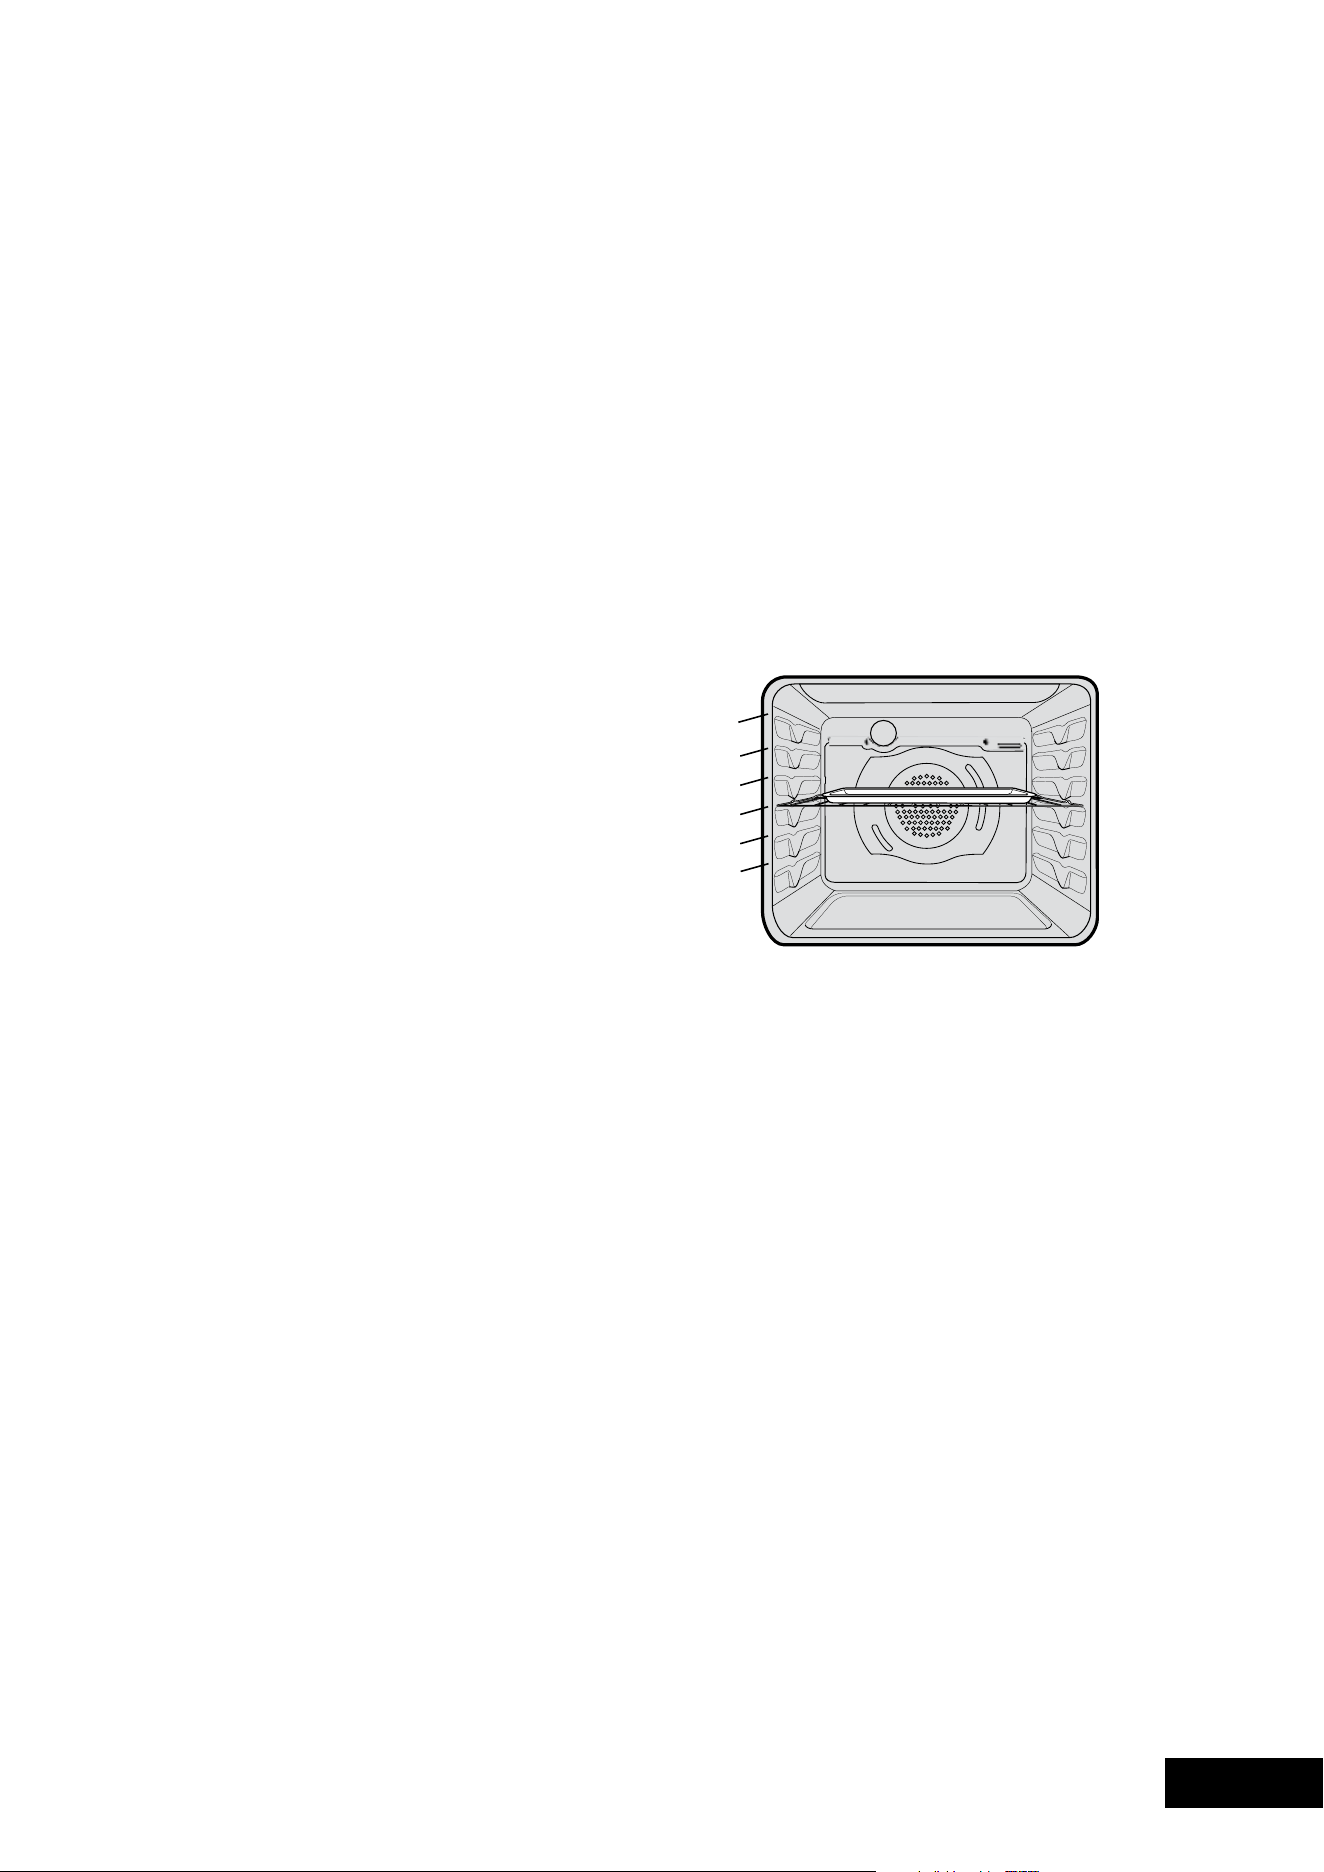
Oven shelf location (POR881)
Yourovencomeswithformed“easyclean”runnersthat
allow five positions for shelves. These are numbered from
1(thelowestshelfposition)to5(thehighestshelfposition).
See diagram.
In general:
•Whencookingwith1shelf,useposition3.
•Whencookingwith2shelves,useposition2and4.
For more specific suggestions refer to the table on the
following page.
Usetheovenefficiently,bycookingmanytraysoffoodat
the same time. For example:
•Cook2traysofscones,smallcakesorsausagerolls.
•Cookaroastdinneratthesametimeasyoucookchips
or vegetables.
not a shelf
position
5
4
3
2
1
MODEL POR881 ELECTRONIC CLOCK OVEN SHELF LOCATION
Setting the timer
1.PressTImeRbuttonuntilthe
display begins to flash.
2.Setthecountdowntimeyouwantbyusing–and+.
Commence with setting the number of seconds first.
The minutes and hours can then be set by subsequently
pressingtheTImeRagainandadjustingusingthe–and
+buttons.5secondsafterthelastchangethetimerwill
stop flashing, confirming the timer has been set.
3.Tocancelthetimerpressthetimerbuttonuntilthe
displayflashes.Thenpressandhold+and–buttons
until the timer is cleared.
4.Tostopthebeeper,press–,+orTImeRbuttons
Note: The clock display cannot be selected when the timer
is operating.
Elapsed Time
When an oven function is selected (other than pyrolytic
clean) and elapsed timer commences on the display
1.Toresetthistimerpressandholdboththe+and–
buttons until the timer is reset.
Displaying the cavity temperature
1.Duringoperationoftheoventhecurrentoven
temperatureduringpre-heatingoftheovencanbe
displayedbypressingtheTemPbutton.Duringnormal
operation the set temperature can be reviewed by
pressingtheTemPbutton.
Note: this temperature will only be displayed for
approximately 5 seconds.
Light operation
1.Duringoperationoftheoventhelampcanbeswitched
offbypressingandholdingtheTImeRbuttonuntilthe
lightturnsoff.Alsothelightcanbeturnedonfromthe
standbystatebypressingandholdingtheTImeRbutton
until the light comes on.
Activating the child-proof lock
When the child lock is engaged, the oven cannot be
operated and the door cannot be opened
1. Switch off the appliance using the function selector switch.
2.PressandholdtheCLoCKand+buttonsatthesame
timeuntiltheword‘SAfe’isdisplayedandadouble
beep is sounded. The word safe will be replaced by a
padlocksymbolonthedisplayafter5seconds.
Releasing the child-proof lock
1.PressandholdtheCLoCKand+buttonsatthe
same time until a double beep is sounded. This will
commencetounlockthedoorandafter5seconds
the oven is ready for use.
Switching the clock display ON and OFF
1.Presstogether+and–for2secondstoswitch‘off’
the display.
2.Presstogether+and–for2secondstoswitchtheclock
display‘on’again.
3.Whenthedisplayissettothe‘off’statepressingthe
+or–buttonmomentarilywilldisplaythetimefor5
seconds then turn off the display.
4.Whenthedisplayissettothe‘off’state,turningonthe
ovenwillturnthedisplay‘on’forthedurationofoven
operation.oncethefunctionisturned‘off’thedisplay
willturnoffafter5seconds.
Note: if a timer mode is set or the oven is operating, then it
is not possible to switch the display off.
Safety Cut-out feature
The oven automatically switches itself off if the temperature
is not adjusted or the appliance is left operating after a
period of time. The oven switches itself off after:
•12.5hourswhenthetemperatureissetlessthan120°C.
•8.5hourswhenthetemperatureissetto120°Cor
above,andbelow200°C.
•5.5hourswhenthetemperatureissetto200°Cor
above,andbelow250°C
•3.0hourswhenthetemperatureissetat250°C.
DEMO Mode
The oven can to be set to operate in a demo (eg in a retail
store) mode. In this mode the oven does not actually heat
If the oven has been inadvertently supplied in this mode.
The following instructions demonstrate how to exit this mode.
1.ensuretheovenisintheoffstate.Pressandholdthe+
buttonuntilabeepsounds.The‘Demo’textwillbegin
to flash.
2.Whileholdingthe+buttonturnthefunctionselectorto
the first oven function until another beep is heard.
3.Thenturnthefunctionselectortothe‘off’position.
4.Releasethe+button.
5.Toggleandholdthetemperatureselectortotheright(+)
until3beepssound.
The‘Demo’textwillnolongerbelitandtheovenwill
functionnormally.Ifthe‘Demo’testisstillpresentthen
repeat the above procedure.
degree to which the oven is currently being heated.
Loading ...
Loading ...
Loading ...