Loading ...
Loading ...
Loading ...
_" WARNING: Do not allOWfamiliaritywith tools
to make you careless.Remember that a careless
fraction of a second is sufficient to inflictserious
inlury.
• k WARNING: Always wear eafsty goggles or safety
glasseswith slde shieldswhen operating power
tools. Failureto do so could resultin objects being
thrown intoyour eyes resulting in possibleserious
injury.
_ WARNING, Do not use any attachments or
aecessodea not recommended by the manufacturer
ofthis tool. The use of attachments or accessories
not recommended can resultin seriouspersonal
in}ury.
_1= WARNING: Keep a finn grip on router with both
hands at all times. Failureto do so could result in
lossof controlfeeding to possibleseriouspersonal
injury.
APPLICATIONS
You may"use thistool for the purposes listed below:
• Routing grooves,shapingedges, freehand designs,
etc., In wood
• Chamfering, rabbeting, dadoing, and dovetailingin
wood
• Routingedges on ]amlnatas
_lh WARNING: Beforeperformingany adjustment,
make sure the tool isunplugged from the power
supply and the switch Isin the OFF position.Failure
to heed this warning could result in sedouspersonal
injury.
_1= WARNING: Bit continuesto rotate afterthe router
has been turned off. Toavoid injury, wait untilthe bit
has come to a complete stop before removingrouter
from theworkplace.
CAUTION" To prevent damage to the spindle
or spindle lock,always allow motorto come to a
complete stop before engagingthe spindle lock.
CHANGING CuI"rERS
See Figures4 - 5.
• Unplug the router.
• Remove dust shieldfrom router base.
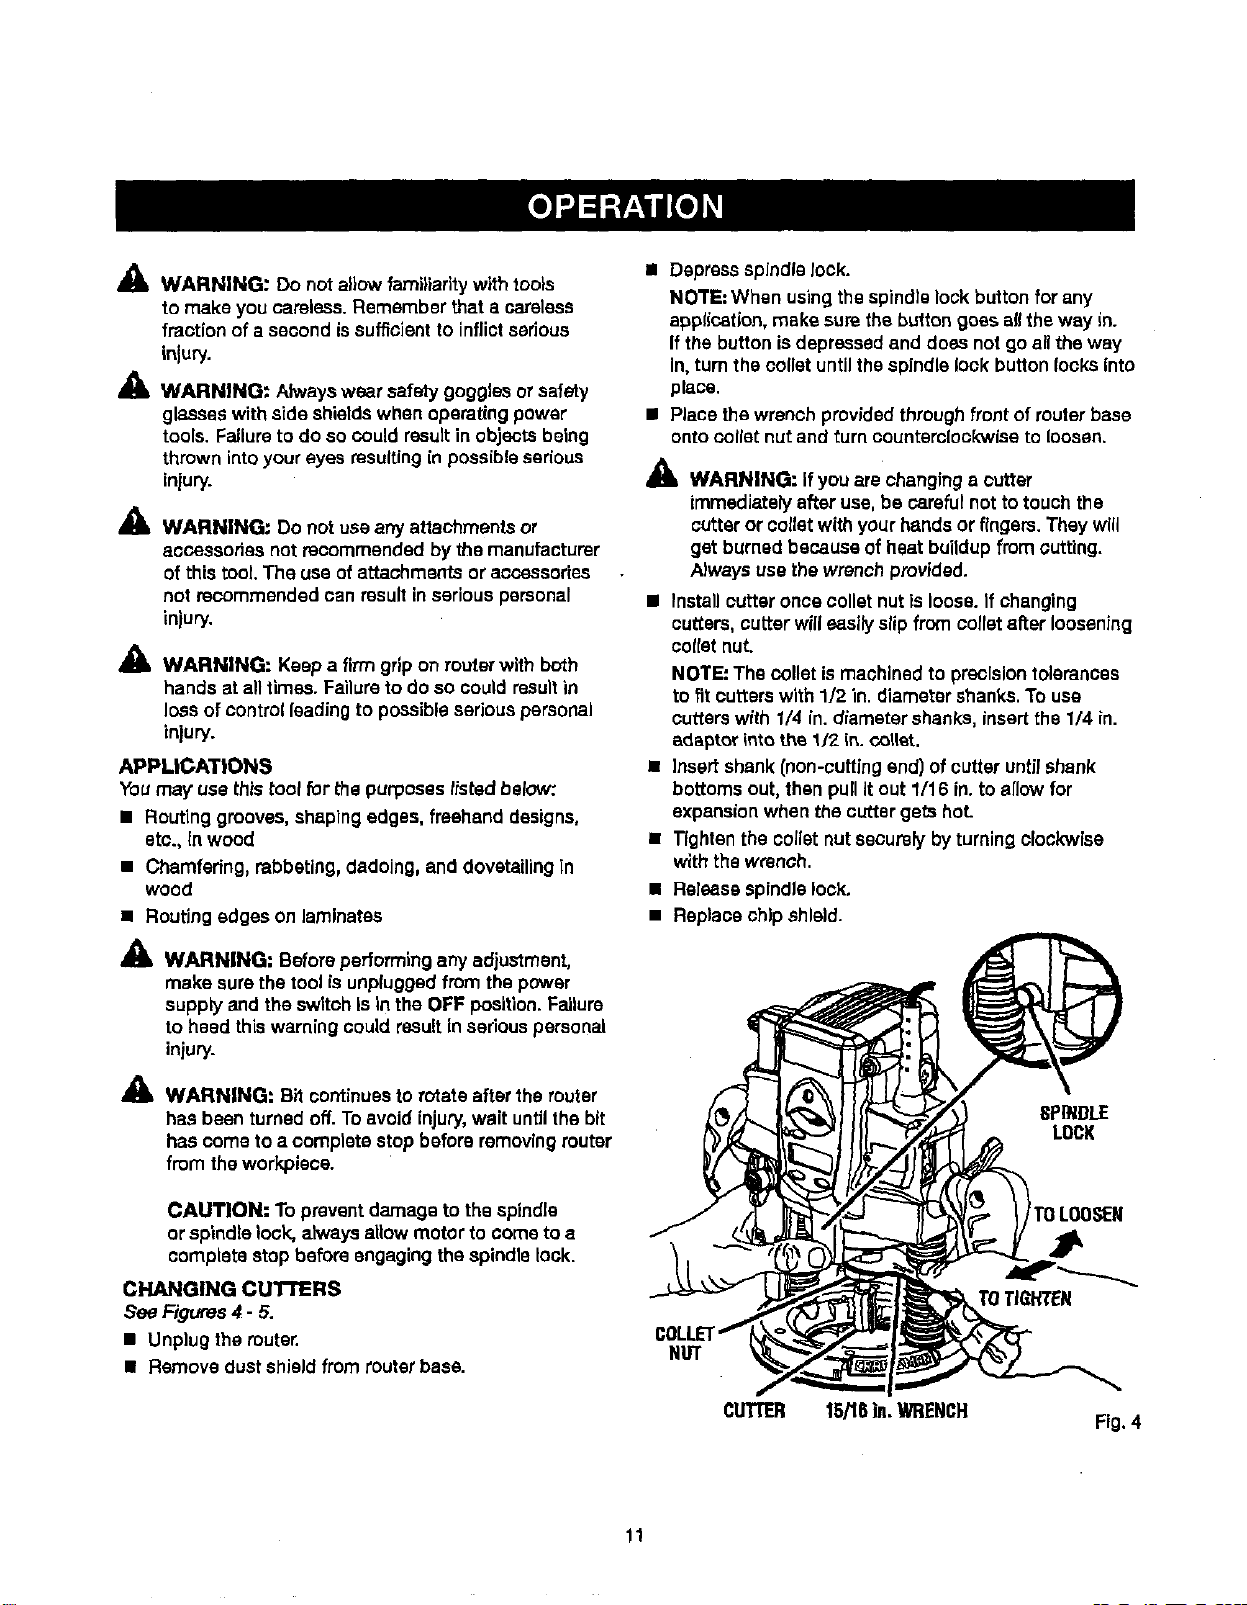
• Depressspindlelock.
NOTE: When using the spindlelock button for any
application,make sure the buttongoes aHthe way in.
Ifthe button is depressedand does not goallthe way
In,turnthe colletuntilthe spindlelock button locks Into
place.
• Place the wrench providedthroughfront of router base
onto cetletnut and turn counterclockwiseto loosen.
WARNING: If you are changing a cutter
immediately after use, be carefulnot to touch the
cutter or toilet with yourhandsor fingers. They will
get burned because of heat buildup from cutting.
Always use thewrench provided.
• Install cutter once collet nut isloose. If changing
cutters,cutter willeasily slipfrom colfetafter loosening
cotternut.
NOTE: The collet ismachined to precisiontolerances
to fit cutterswith 1/2 in. diametershanks.To use
cutterswith 1/4 in. diameter shanks,insertthe 1/4 in.
adaptor into the 1/2 in. collar.
• Insertshank (non-cuttingend) ofcutter untilshank
bottoms out,then pull itout 1/16 in.to allow for
expansionwhen the cutter gets hoL
• Tfghtenthe toilet nut securelyby turning clockwise
with the wrench.
• Release spindle lock,
• Replaoe chipshield.
SPINDLE
LOCK
CUTTER 15/18Ja,WRENCH
Fig.4
11
Loading ...
Loading ...
Loading ...