Loading ...
Loading ...
Loading ...
• If the blade is still not parallel, adjust the front table
bracket. Tilt the blade to 45" with the bevel lock
handle and bevel handwheel.
• From the back of the saw, loosen bolts holding the
front table bracket, as welt as the rear table
bracket.
• Reposition the blade to 90" with the bevel hand-
wheel and bevel lock handle.
• Lower the blade and move the brackets as needed.
Retighten all bracket screws.
• Raise the blade and recheck. Repeat until the
blade is parallel to the miter gage groove.
• Place the throat plate in the opening and push it
toward the rear of saw base to engage the spring
clip.
Note: The keyslot in the throat plate will drop over the
front screw.
• Tighten the screw. Do not allow the throat plate to
bow up above the table surface.
SETTING THE BEVEL STOPS AND INDICATOR
See Figures 52 and 53.
Wait to loosen any screws for the adjustments until
you have checked with a square and made test cuts
to be sure adjustments are necessary. Once the
screws are loosened, these items must be reset.
WARNING: Make sure the switch is off, the
switch key is removed, and the saw is
unplugged. Failure to do so could result in
serious personal injury.
The bevel scale should show 0 when the blade is set
at 90" and 45" when blade is at a 45" tilt.
• Raise the blade all the way up by turning the height
handwheel. Lift the blade guard.
• Loosen the bevel lock handle and turn the bevel
handwheel clockwise to tilt the blade. Reverse it
and turn the handwheel counterclockwise until it
stops.
• Check the blade angle with a combination square.
Don't let the square touch a blade tooth. The blade
should be at 90" and the scale indicator at 0.
Note: The scale indicator is the plastic plate on the
scale at the front of the cabinet.
• If the scale indicator does not point to 0, loosen the
scale indicator with a screwdriver, adjust it within
the slot and retighten the screw.
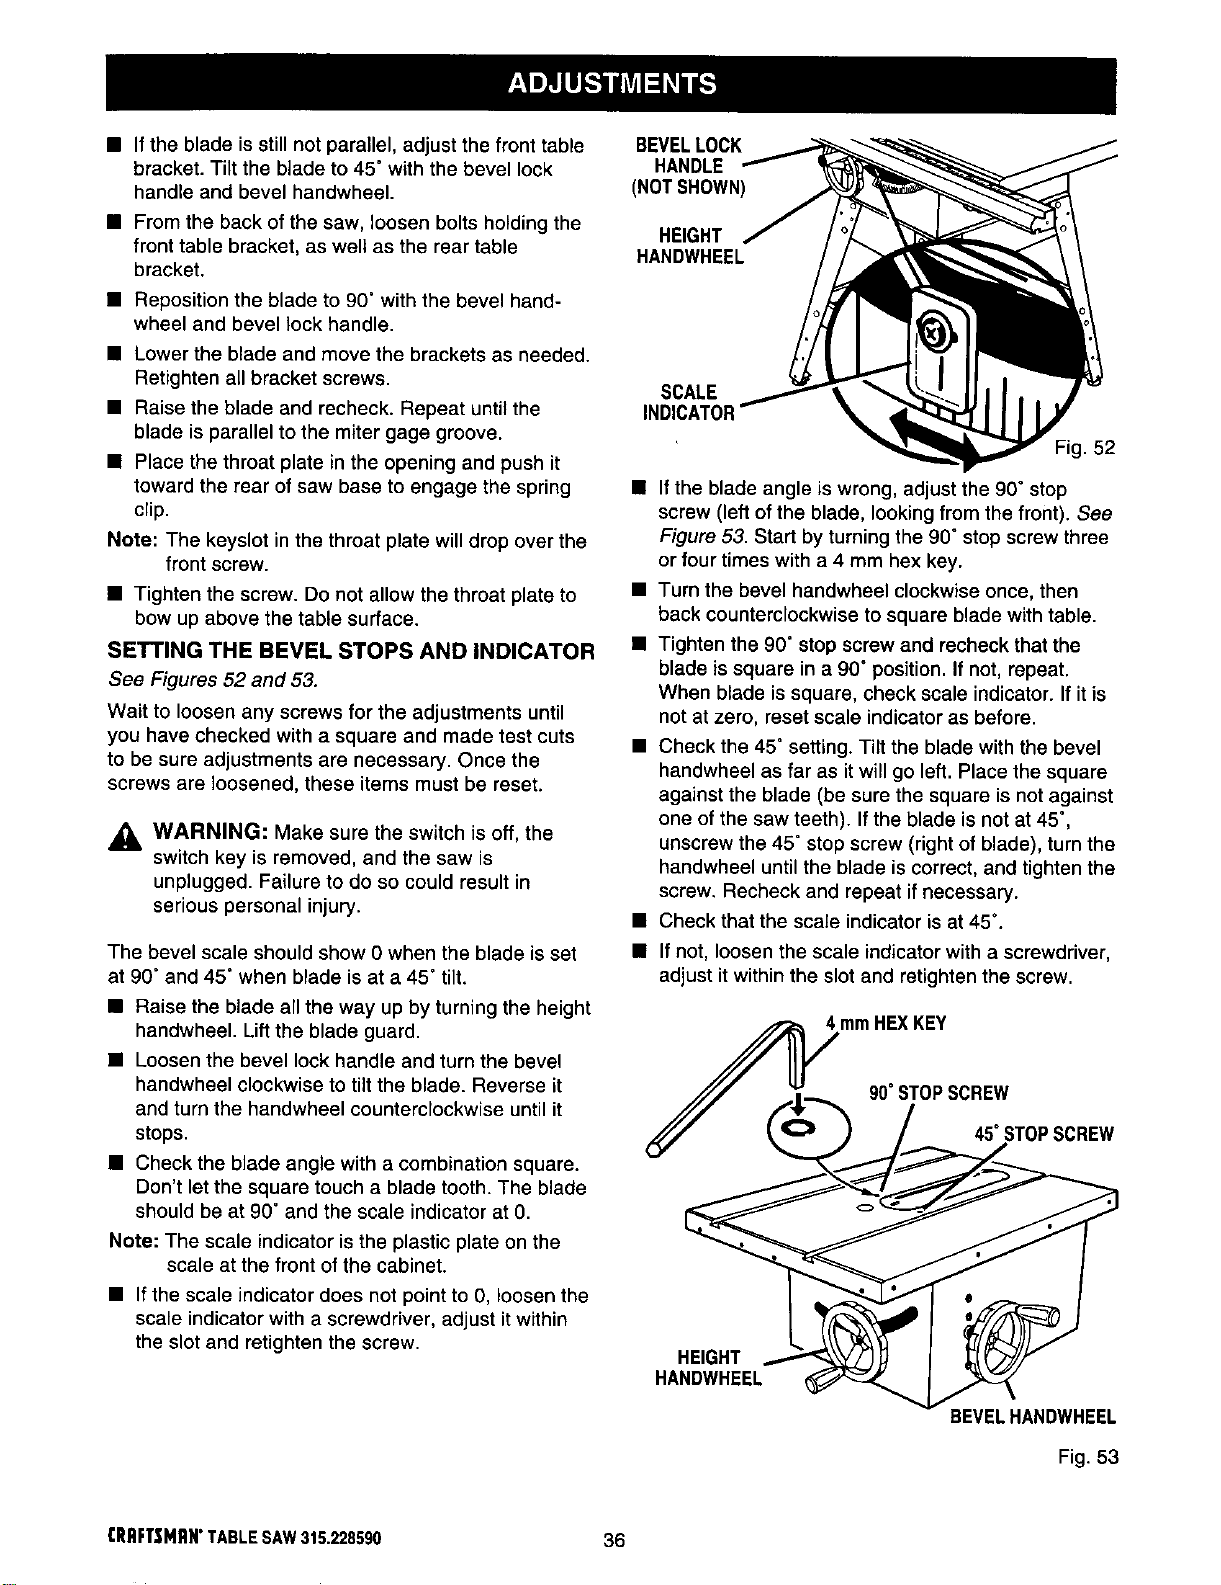
BEVELLOCK
HANDLE
(NOTSHOWN)
HEIGHT
HANDWHEEL
SCALE
INDICATOR
Fig. 52
• If the blade angle is wrong, adjust the 90" stop
screw (left of the blade, looking from the front). See
Figure 53. Start by turning the 90" stop screw three
or four times with a 4 mm hex key.
• Turn the bevel handwheel clockwise once, then
back counterclockwise to square blade with table.
• Tighten the 90" stop screw and recheck that the
blade is square in a 90" position. If not, repeat.
When blade is square, check scale indicator. If it is
not at zero, reset scale indicator as before.
• Check the 45" setting. Tilt the blade with the bevel
handwheel as far as it will go left. Place the square
against the blade (be sure the square is not against
one of the saw teeth). If the blade is not at 45°,
unscrew the 45" stop screw (right of blade), turn the
handwheel until the blade is correct, and tighten the
screw. Recheck and repeat if necessary.
• Check that the scale indicator is at 45 °.
• If not, loosen the scale indicator with a screwdriver,
adjust it within the slot and retighten the screw.
4 mm HEXKEY
90°STOPSCREW
45°STOPSCREW
HEIGHT
HANDWHEEL
BEVELHANDWHEEL
Fig. 53
CRRFTSMgN°TABLESAW315.228590 36
Loading ...
Loading ...
Loading ...