Loading ...
Loading ...
Loading ...
18 | English
The stated vibration level and noise emission value repres-
ent the main applications of the power tool. However, if the
power tool is used for other applications, with different ap-
plication tools or is poorly maintained, the vibration level
and noise emission value may differ. This may significantly
increase the vibration and noise emissions over the total
working period.
To estimate vibration and noise emissions accurately, the
times when the tool is switched off or when it is running but
not actually being used should also be taken into account.
This may significantly reduce vibration and noise emissions
over the total working period.
Implement additional safety measures to protect the oper-
ator from the effects of vibration, such as servicing the
power tool and application tools, keeping their hands warm,
and organising workflows correctly.
Assembly
u Remove the battery from the power tool before carry-
ing out work on the power tool (e.g. maintenance,
changing tool, etc.). The battery should also be re-
moved for transport and storage. There is risk of injury
from unintentionally pressing the on/off switch.
Charging the Battery
u Use only the chargers listed in the technical data. Only
these chargers are matched to the lithium-ion battery of
your power tool.
Note: The battery is supplied partially charged. To ensure
full battery capacity, fully charge the battery in the charger
before using your power tool for the first time.
The lithium-ion battery can be charged at any time without
reducing its service life. Interrupting the charging process
does not damage the battery.
The lithium-ion battery is protected against deep discharge
by the "Electronic Cell Protection (ECP)". When the battery
is discharged, the power tool is switched off by means of a
protective circuit: The application tool no longer rotates.
u Do not continue to press the On/Off switch after the
power tool has automatically switched off. The battery
can be damaged.
Follow the instructions on correct disposal.
Removing the Battery
The battery (4) is equipped with two locking levels to pre-
vent the battery from falling out when pushing the battery re-
lease button (5) unintentionally. As long as the battery is in-
serted in the power tool, it is held in position by means of a
spring.
To remove the battery (4), press the release button (5) and
pull the battery out of the power tool. Do not use force to
do this.
Battery charge indicator
The green LEDs on the battery charge indicator indicate the
state of charge of the battery. For safety reasons, it is only
possible to check the state of charge when the power tool is
not in operation.
Press the button for the battery charge indicator
or to
show the state of charge. This is also possible when the bat-
tery is removed.
If no LED lights up after pressing the button for the battery
charge indicator, then the battery is defective and must be
replaced.
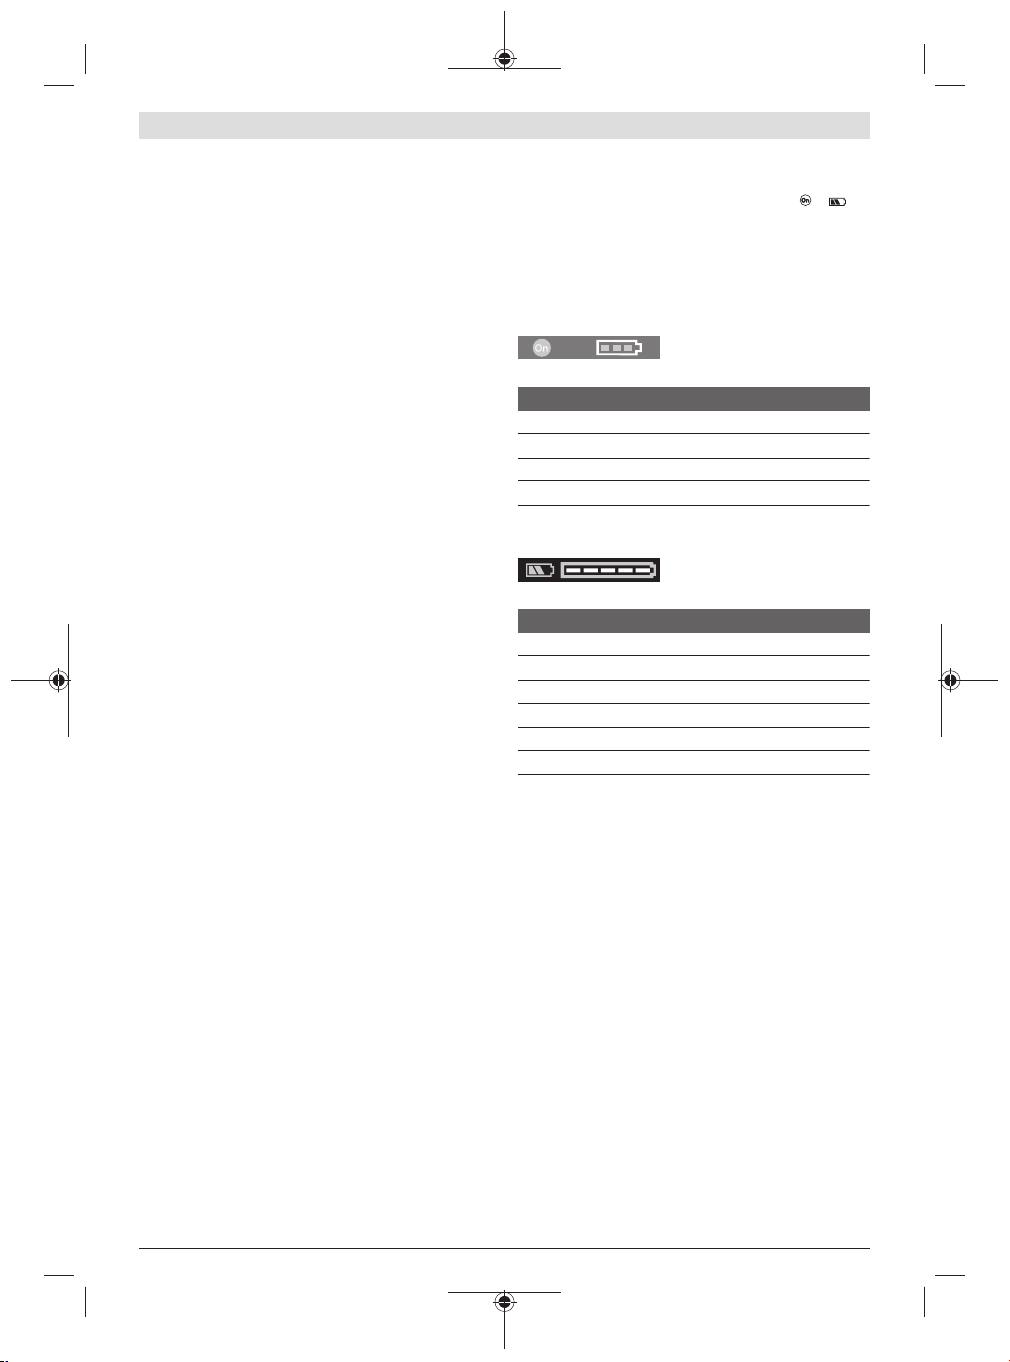
Battery model GBA 18V...
LEDsCapacity
3× continuous green light60−100%
2× continuous green light30−60%
1× continuous green light5−30%
1× flashing green light0−5%
Battery model ProCORE18V...
LEDsCapacity
5× continuous green light80−100%
4× continuous green light60−80%
3× continuous green light40−60%
2× continuous green light20−40%
1× continuous green light5−20%
1× flashing green light0−5%
Inserting the Bluetooth® Low Energy Module
GCY42 (Accessory)
Read the corresponding operating instructions for informa-
tion about the Bluetooth® Low Energy ModuleGCY42.
Changing the Tool
u Remove the battery from the power tool before carry-
ing out work on the power tool (e.g. maintenance,
changing tool, etc.). The battery should also be re-
moved for transport and storage. There is risk of injury
from unintentionally pressing the on/off switch.
Inserting the application tool (see figuresA – B)
GDR 18V-210 C / GDX 18V-210 C:
Pull the locking sleeve (2) forward, guide the application tool
(1) into the tool holder as far as it will go and release the
locking sleeve (2) to lock the application tool.
Impact-proof screwdriver bits(12) can be inserted using a
universal bit holder(13) with ball catch.
1 609 92A 5TB | (06.05.2021)Bosch Power Tools
Loading ...
Loading ...
Loading ...