Loading ...
Loading ...
Loading ...
@i!_ii_!i_!!_!i_i!(_!ii_i!;ii_i!i;!_;!_;!@i:_i_i_i_i!_ii_@;!!_!_i;;_:iiii
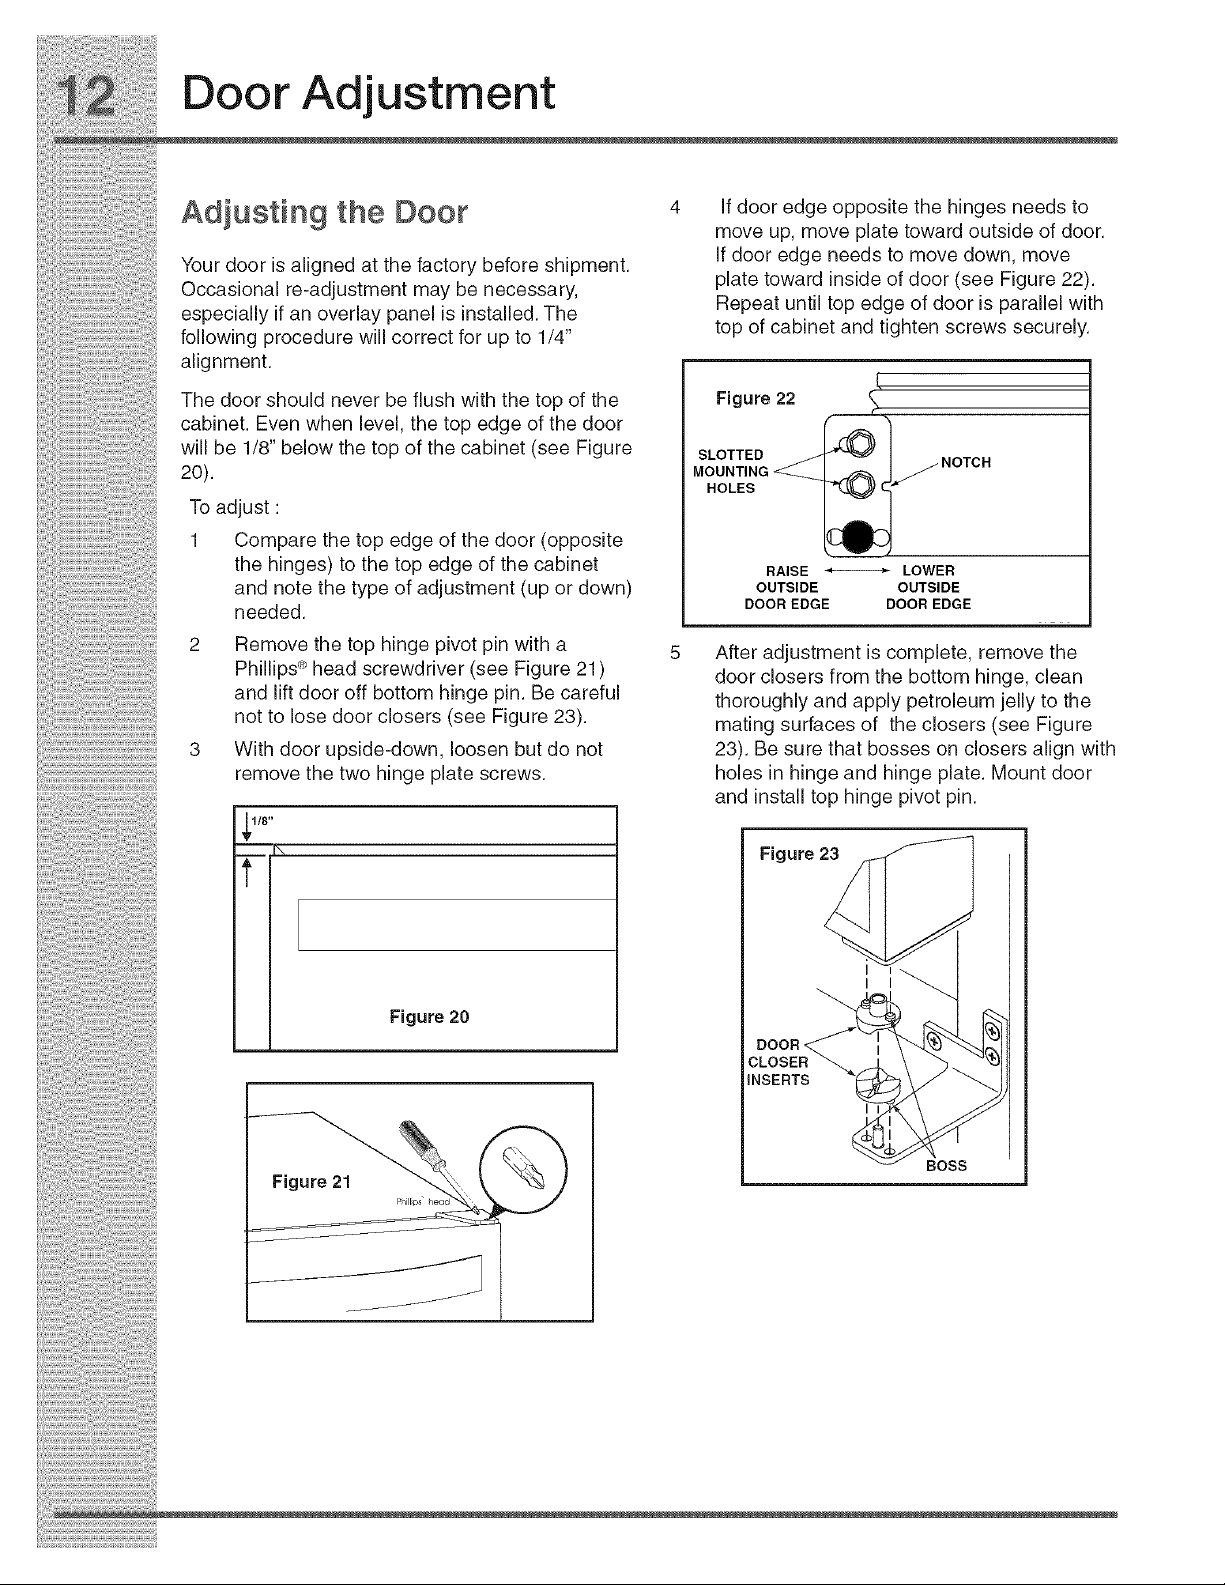
Door Adjustment
A " tin th D r 4 fdooredgeoppostethe hnges needsto
dJus e CO
g move up, move plate toward outside of door.
Yourdoorisalignedatthefactorybeforeshipment. Ifdooredgeneedsto,movedown:move^,
Occasional re-adjustmentmaybenecessary, _a_etowara!ns,aeoTaoor_see P,gu[,e,zz!..
especially if an overlay panel is installed. The Hepea[ un[ll lop e.ageoTuoorls parallel wl[n
following procedurewillcorrectforupto 1/4" [opofcaDme[ana[,gn[enscrewssecure,y.
alignment•
Thedoorshould neverbefiush with thetopofthe Figure22
cabinet. Evenwhenlevel, thetopedgeofthedoor
will be 1/8 belowthetopofthecabinet(see Figure SLOTTED _ I _.._.r.. I
20). MOUNTING -_--_-__L_ J_ ...... I
HOLES I _ L]" I
Toadjust: I.--.dll_-,] I
1 Comparethetopedgeofthedoor(opposite Lt'qP-"_ I
the hinges) to the top edge of the cabinet RAISE _ LOWER I
and note the type of adjustment (up or down) OUTSIDE OUTSIDE I
needed DOOR EDGE DOOR EDGE
• I
2 Remove the top hinge pivot pin with a 5 After adjustment is complete remove the
Phillips <ehead screwdriver (see Figure 21) rlnnr PJn£Ar£frr_m thA hr_ttnm hinrlA P.IAan
an_tloiftld°°d°ffrbc_tt°mhlng:PlguBe;3_ieful thoroughly'andVa;piypetroie'um'j_H'ytot_e
mating surfaces of the closers (see Figure
..... 3 With door upside-down, loosen but do not 23). Be sure that bosses on closers align with
i_i!_!_i!i_ii_!i!_!_i!i_ii_!i!_!_i!i_ii_!i!_!_i!i_ii_!i!_!_i!i_ii_!i!_!_i!i_ii_!i!_!_i!i_ii_!i!_!_i!i_ii_!i!_!_i@!_!_i!i_i
remove the two hinge plate screws•
1I8"
7-1"
Figure 20
holes in hinge and hinge plate• Mount door
and install top hinge pivot pin.
Figure 23
i
DOOR_
CLOSER "_
INSERTS
BOSS
Loading ...
Loading ...
Loading ...