Loading ...
Loading ...
Loading ...
TheBenchGrinderisprovidedwitha Ueftandrighttwo
pieceToolRest.BothToolRestshavea fiat,smooth
surfacetoUayyourworkpieceagainst.Anaccessory
DrHUBitSharpeningHateis included.ThispUategoes
onovertherightToolRestonUyandisusedtosharpen
twistdrHUbits.
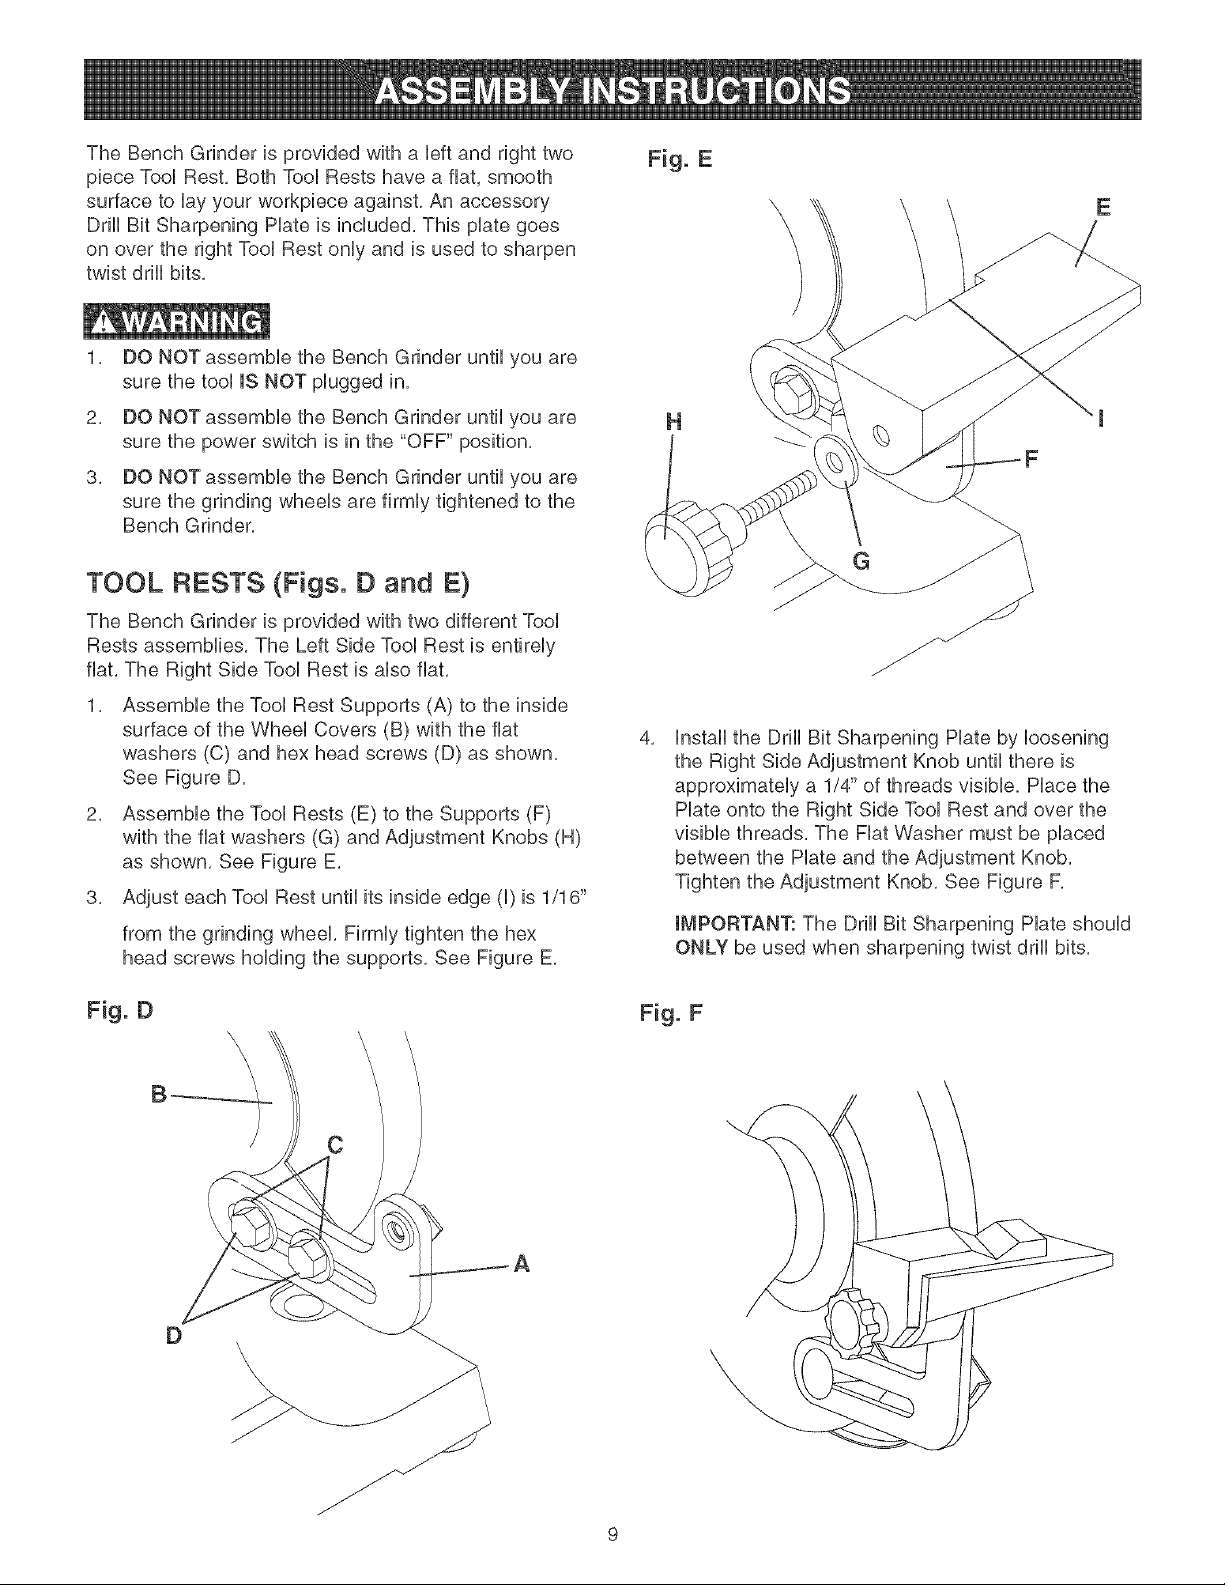
Fig. E
E
1. DO NOT assemMe the Bench Grinder until you are
sure the tooU IS NOT pUugged in.
2. DO NOT assemMe the Bench Grinder until you are
sure the power switch is in the "OFF" position.
3. DO NOT assemMe the Bench Grinder until you are
sure the grinding wheeUs are firmUy tightened to the
Bench Grinder.
TOOL RESTS (Figs. D and E}
The Bench Grinder is provided with two different Tool
Rests assemblies. The Left Side Tool Rest is entirely
flat. The Right Side Tool Rest is also flat.
1. Assemble the Tool Rest Supports (A) to the inside
surface of the Wheel Covers (B) with the flat
washers (C) and hex head screws (D) as shown.
See Figure D.
2. Assemble the Tool Rests (E) to the Supports (F)
with the flat washers (G) and Adjustment Knobs (H)
as shown. See Figure E.
3. Adjust each Tool Rest until its inside edge (I) is 1/16"
from the grinding wheel. Firmly tighten the hex
head screws holding the supports. See Figure E.
Fig. D
B
\
\
\
C
H
4,
G
Install the Drill Bit Sharpening Plate by loosening
the Right Side Adjustment Knob until there is
approximately a 1/4" of threads visible. Place the
Plate onto the Right Side Tool Rest and over the
visible threads. The Flat Washer must be placed
between the Plate and the Adjustment Knob.
Tighten the Adjustment Knob. See Figure F.
IMPORTANT: The Drill Bit Sharpening Plate should
ONLY be used when sharpening twist drill bits.
Fig. F
D \
\
Loading ...
Loading ...
Loading ...