Loading ...
Loading ...
Loading ...
ENGLISH
10
To Check Safety Valve (Fig. A, C)
WARNING: Risk of Bursting. If the safety valve does
not work properly, over-pressurization may occur,
causing air tank rupture or anexplosion.
WARNING: Risk from Flying Objects. Always wear
certified safety equipment: ANSI Z87.1 eye protection
(CAN/CSA Z94.3) with sideshields.
Before starting compressor, pull the ring on the safety
valve
4
to make sure that the safety valve operates freely. If
the valve is stuck or does not operate smoothly, it must be
replaced with the same type ofvalve. Refer to Repairs for
moredetail.
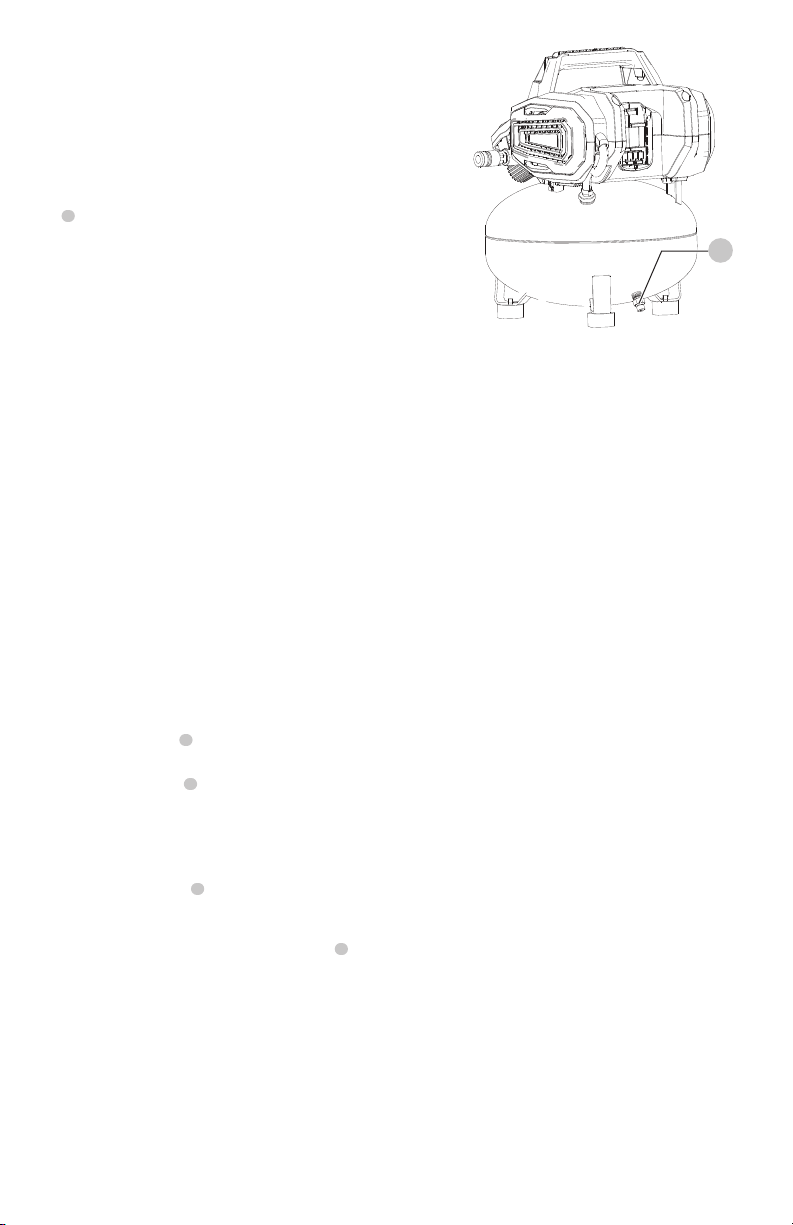
To Drain Tank (Fig. A, D)
WARNING: Risk of Unsafe Operation. Air tanks
contain high pressure air. Keep face and other body
parts away from outlet of drain. Use ANSI Z87.1 eye
protection (CAN/CSA Z94.3) when draining as debris
can be kicked up intoface.
WARNING: Risk from noise. Always wear proper
hearing protection during use. Under some conditions
and duration of use, noise from this product may
contribute to hearingloss.
NOTE: All compressed air systems generate condensate
that accumulates in any drain point (e.g., tanks, filter,
aftercoolers, dryers). This condensate contains lubricating
oil and/or substances which may be regulated and must be
disposed of in accordance with local, state, and federal laws
andregulations.
WARNING: Risk of Bursting. Water will condense in
the air tank. If not drained, water will corrode and
weaken the air tank causing a risk of air tankrupture.
NOTICE: Risk of Property Damage. Drain water
from air tank may contain oil and rust which can
causestains.
1. Set the On/Off switch
1
to "Off".
2. Remove thebattery.
3. Turn the regulator dial
7
counterclockwise to set the
outlet pressure tozero.
4. Remove the air tool oraccessory.
5. Place a suitable container under the drain valve to
catchdischarge.
6. Pull ring on safety valve
4
allowing air to bleed from
the tank until tank pressure is approximately 20 psi.
Release safety valvering.
7. Drain water from air tank by opening drain valve
8
on
bottom oftank.
8. After the water has been drained, close the drain valve.
The air compressor can now bestored.
NOTE: If drain valve is plugged, release all air pressure
by connecting a tool the the airline and operating it until
tank pressure is zero psi. The valve can then be removed,
cleaned, thereinstalled.
Accessories
WARNING: Since accessories, other than those
offered by CRAFTSMAN, have not been tested with
this product, use of such accessories with this tool
could be hazardous. To reduce the risk of injury, only
CRAFTSMAN recommended accessories should be
used with thisproduct.
Recommended accessories for use with your tool are
available at extra cost from your local dealer or authorized
service center. If you need assistance in locating any
accessory, please contact CRAFTSMAN call 1-888-331-4569.
Cleaning
WARNING: Blow dirt and dust out of all air vents with
clean, dry air at least once a week. To minimize the risk
of eye injury, always wear ANSI Z87.1 approved eye
protection when performingthisprocedure.
WARNING: Never use solvents or other harsh
chemicals for cleaning the non-metallic parts of
the tool. These chemicals may weaken the plastic
materials used in these parts. Use a cloth dampened
only with water and mild soap. Never let any liquid
get inside the tool; never immerse any part of the tool
into aliquid.
Storage
Before you store the air compressor, make sure you do the
following:
1. Review the Maintenance section on the preceding
pages and perform scheduled maintenance
asnecessary.
2. Always toggle Auto On/Off Switch to "Off" and remove
battery. Drain water from air tank. See To Drain Tank
underMaintenance.
WARNING: Water will condense in the air tank. If
not drained, water will corrode and weaken the
air tank causing a risk of air tankrupture.
3. Store the air compressor in a clean and drylocation.
Fig.D
8
Loading ...
Loading ...
Loading ...