Loading ...
Loading ...
Loading ...
16
INSTALLATION INSTRUCTIONS
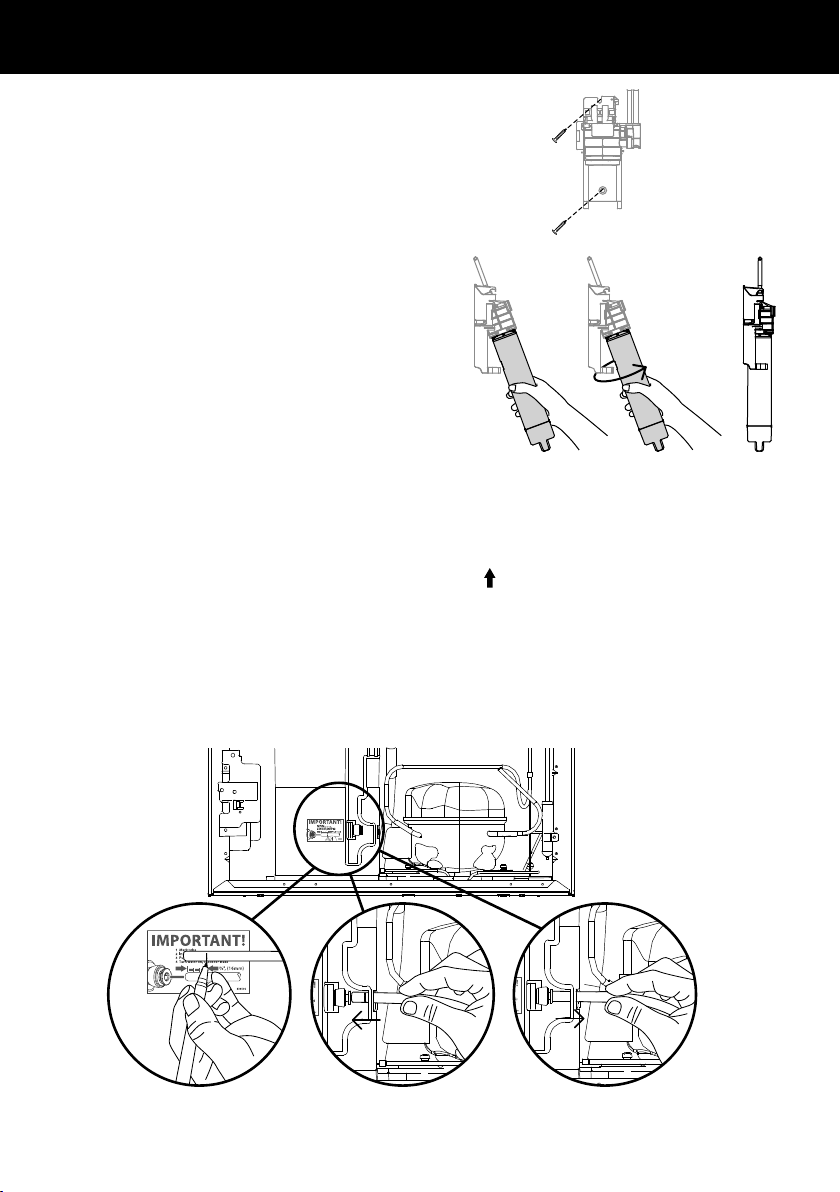
7 Attach the wall mounting bracket with the
two screws provided, attach the bottom
screw first then the top screw (refer
to Diagram5).
8 Insert the filter water into the filter head.
Push the filter firmly into the filter head and
turn in a clockwise direction until it locks into
place (refer to Diagram 6).
9 To flush the water filter of any trapped air,
harmless carbon fines and check for leaks:
Aim the end of the filter outlet tubing into a
bucket, turn on the tap and run 8L of water
through. Once complete, turn the tap off.
Note: Further flushing is required before first
use of your ice or water functions, please refer
to ‘Before you start using the Ice & Water or
Automatic Ice function’ for details.
!0 Run the 6mm tubing to the back of the
refrigerator ensuring there is enough tubing to
pull the refrigerator out for service.
!1 Using the measurement guide shown in Diagram 7, mark out 16mm, on the end of the
tubing as shown in Diagram 8.
!2 Insert the outlet tubing to the water (solenoid) valve up to the marked line. The
outlet tube can be identified by the upward arrow
on the filter head and a blue
mark on the tube.
!3 Pull gently on tubing to ensure it is locked in as shown in Diagram 10.
!4 Turn the tap on and check that all connections are dry and free of drips.
!5 Coil water line tubing behind the refrigerator. Pushyour refrigerator into place being
careful notto kink or squash the water line tube.
!6 Read pages 17–18 carefully and then turn refrigeratoron.
Diagram 7
Diagram 9
Diagram 10Diagram 8
Completed installation
INSTALLATION INSTRUCTIONS
Diagram 5
Diagram 6
Loading ...
Loading ...
Loading ...