Loading ...
Loading ...
Loading ...
W415-1139 / B / 01.08.13
10
EN
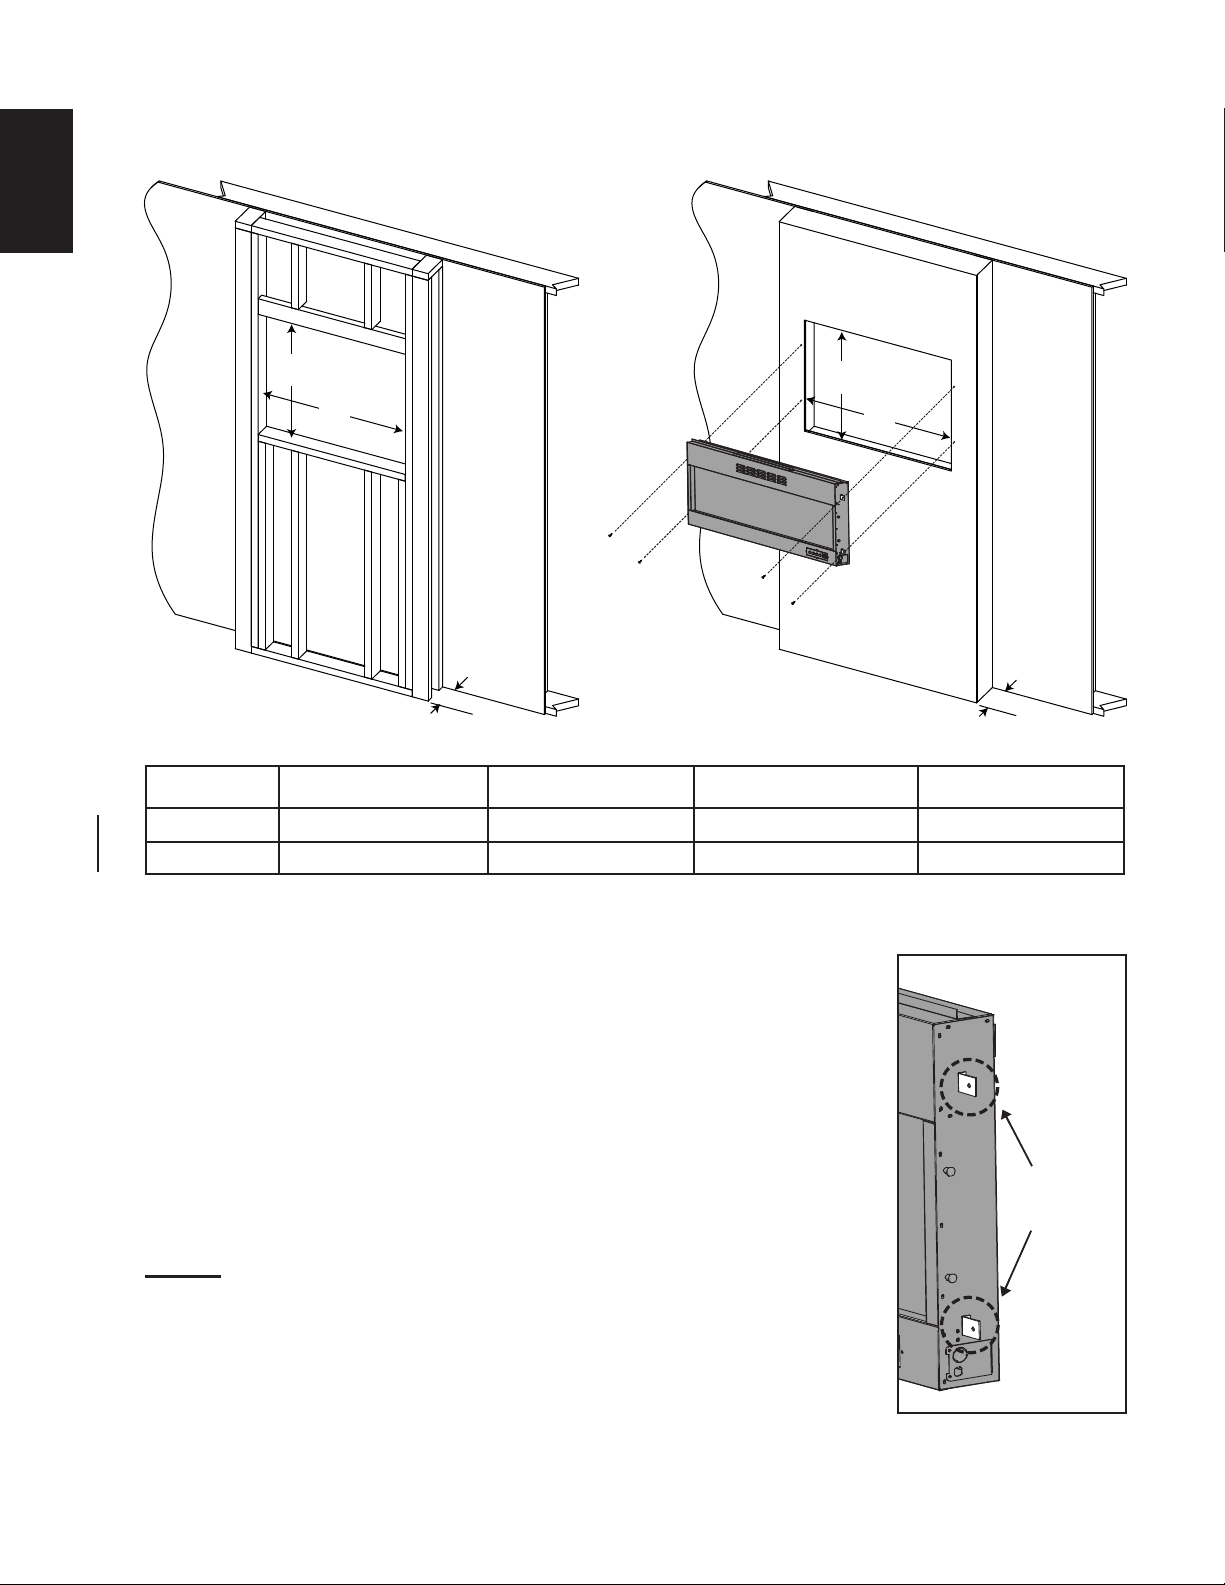
A. Once the rough opening has been prepared, and the power has been routed
to the right side of the recess, the appliance may be installed.
B. Remove the glass from the front of the appliance, refer to the "GLASS
FRONT INSTALLATION" section.
C. Secure the two side brackets to both sides of the appliance, using the 8
screws provided as shown.
D. Lift the appliance up to the opening.
E. The electrical connection must be made prior to sliding the appliance into
place.
F. Using four #10 x 2" (50.8mm) wood screws (not supplied) level the
appliance and secure it to the wall, as shown above.
G. Re-install the front glass to the appliance, refer to the "GLASS FRONT
INSTALLATION" section.
* NOTE: In order to avoid the possibility of exposed insulation or vapour
barrier coming in contact with the appliance body, it is recommended that the
walls of the appliance enclosure be "fi nished" (i.e. drywall/sheetrock), as you
would fi nish any other outside wall of a home. This will ensure that clearance
to combustibles is maintained within the cavity. Framing dimensions will need
to be adjusted to account for the enclosure fi nishing material thickness.
** With a 1/2" (12.7mm) thick fi nishing material.
D
2
1
/2”
3”
**
D
E
E
Finishing Material
3.3.2 FRAMING
EFL32H/EFC32H EFL48H EFL60H EFL72H
D* 20 3/4" (527.0mm) 20 3/4" (527.0mm) 20 3/4" (527.0mm) 20 3/4" (527.0mm)
E* 27" (685.8mm) 42 3/4" (1085.9mm) 55" (1397.0mm) 66 3/4" (1695.5mm)
NON LOAD
BEARING
SIDE
BRACKETS
Loading ...
Loading ...
Loading ...