Loading ...
Loading ...
Loading ...
SERVICE AND ADJUSTMENTS
• If chain is too loose, refer to "Chain Adjustment."
Loosen bar clamp nuts;then, turnadjusting screw 1/4
turn clockwise. Lift up tip of guide bar to check for sag.
Retighten bar clamp nuts.
Bar Clamp Bar
Nuts Screw Tool
Figure 43
STARTER ROPE REPLACEMENT
(Fig. 44, 45, 46, 47 & 48)
WARNING:
ALWAYS WEAR EYE PROTECTION
WHEN SERVICING THE STARTER ROPE.
THE RECOIL SPRING BENEATH THE
PULLEY IS UNDER TENSION. IF THE
SPRING POPS OUT, SERIOUS INJURY
CAN RESULT.
Replace a broken starter rope or one that is badly
frayed.
NOTE: A recoil spring lies beneath the pulley and is
under tension. If the recoil spring is disturbed, con-
siderable time and effort will be required to reinstall.
For this reason you may want to letyour Sears Service
Center handle this repair. If you try to repair the starter
rope and the recoil spring popsout, take the unitto your
Sears Service Center.
• Remove the four fan housing screws and loosen the
two screws on the cylinder cover.
Remove fan housing from the unit.
,,Cylinder Cover Screws
II / \ Fan Housing
Fan HL.. _k \ Screw
Housing "-_" Jl
Screw
(Inside Fan Housing) i
I
Figure 44
• To take out rope tension, pull out 10" of rope.While
holding down pulley ratchet with thumb, push several
inches of rope back into fan housing and catch in notch.
Either hold pulley ratchet with thumb or hold starter
rope handle. Retain rope in the notch and slowly allow
pulley to turn counterclockwise until tension is gone.
• Remove the pulley screw in the center of the pulley.
• Gently twist and lift pulley while rotating counterclock-
wise.
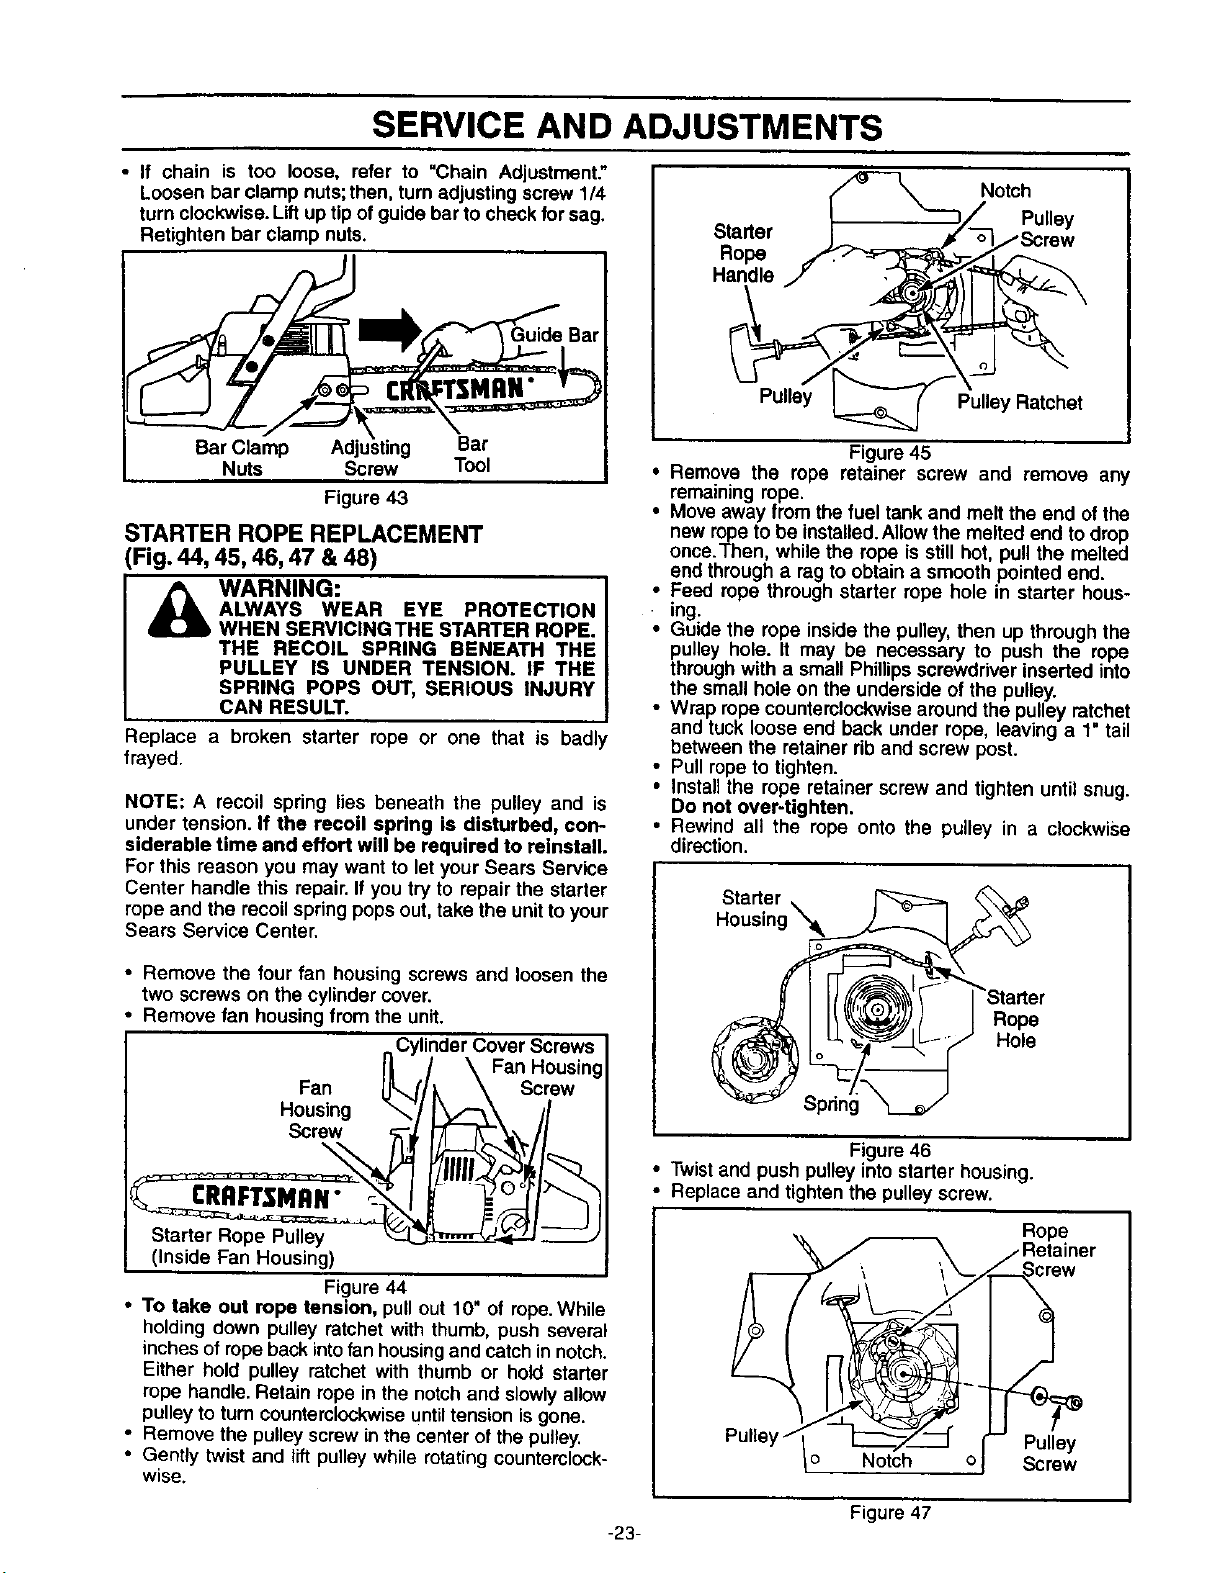
Starter
Rope
Handle
Notch
Pulley
Pulley Pulley Ratchet
Figure 45
• Remove the rope retainer screw and remove any
remaining rope.
• Move away from the fuel tank and melt the end of the
new ropeto be installed.Allowthe melted end to drop
once.Then, while the rope is still hot, pull the melted
end through a rag to obtain a smooth pointed end.
• Feed rope through starter rope hole in starter hous-
ing.
• Guide the rope inside the pulley,then up through the
pulley hole. It may be necessary to push the rope
through with a small Phillipsscrewdriver inserted into
the small hole on the underside of the pulley.
• Wrap rope counterclockwisearound the pulley ratchet
and tuck loose end back under rope, leaving a 1" tail
between the retainer rib and screw post.
• Pull ropeto tighten.
• Install the rope retainer screw and tighten until snug.
Do not over-tighten.
• Rewind all the rope onto the pulley in a clockwise
direction.
Starter \
Housing"_k
Rope
Hole
Figure 46
• Twist and push pulley into starter housing.
Replace and tighten the pulleyscrew.
o Notch o
Rope
_er
Pulley
Screw
Figure 47
-23-
Loading ...
Loading ...
Loading ...