Loading ...
Loading ...
Loading ...
CUSTOMER RESPONSIBILITIES
CHECK FOR DAMAGED/WORN PARTS
The followingdamaged/worn parts should be referred to
your Sears Service Center.
NOTE: It is normal for a small amount of oil to appear
under the saw after engine stops.Do not confusethis with
a leakino oiltank.
• On/Stop Switch - ensure on/stopswitchfunctionsprop-
erly by moving the switch to the =Stop"position and
assure that engine stops, then restartyour engine and
continue.
• Fuel Tank - discontinue use of chain saw if fuel tank
show signsof damage or leaks.
• Oil Tank- discontinue use of chainsaw ifoiltankshows
signs ofdamage or leaks.
• Chain Catcher - replace chain catcher if bent, cut, or
damaged in any way.
CLEAN UNIT AND LABELS
• Clean the unitusinga damp clothwitha milddetergent.
• Wipe off the unitwith a clean dry cloth.
CLEAN AIR FILTE_ (Fig. 30)
A dirtyair filterdecreases the life and performance of the
engineand increasesfuelconsumptionand harmfulemis-
sions.
Always clean your air filter after 15 tanks of fuel or 5
hours of operation, whichever is less. Clean more fre-
quently in dustyconditions.A used air filtercan never be
completelycleaned. It is advisable to replace your air fil-
ter with a new one after every 50 hours of operation, or
annually,whichever is less.
• Loosen 3 screws on cylindercover.
• Remove cylinder cover.
• Remove air filter.
• Clean the air filter using hot soapy water. Rinse with
clean cool water, and air dry completely prior to rein-
stalling.
• Lightly oil air filter prior to installing. Use 2-cycle engine
oil or motor oil (SAE 30). Squeeze excess oil from filter.
This willimprove the efficiency of the air filter.
• Reinstall air filter.
• Reinstall cylinder cover and 3 screws (15-20 in-lbs).
Cylinder
Air 3over
Filter :rews
Cylinder
Cover
Figure '30
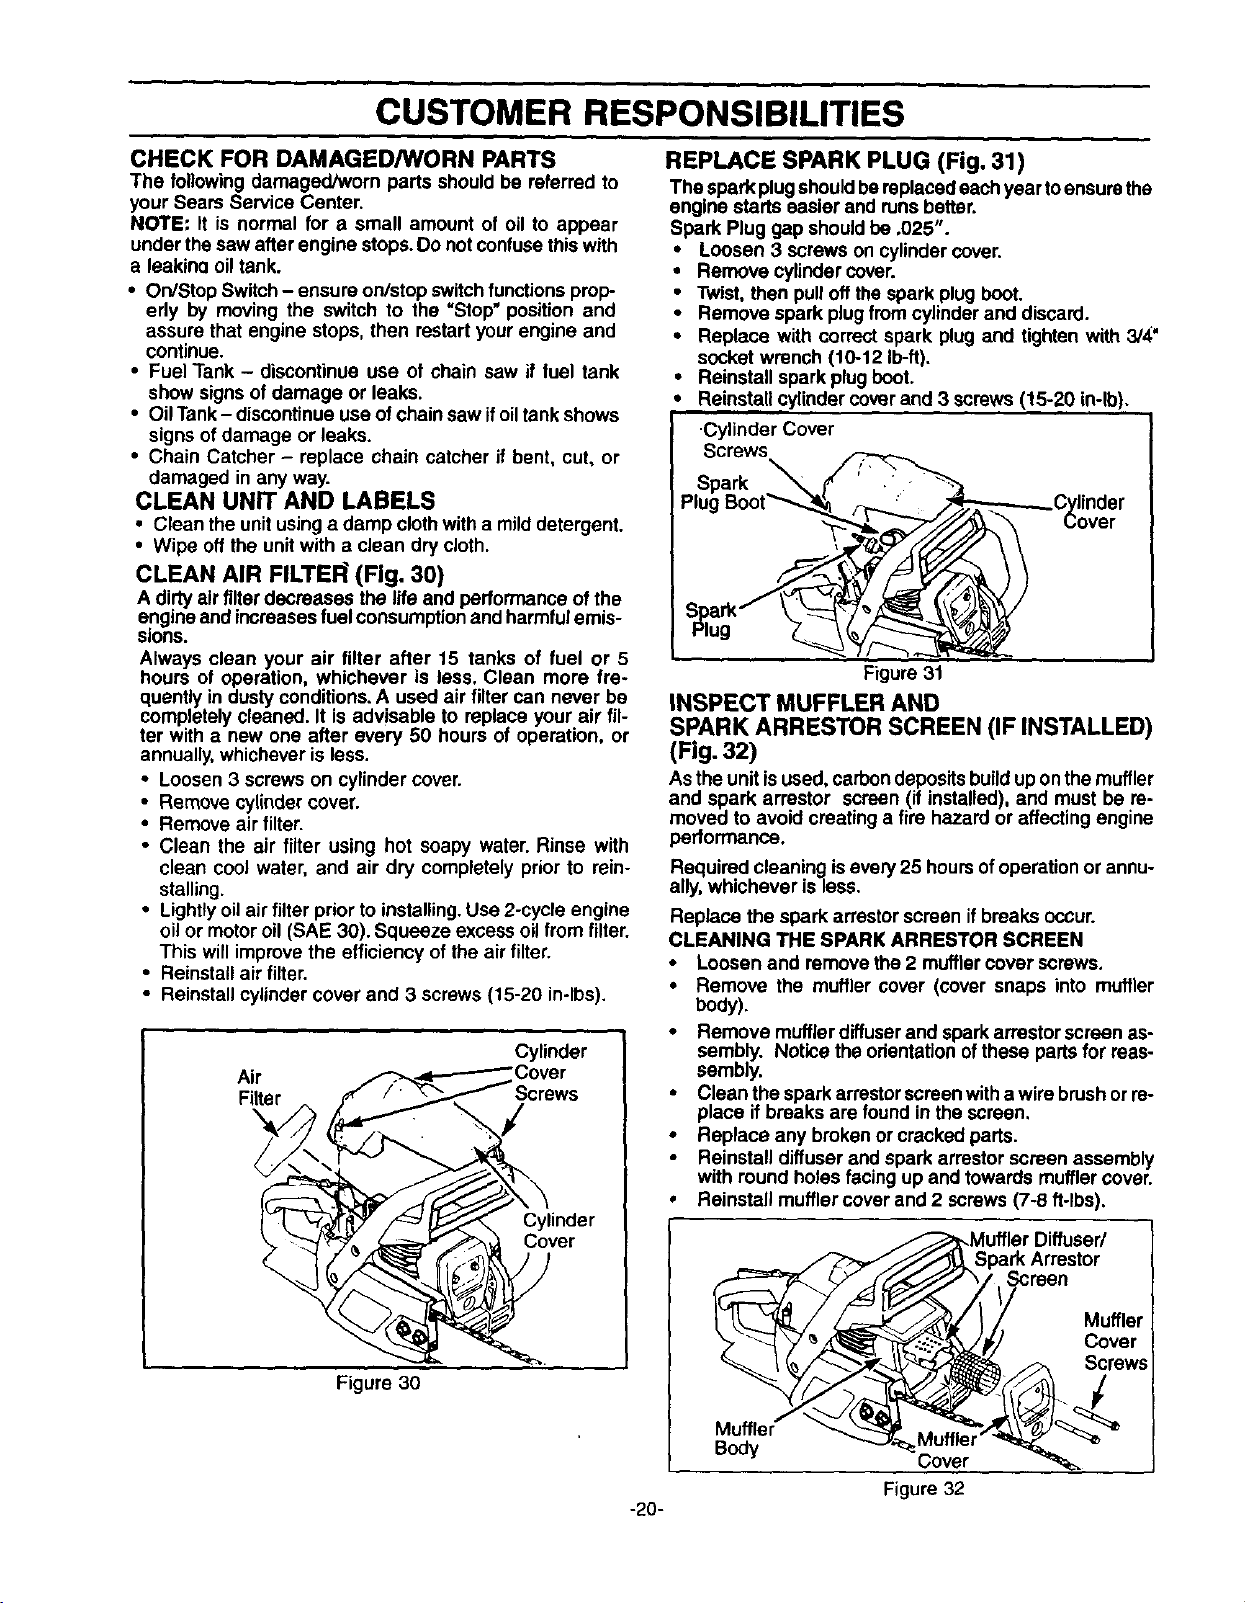
REPLACE SPARK PLUG (Fig, 31)
The spark plugshouldbereplacedeachyear toensurethe
engine starts easier and runsbetter.
Spark Plug gap shouldbe .025".
• Loosen 3 screws on cylindercover.
• Remove cylindercover.
• Twist,then pulloffthe spark plug boot.
• Remove spark plugfromcylinderand discard.
• Replace with correct spark plug and tighten with 3/4"
socket wrench (10-12 Ib-ft).
• Reinstall spark plugboot.
Reinstallcylindercover and 3 screws(15-20 in-lb).
Cylinder Cover
Screws
-20-
Figure31
INSPECT MUFFLER AND
SPARK ARRESTOR SCREEN (IF INSTALLED)
(Fig. 32)
Asthe unitisused, carbondepositsbuildupon themuffler
and spark arrestor screen (if installed),and must be re-
moved to avoid creating a fire hazard or affecting engine
performance.
Required cleaning isevery 25 hoursofoperationor annu-
ally,whichever is less.
Replace the spark arrestor screen ifbreaks occur.
CLEANING THE SPARK ARRESTOR SCREEN
• Loosen and remove the 2 mufflercover screws.
• Remove the muffler cover (cover snaps into muffler
body).
• Remove muffler diffuserand sparkarrestor screen as-
sembly. Notice the orientationofthese parts for reas-
sembly.
• Clean the sparkarrestorscreenwitha wire brushorre-
place ifbreaks are foundin the screen.
• Replace any brokenor cracked parts.
• Reinstall diffuser and spark arrestor screen assembly
with round holesfacingup and towards mufflercover.
• Reinstall mufflercover and 2 screws(7-8 ft-lbs).
Muffler
Body
_Muffler Diffuser/
_'_S Pa_ rA'_eeSt°r
G/ Z ,.u.,o,
_,.,_/j ,_/ Cover
Muffler _
Cover
Figure 32
Loading ...
Loading ...
Loading ...