Loading ...
Loading ...
Loading ...
GETTING TO KNOW YOUR BAND SAW
12 1
ON/OFF GUIDE BAR
SWITCH LOCK KNOB
13
VARIABL E
D CONTROL
BLADE
HOUSING
1 COVER 2
LATCH UPPER
TH RUST
ROLLER
ADJUSTMENT
5
UPPER
BLADE GUIDES
TABLE
6
TRACKING
ADJUSTMENT
KNOB
COVER
RELEASE
BUTTON
5
LOWER
BLADE GUIDES
UNDER TABLE 2
LOWER THRUST
ROLLER ADJUSTMENT
UNDER TABLE
/9 MITER GAUGE
EXTENSION
TILT SCALE
MITER
GAUGE
7
VACUUM
HOOK-UP
COVER
RELEASE
BUTTON
3
TABLE LOCK
KNOB
J
,
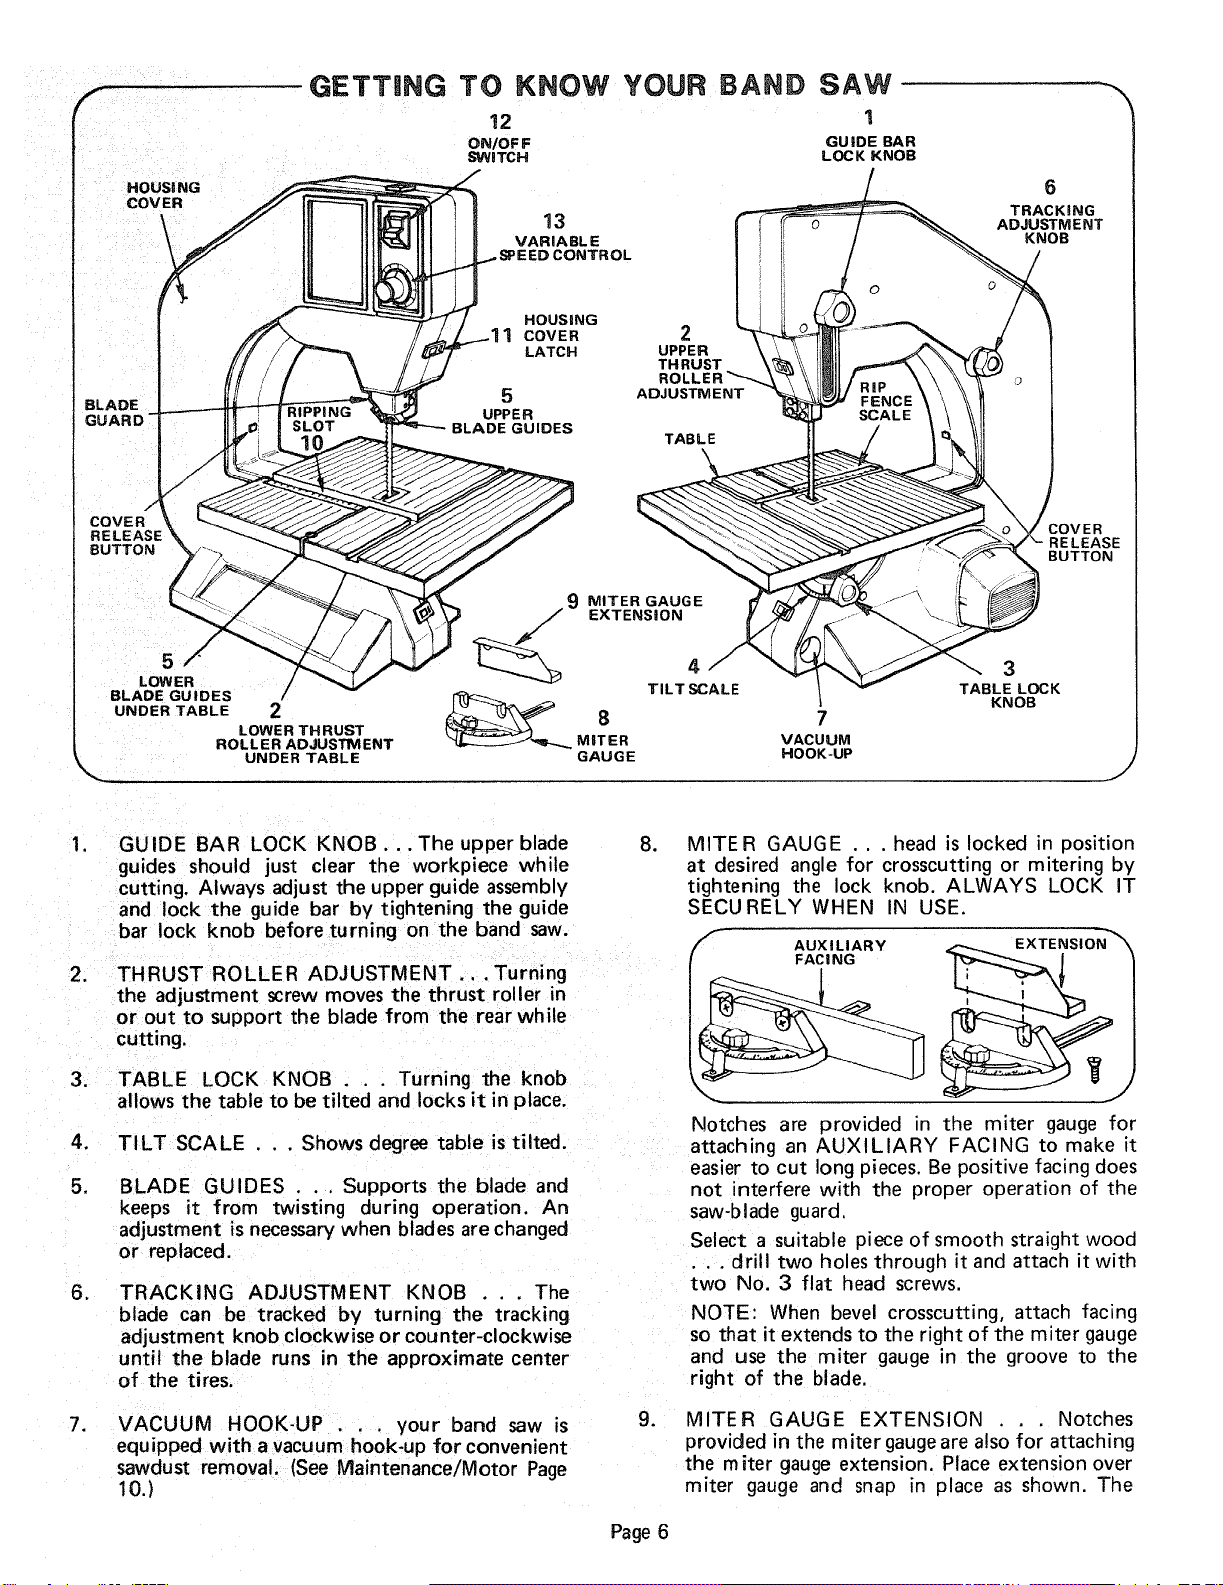
GUIDE BAR LOCK KNOB... The upper blade
guides should just clear the workpiece while
cutting. Always adjust the upper guide assembly
and lock the guide bar by tightening the guide
bar lock knob before turning on the band saw.
.
THRUST ROLLER ADJUSTMENT., . Turning
the adjustment screw moves the thrust roller in
or out to support the blade from the rear while
cutting.
3. TABLE LOCK KNOB . , . Turning the knob
allows the table to be tilted and locks it in place.
4. TILT SCALE . . . Shows degree table is tilted.
5_
BLADE GUIDES . . . Supports the blade and
keeps it from twisting during operation. An
adjustment is necessary when blades are changed
or replaced.
, TRACKING ADJUSTMENT KNOB ... The
blade can be tracked by turning the tracking
adjustment knob clockwise or counter-clockwise
until the blade runs in the approximate center
of the tires.
.
VACUUM HOOK-UP . . . your band saw is
equipped with a vacuum hook-up for convenient
sawdust removal, {See Maintenance/Motor Page
10.)
o
.
MITER GAUGE .. , head is locked in position
at desired angle for crosscutting or mitering by
tightening the lock knob. ALWAYS LOCK IT
SECURELY WHEN IN USE.
_" AUXILIARY
FACING
iSlON'
_ j
Notches are provided in the miter gauge for
attaching an AUXILIARY FACING to make it
easier to cut long pieces. Be positive facing does
not interfere with the proper operation of the
saw-blade guard.
Select a suitable piece of smooth straight wood
• . . drill two holes through it and attach it with
two No. 3 flat head screws.
NOTE: When bevel crosscutting, attach facing
so that it extends to the right of the miter gauge
and use the miter gauge in the groove to the
right of the blade,
MITER GAUGE EXTENSION . Notches
provided in the miter gaugeare also for attaching
the miter gauge extension, Place extension over
miter gauge and snap in place as shown. The
Page 6
Loading ...
Loading ...
Loading ...