Loading ...
Loading ...
Loading ...
ADJUSTMENTS
F'"
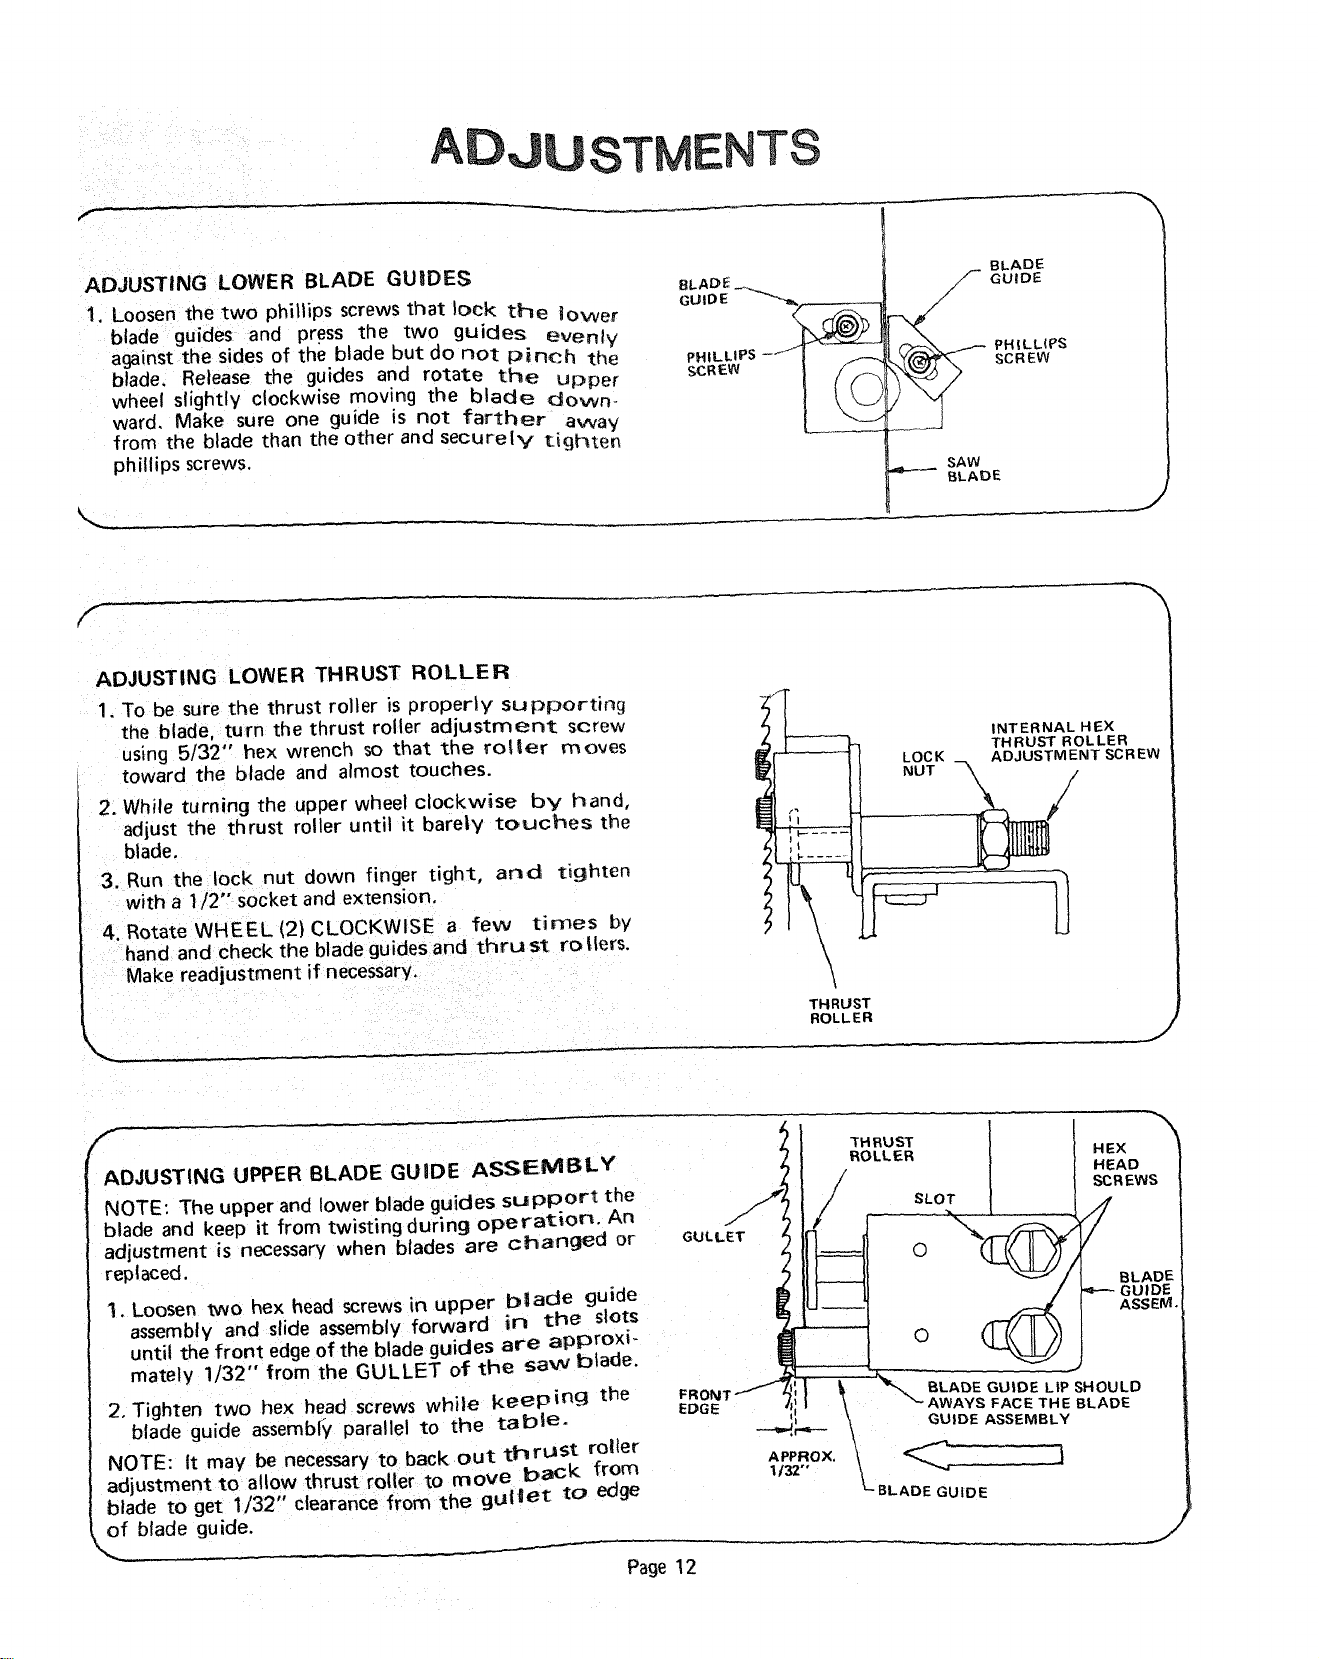
ADJUSTING LOWER BLADE GUIDES
1. Loosen the two phittips screws that lock the lower
blade guides and press the two guides evenly
against the sides of the blade but do not pinch the
blade. Release the guides and rotate the upper
wheel slightly clockwise moving the blade down-
ward. Make sure one guide is not farther away
from the blade than the other and securely tighten
phillips screws.
BLADE _.
BLADE
f- GUIDE
/
I
j__ PHILLII>S
sCREW
SAW
_--_ BLAIDE
J
F
ADJUSTING LOWER THRUST ROLLER
1. To be sure the tnrust roller is property supporting
the blade, turn the thrust roller adjustment screw
using 5/32" hex wrench so that the roller moves
toward the blade and almost touches.
2. While turning the upper wheel clockwise by hand,
adjust the thrust roller until it bare|y touches the
blade,
3. Run the lock nut down finger tight, and tighten
with a 1/2" socket and extension,
4. Rotate WHEEL (2) CLOCKWISE a few tinges by
hand and check the blade guides and thrust rollers.
Make readjustment if necessary.
l
INTERNAL HEX
THRUST ROLLER
LOCK ADJUSTMENT SCREW
THRUST
ROLLER
J
f
ADJUSTING UPPER BLADE GUIDE ASSEMBLY
NOTE: The upper and lower blade guides support the
blade and keep it from twisting during operation. An
adjustment is necessary when blades are changed or
replaced.
1. Loosen two hex head screws in upper blade guide
assembly and slide assembly forward in the slots
until the front edge of the blade guides are approxi-
mately 1/32" from the GULLET of the saw blade.
2. Tighten two hex head screws while keeping the
blade guide assemble/ parallel to the table.
NOTE: It may be necessary to back out thrust roller
adjustment to allow thrust roller to move back from
blade to get 1/32" clearance from the gullet to edge
of blade guide.
HEX
HEAD
R EWS
BLADE
e---- GUIDE
ASSEM.
SHOULD
BLADE
Page 12
Loading ...
Loading ...
Loading ...