Loading ...
Loading ...
Loading ...
10
Installation Procedures
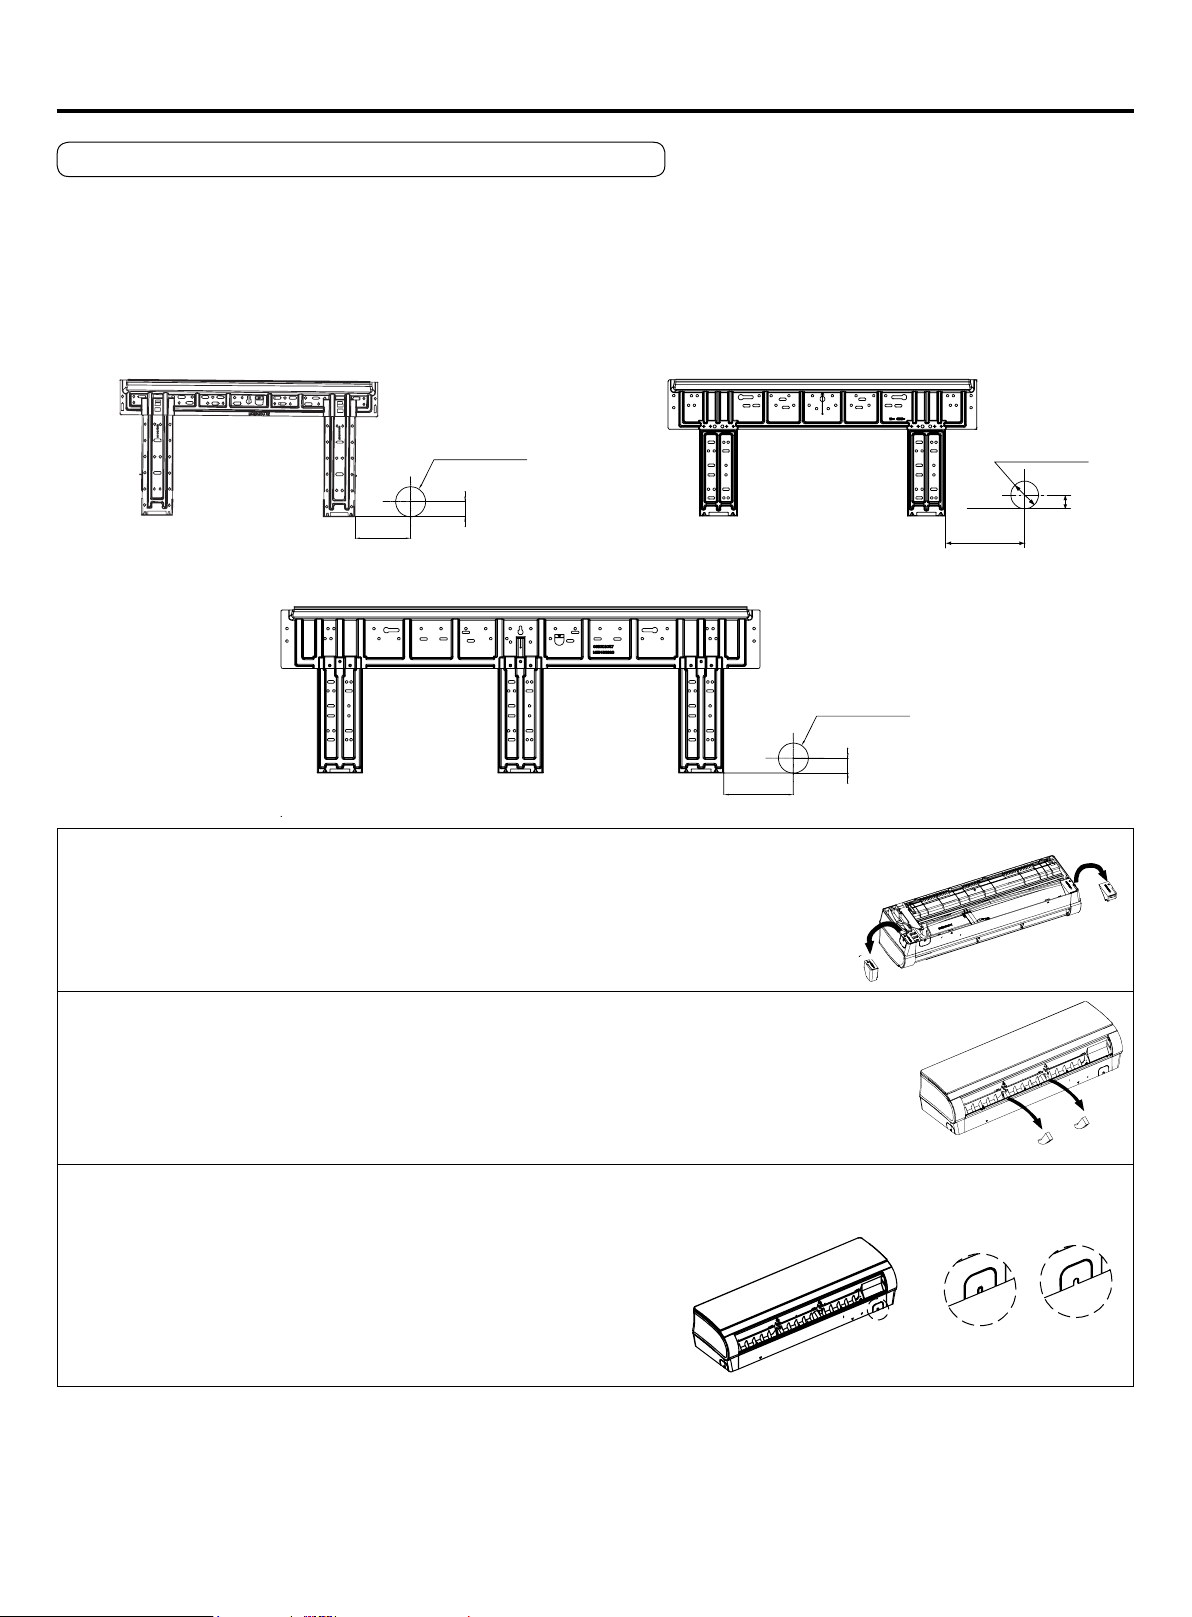
Fitting of the Mounting Plate and Positioning of the wall Hole
When the mounting plate is rst xed
1. Carry out, based on the neighboring pillars or lintels, a proper leveling for the plate to be xed against the wall, then
temporarily fasten the plate with one steel nail.
2. Make sure once more the proper level of the plate, by hanging a thread with a weight from the central top of the plate,
then fasten securely the plate with the attachment steel nail.
3. Find the wall hole location A using a measuring tape.
MVAW018~024MV2AA
A=4.92in
B=Ø2.36in
1.18in
MVAW007~012MV2AA
A=2.99in
B=Ø2.36in
1.18in
A=5.5in
B=Ø2.36in
1.18in
MVAW030MV2AA
Pay attention to the following points before installation of machine:
1. Take out cushion blocks on the left and right angle beads as shown in the following Figure.
2. Remove 2 gaskets under the cross-ow fan (MVAW018/24MV2AA).
3. Clean the burr on the surface of fracture to avoid the power wire from being scratched after removing the virtual
opening of the outgoing line slot on the case by hands in indoor power-on process.
When the mounting plate is xed side bar and lintel
• Fix to side bar and lintel a mounting bar, Which is separately sold, and then fasten the plate to the xed mounting bar.
• Refer to the previous article, "When the mounting plate is rst xed" for the position of wall hole.
Loading ...
Loading ...
Loading ...